
As promised, the crochet jar cosy tutorial.
You can use one or more colours to suit your taste. I think it is nice with atleast a couple of colours just because I like colour. ;-)
July 2012 – Please note: my interests have changed and I do very little crochet these days. I’m sorry I do not have the time to answer emails about help with crochet. Try the Ravelry site for help instead. Thank you for understanding. :-)
Please respect my copyright. Please do not copy this tutorial and post it on your own site or blog in any form. This includes translations of the tutorial. Please respect the time and effort that goes into writing and photographing a tutorial. If you see this tutorial posted on someone else’s site or blog in any form, please let me know. Thank you. Happy crafting! :-)
Por favor, respeta mis derechos de autor. Por favor no copies y pongas este tutorial y mensaje en tu blog en ningun formato. Esto incluye traducciones del tutorial. Por favor, respeta el tiempo y esfuerzo puesto en escribir y fotografiar este tutorial. Si ves este tutorial en cualquier tipo de formato en alguna pagina o blog, por favor, dimelo. Gracias. Felices creaciones. :-)
This tutorial is based on a jar with a diameter of 7.5cm /3″.
Please note: I use US crochet terms in this tutorial!
I used Sport weight yarn with a hook that is a bit smaller (2.0mm) than the size suggested for the yarn. This will make the ‘fabric’ a bit tighter than with the ‘regular’ hook. More about the yarn I use.

Chain 4 and make a ring. Or make a Magic Ring. June has a great tutorial for it.
Ok, got your ring?
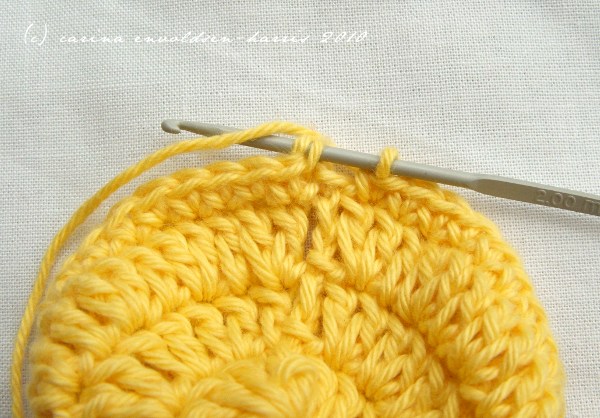
Chain 3, this counts as the first dc, dc 13 in the ring, join in top of ch3.
Chain 3, this counts as the first dc, dc in the same stitch, 2dc in the next stitch, continue with 2dc all the way around, join in top of ch3.
Chain 3, this counts as the first dc, dc 2 in the next stitch, dc in the next stitch, continue alternating 1 and 2 dc all the way around, join in top of ch3.
If your jar is wider than mine, you might want to add a fourth round of dc. The ‘system’ for the fourth round will be: dc, dc, 2dc. If your jar is only a bit wider, use sc in the fourth round instead, but still using the same system.
You can use these instructions for covering a vase too, or anything, really. If the thing you are covering is really wide, you will of course need to make the bottom circle really wide too. You may have guessed, but for each round of dc you add, you will need to add a dc in the system. So a fifth round would be: dc, dc, dc, 2dc. The number of single dc is the same as your round ‘number’ minus 2.

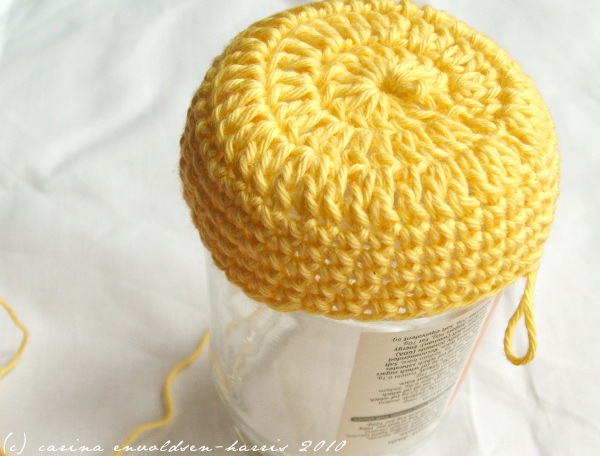
Ok, you should now have a circle that is approximately the same diameter as the bottom of your jar. If it is a little smaller, don’t worry, the yarn will stretch so it should still fit.
Chain 2, this counts as the first sc. Sc in each stitch all the way round, join in top of ch2. It is important that you do the joining thing so you have proper rounds instead of just continuing on and on, because that will create a sort of spiralling pattern on the cosy.
Continue like this, making up the ‘body’ of your jar cosy.

Once you have done a few rows of sc, the body will start to curl up, just like magic. This is exactly what we need, so do not be alarmed!
When you have done 5-7 rows, try the cosy on the jar. If it fits, great, carry on!
If it is too tight, unravel the sc rows apart from the first one. Do a few increases evenly spaced in the second sc row. Then proceed with the sc rows as outlined above.
If it is too loose, unravel the sc rows apart from the first one. Do a few decreases evenly spaced in the second sc row. Then proceed with the sc rows as outlined above.

In case you are unsure about how to do a decrease, it is quite easy and this is how: put you hook through the first stitch, yarn over, pull back to the front, put the hook straight through the next stitch, yarn over, pull hook to the front. You now have 3 yarn loops on your hook. Yes? Yarn over again and pull this (fourth) loop through the other 3. That’s a decrease! Not difficult at all, right?
When you get to approximately 1cm ≈ 3/8″ from the shoulder of the jar, do 5 decreases, (sc2tog). Don’t worry if they are not completely evenly spaced. Noone will notice unless you tell them!
Repeat this in the next 2 rows.
Do 2 rows of ch2, then regular sc in every stitch (no de- or increases necessary!), join in top of ch2.
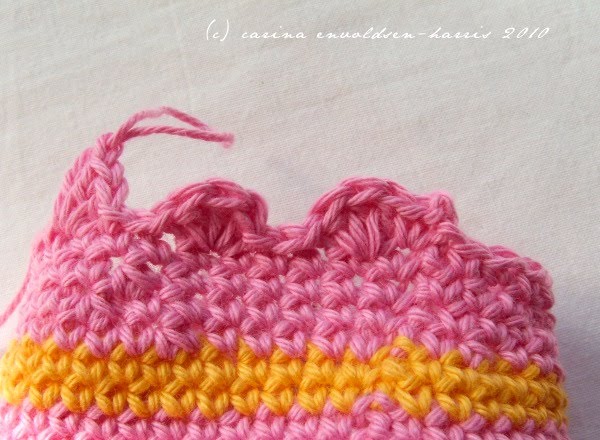
Ch2, then sc in the next stitch. [3dc in the next stitch, slip stitch in the next 3 stitches] repeat this all the way around, joining in the ch2. You might find that you have a few stitches too many or too few at the last repeat, but don’t worry about it. Unless you want to unravel and make it Perfect. But seriously, it’s just a jar cosy, so don’t beat yourself up over it. Make It Work.
You may have noticed that there has been a couple of colour changes on the cosy – if you haven’t tried this before, I’ll show you a simple method of changing colour after the ‘main’ attraction. ;-)
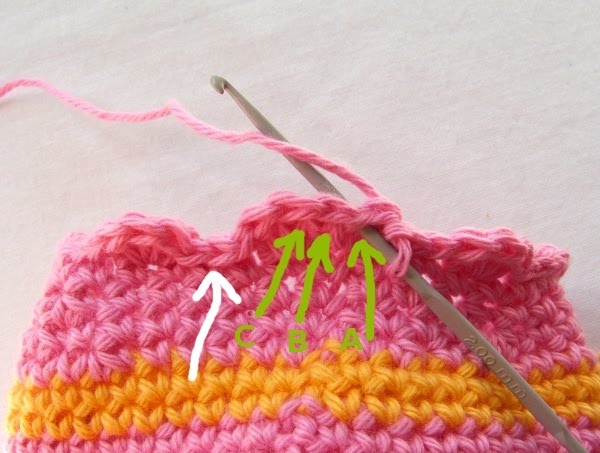
In this (last!) row there’s no need to do any chain stitches, instead you get right into it, by slip stitching through the first 3 stitches from the hook: A,B,C.
When you get to stitch C, yarn over to dc into the middle slip stitch from the previous round (white arrow), do another 2 dc in the same stitch. [Slip stitch into the middle dc from the previous round, 3dc in middle slip stitch] repeat this througout the round. Again, it might not add up completely at the end, but don’t worry!

The last round should look something like this. The two rows of ‘scallops’ will more or less cancel each other out so you get a fairly straight line. If you would like it to be a bit more scalloped, do 3tr in the last row instead of 3dc. Or, go crazy and experiment until you find your perfect finishing edge! :-)
And that’s it, you’re done! Until you get your hands on some more jars to cover. :-)
Simple colour change method.
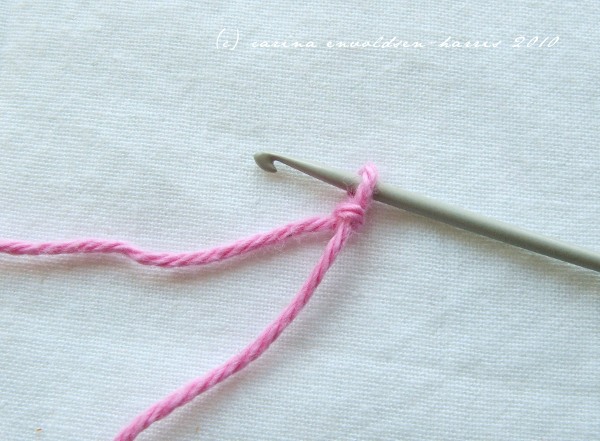
Make a slip knot (aka starting loop). You should be familiar with this already if you can do a crochet chain. Make sure it will fit your hook, but it doesn’t need to be a lot bigger than that.

Take the knot/loop off your hook. Insert the hook in the loop of the last stitch of Colour One (let’s call it yellow from now on), then into the top of the chain to join the two ends of the row.
Put the knot/loop of Colour Two (pink, ok?) back on the hook. This acts as your yarn over. Pull it through the yellow loops already on the hook.

You have now joined the two ends of the row and changed the colour. You want to do it in this manner because if you joined yellow with yellow and then added pink once you started with ch2, yellow would ‘bleed’ into the pink. Granted, it’s not a big difference, it just looks nicer.
Cute tutorial, I like your colors.
Thank you :)
What a lovely blog post! Thanks for sharing! If you like: I have a blog post right now in which you can add a picture and a link to your blog or Flickr-album. I'd be delighted if you add something!
Annemarie
http://www.annemariesbreiblog.blogspot.com