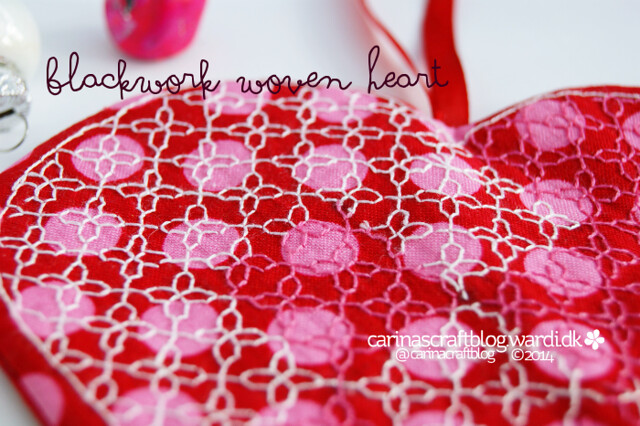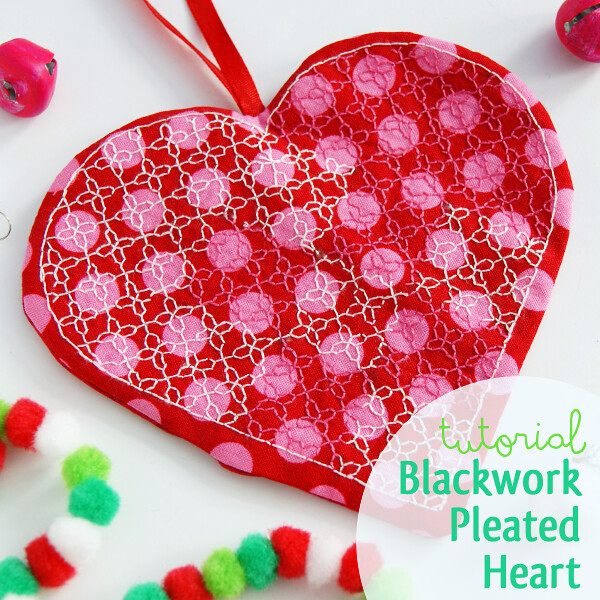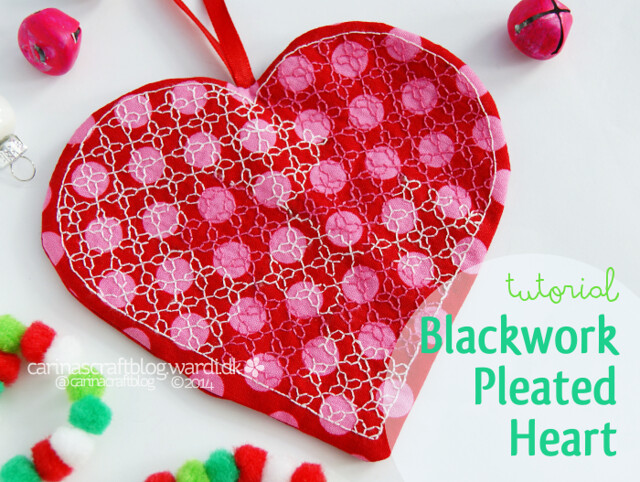
This heart is a combination of the pleated paper hearts I grew up making in Denmark, and my recent-ish love of blackwork. In my version, the effect is very, very subtle. You really have to get up close to see the blackwork properly. That’s on purpose – I wanted to make something that has to be looked at very closely to appreciate what is really going in. Like there’s a secret design on the heart… You may want to use colours that have more contrast. Maybe on a solid colour background for greater impact.
You can make so many variations with this little heart. One thing that can’t be altered, though, is that it is kinda time consuming. The heart is basically completely covered in stitches. But the good news is that you only use back stitch and once you get into the rhythm of it, it goes much quicker than you might think. And sometimes it’s nice to make something that isn’t a quick crafty fix. :-)

Materials needed
Waste canvas, approx. 5″x5″ (12.7 x 12.7cm)
Fabric for the front, approx. 6″x 6″ (15.25 x 15.25cm) – I used Ta Dot in Berry from Michael Miller
Fabric for the back, approx. 6″x 6″ (15.25 x 15.25cm) – I used heart fabric I bought in Denmark
(Optional) Padding, either thin quilt batting or felt, approx. 6″x 6″ (15.25 x 15.25cm)
Six stranded embroidery floss in two colours, I used Blanc (white) and 602 (pink), both DMC.
Ribbon in matching colours, approx. 5″ (12.7cm)
Heart template
Marker pen
Ruler.
Tweezers, optional but very strongly recommended!
Scissors and embroidery needle.
Patience (not optional)
How to make it
Print and cut out the template.
Make little holes as indicated. You can use a small pair of scissors and turn the tip around in the hole spots.
Place the template on top of the waste canvas. Line up the corner of the heart with two lines of waste canvas so it is placed straight on.
Trace around the heart. Mark the ends of the lines on the waste canvas. Push the pen through the holes you made, to mark where the lines intersect. Remove the template and draw the lines by connecting the dots, using the ruler.
(I’m sorry there’s no photos for the steps above, “someone” deleted them by accident. But you’re clever clogs so I’m sure you can figure it out anyway…) ;-)

Baste the waste canvas to the right side of the front fabric. Pay attention to the direction of the print on the fabric, if applicable. You can baste it using a sewing machine to make this bit quicker. I did that here, the orange stitching around the edge. Use a large stitch size.
To help keep the two colours separated, I stitched along the straight lines, but it isn’t necessary. Just make sure that it’s nice and obvious where the lines are so you keep the two colours separate.
It is also a good idea to stitch around the outline of the heart to help get the curves right and not stitch outside the lines as it were. This will be a helpful guide for sewing the heart together.
I used a blackwork pattern I made up as I went along. You can find my pattern with the heart template. There are lots of different patterns. A pattern that has a smaller repeat may have a better effect, because it will be repeated many times, but a larger repeat could work too. If this is your first go at blackwork, I’d recommend a simple pattern. Visit this site for a large collection of blackwork patterns.
Find the centre of the heart and start stitching the pattern using one strand of floss. You only use back stitch. There really is no special technique for this, just make single back stitches to ‘fill up’ the pattern you have chosen. And don’t worry what the back looks like, this will be hidden.
I find it easiest to stitch one colour first and then do the other.
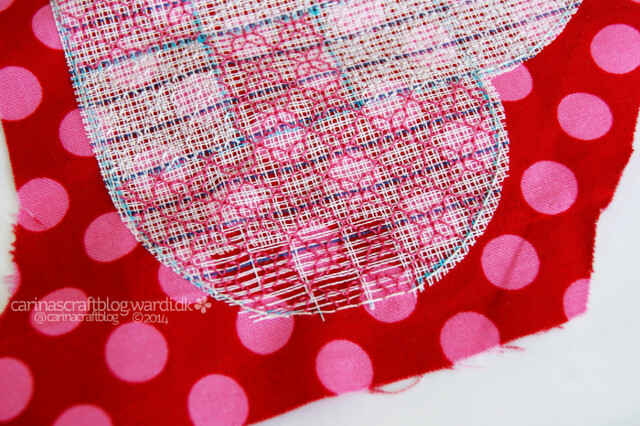
When you are done with the stitching, it is time to remove the waste canvas. First remove the basting thread. Then cut away as much of the waste canvas around the heart as possible. But take care not to cut into any of the stitches.
With the tweezers, start pulling out strands of waste canvas. To start with, it will be a bit difficult to pull out long strands in one go, so where you have open spaces in the embroidery, snip the waste canvas strands to make it easier. I wrote another tutorial that goes a bit more into detail on how to remove the waste canvas.
Your embroidery will stand up to quite a bit, but it’s best to be as careful as you can when you pull out the strands. You don’t want to rip the stitches.
The more strands you remove, the easier it will get.
When you have removed all the strands, iron the piece lightly from the back.
Cut the piece to shape, ½”-1″ ( 1.25 – 2.5cm) all around the outside of the heart.
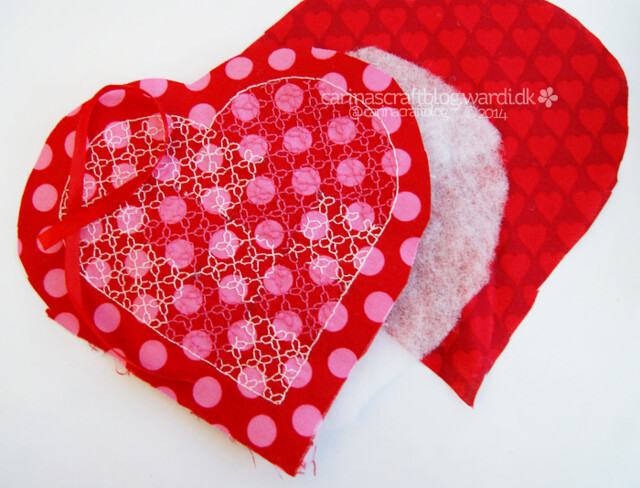
Cut the back piece and the batting/felt piece to the same size/shape.
Sandwich the pieces together (bottom up) like this:
Batting/felt
Back fabric, right side facing up
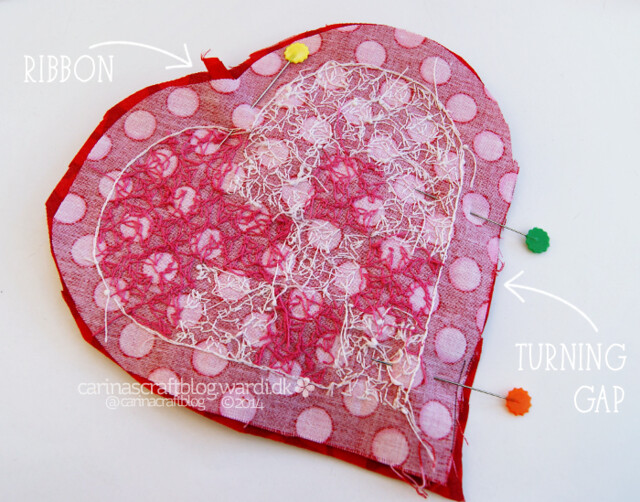
Ribbon, folded in half, with the fold between the fabric layers
Front piece, right side facing down.
Pin together. The heart is quite small, so you only need 2-3 pins. I pinned where the ribbon is and to mark the turning gap.
Sew the layers together, using a 1/4″ seam. Remember to leave a 2″ turning gap along one straight edge. Back stitch a couple of times over the ribbon to make sure it stays in place.
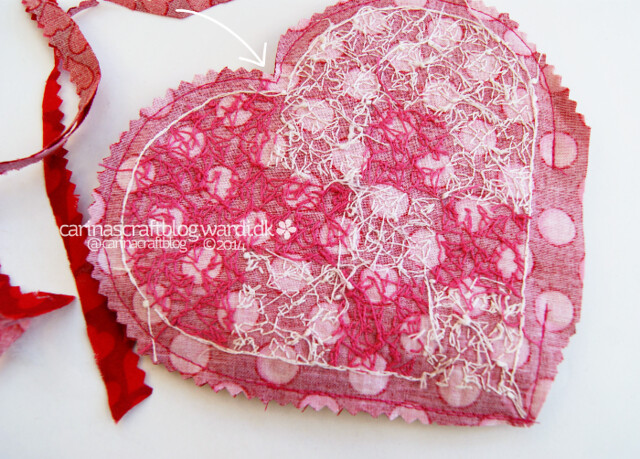
Clip around the curved edges, either by making little triangle cuts or using pinking shears. This will reduce the bulk and make the curves look smoother when the heart is turned right side out.
Because this isn’t a piece that will see a lot of wear, I also cut away around the rest of the heart, to reduce bulk at the seam.
Pay special attention to the corners, particularly where the two curves come together. See the arrow? Cut away as much fabric as you can without the seam coming apart. You don’t want this bit to be bulky.
The only place where I didn’t cut away excess seam, is at the turning gap. It will be a lot easier to sew this together when there is a bit of extra fabric to work with.
Turn the heart right side out through the turning gap. Press the seams, then sew the gap together.
And you’re done! Ta dah!