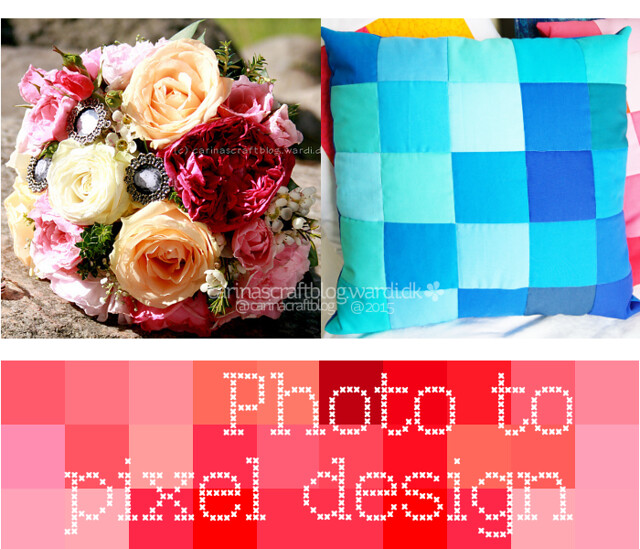
As promised, here is a tutorial for making a template for a cushion like my Pixelated ones. You don’t need any fancy programs on your computer. And no special knowledge! All you need is an image, a computer and an internet connection.
The image I used for my cushions is of my wedding bouquet. Of course, you can use any random photo you have taken, it doesn’t have to have any special meaning. But I thought it was quite fun to use a special photo so the cushions is a reminder of our wedding…even if it is in a code of sorts!
I have written down all the steps and below there’s that screen cast video I mentioned. Watch it without sound because there’s no talking in it, but there is a bunch of mouse clicking sounds which I haven’t been able to remove from the video. #newbie ;-)
This is how you edit your photo:
Open up the browser on your computer and open the site called PicMonkey.
Open an image in PicMonkey. (For each step, remember to hit the ‘Apply’ button to, well, apply the action to the image.)
The first thing to do is square up your image. In Basic Edits, click on the ‘Crop’ tool and select the ‘square’ setting. In the image you can then drag the selector to the right size.
When you have squared the image, click on ‘Exposure’, also in Basic Edits. Here you want to adjust the brightness of the image and also adjust the contrast. Exactly how much you want/need to adjust each one depends on the image/your preference. The more contrast you have between light and dark areas, the more contrast there will be in the final image.
Next, click on Effects (it looks like a magic wand) and select the ‘Focal Pixelate’ option.
Adjust the ‘Pixel size’ to however many pixels you want across your image. I used five for my image. Which means I had to cut out 25 squares of fabric for my cushion cover. The more pixels you have, the more squares of fabric you will need.
Set ‘Focal size’ and ‘Fade’ to 0% and ‘Edge hardness’ to 100%. You will see that there is a small square in the centre square of your image. You can’t get rid of that completely, but if you click in the corner of the darkest of your squares, it almost disappears. And don’t worry about it, it’s not going to affect your ability to use the image.
Now for the fun part: adding the colour you want!
Click on the Touch Up and then select the ‘Lip tint’ option. Set the ‘Brush size’ and ‘Hardness’ to 100%. Then, in the right hand side there is a small box with a spectrum of colours. Click on that and you will see a box of colours.
Select the colour you want (or as near as possible, you can change it later). Then draw across your pixelated image to apply the colour.
When you have filled the whole image with your chosen colour, you can adjust it using the box of colours. You can also use the ‘Intensity’ and ‘Tone’ options to fine tune the colour. The exact amount of adjustment is op to you of course.
Once the image has the colours you want, hit the Save button and save to your computer. Use the ‘Sean’ image size option, it is the best one.
