
If you have a blog, it’s probably a good bet that you add photos to your posts from time to time. I use Flickr to host my photos. There are a few reasons for that.
The quality is better. When you upload photos directly to Blogger there is a weird loss of quality. Sometimes it’s noticeable, sometimes not. But better to be safe than sorry, eh? You also get way more storage space on Flickr, 1 terabyte! That’s a lot!
Having the photos on Flickr is also a good way to share the post on Flickr. You can add photos to groups, add tags and you can add a direct link to the blog post in the photo’s description on Flickr. And if someone clicks on your photo on our blog then it will take them to your Flickr page, so it gives you (or atleast your Flickr page) a bit of a traffic too. ;-)
It’s a couple of extra steps to use Flickr to host images, but it’s easy once you get the hang of it.
I hope you are already familiar with how to upload photos to Flickr, below I will show you how to grab the code to add the photo to a blog post. I’m showing this for Blogger because that’s what I use, but the process will be similar in other blogging platforms. :-)
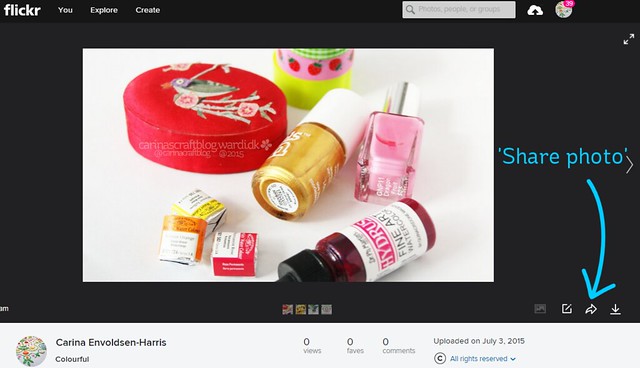
(1) On the photo page, click the little arrow that points right. That’s the ‘share photo’ menu.
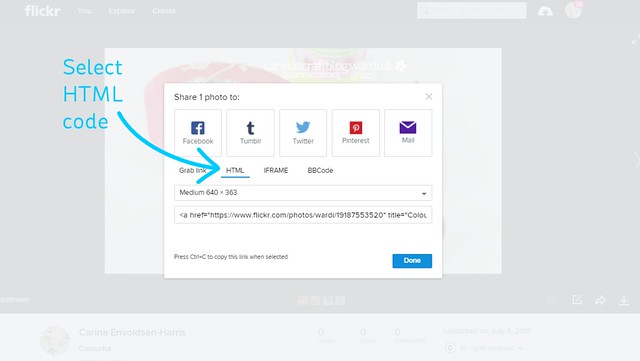
(2) Then click on HTML. Never use IFRAME, it’s evil. ;-)
Since I did the screen shots for this tutorial, Flickr have actually made some changes to this menu, so the IFRAME option doesn’t show anymore.
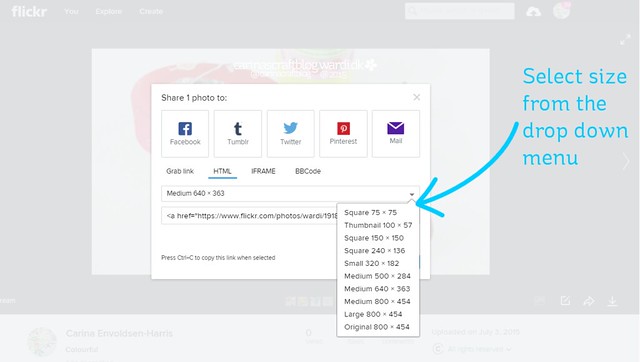
(3) Then click on the size drop down and select the size you want. The size you use should fit the width of your blog posts.
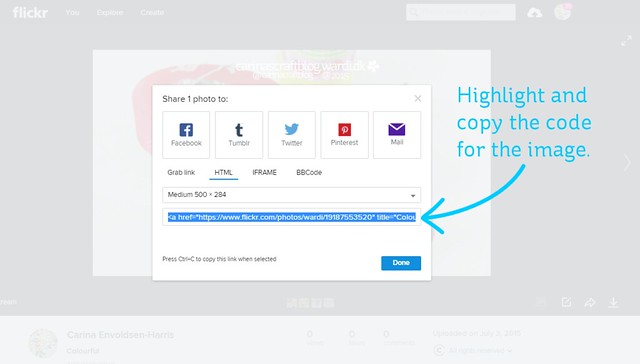
(4) Once you’ve set the size, click to highlight the code and copy it.
Tip: Flickr remembers the setting from last time, so if you’re adding more than one photo, you should be able to skip steps 2-3 and simply copy the code for each photo.
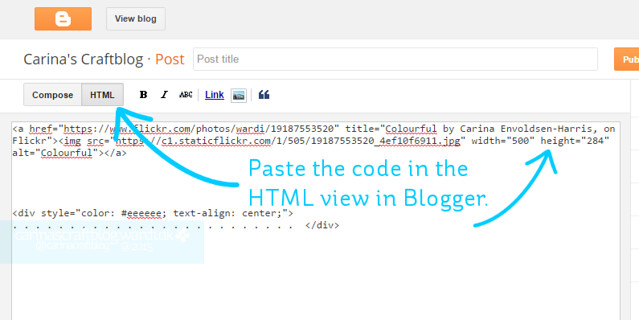
(5) Hop over to your blog post and make sure you have HTML view selected. Then paste the photo code in place where you want it.
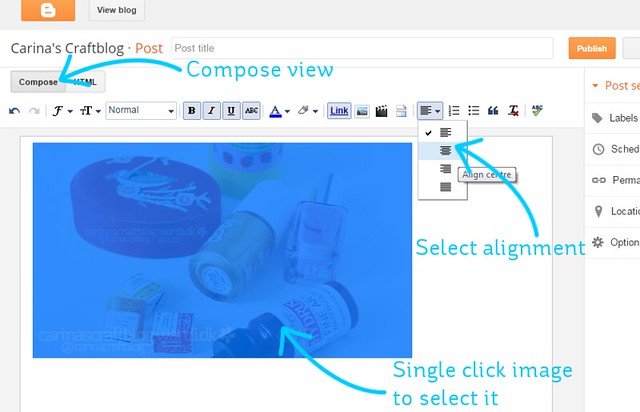
(6) If you want to center align the photo, switch to the Compose mode and single click on the image. It turns blue because it’s been highlighted. Then click on the Alignment button and pick the ‘center’ option.

I mentioned in step (2) that Flickr has changed some things and that includes the code for the HTML. It now adds an annoying header and footer to the photo. As in the photo above. (In a feed reader you may have to clickity-click over here to the blog to see it in action.)
I have no doubt that that could be useful, but it’s mainly useful for Flickr so people are reminded that the photo comes from there so to speak.
On a blog, where you’re trying to make things look pretty and cohesive.. it doesn’t look so great. Fortunately, it’s easy to remove!
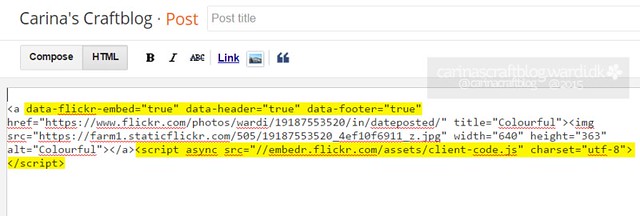
Click to see the HTML view and then remove the pieces of code I have highlighted here. Just select it and delete it. Get rid of it. You won’t break your blog by deleting it, I promise. :-)
Here is that same photo without that header and footer. Much better! :-)