Hello! I have been hard at work (in spite of the heat wave!) taking pictures of my pattern embroideries, because soon I will be able to have a shop on my own website again! I really thought that wasn’t going to happen in the foreseeable future, but it will! More about that later, first I wanted to share a few photo tips with you.
PS No Dala horses where harmed during the shoot of these pictures! ;-)
This tip works best for taking pictures that are lying on a surface, although I suppose you could use it against a standing background as well.
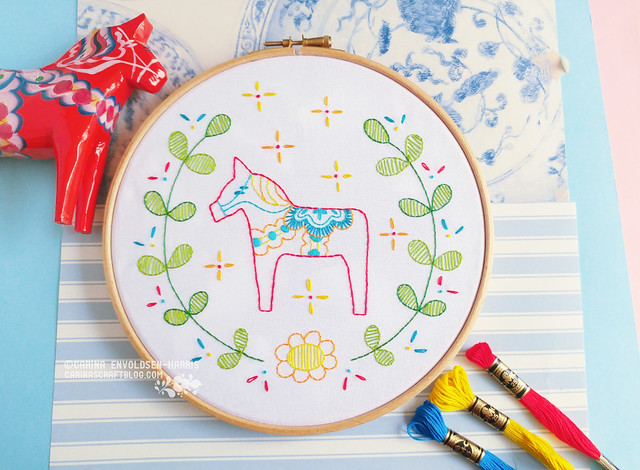
Use different colours of card underneath the things you are taking pictures of to act as a contrast. I have two large sheets of card, in pink and light blue which I use for most of my blog pictures. I used it for some of my new product pictures too.
I also have a pack of solid coloured paper that is a bit larger than an A4 sheet, so most of my embroideries will fit on those. I randomly bought that pack years ago in Lidl for very little (see what I did there?!) and it has come in handy so many times. Look out for cheap paper!
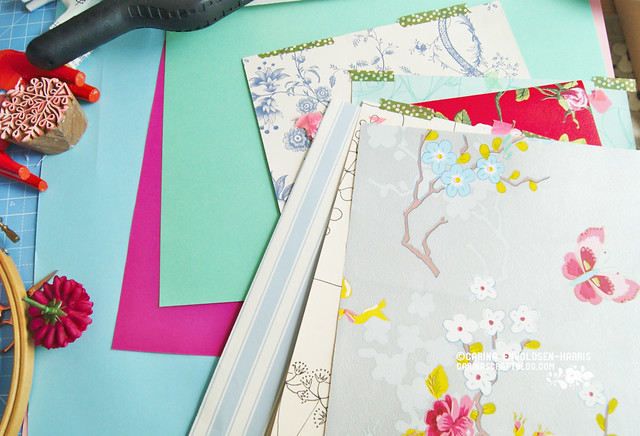
Or completely free paper! I still have all the wallpaper samples I used in my ‘wallpaper quilt wall‘ a few years ago. Wallpaper samples are usually A4-ish size so they won’t fit large hoops, but for most of my embroideries they’re ok. Or you can put two pieces together to create a background with added interest.
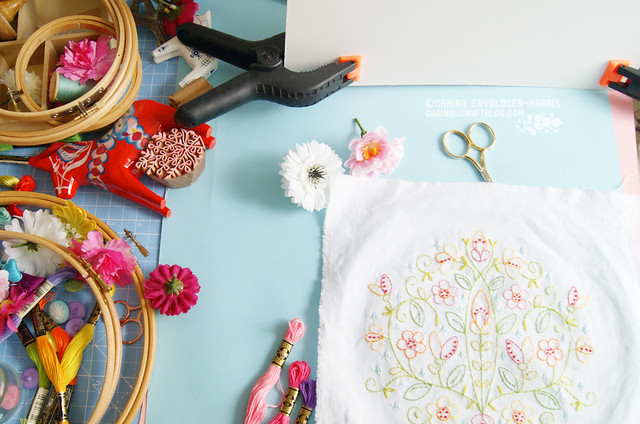
This is where I usually take my blog, and other, pictures. On my work table in the studio, with plenty of light coming in from the doors to the garden, to the right of the picture. You can see my two large cards sheets here.
I use a stiff, and slightly shiny, piece of card held with two clamps as a reflector to get rid of deep shadows. It’s usually on the left of whatever I’m photographing, but I had to move it for this picture or all my props (!) would have been in the shade.
My props are mainly skeins of embroidery floss, fake flowers, various scissors, buttons, ribbon and other pretty things.
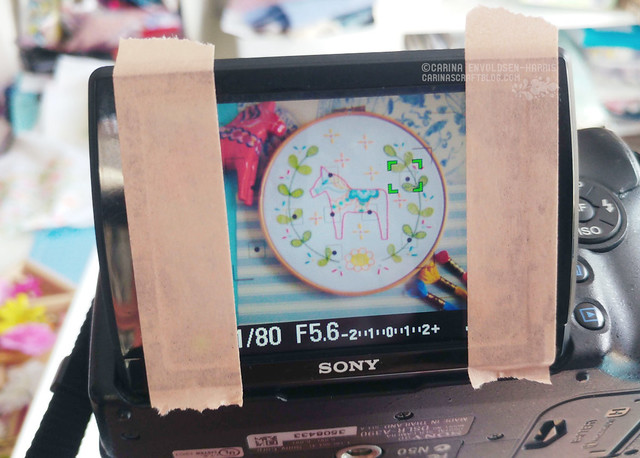
I knew I wanted my pictures to be square, so I put two pieces of washi tape on the screen of my camera to make a square ‘view finder’. It really helped a lot with getting the right angle and distance and saved me lots of time!
This tip might not work if you’re taking pictures with a smart phone, because the tape will make the phone think it’s human touch. But who knows, try and see if it works. ;-)
