Here’s a tutorial for making a zippered sketchbook cover. This will be very lengthy, with lots of pictures and explanations of things which you might know already, because you’re a lot smarter than me. If you have any tips for doing some of the steps quicker/easier in future, please leave a comment or email me; after all, I’ve never learnt to do this, I’m making it up as I go along. ;-) Also, can we just start out by having a giggle at the fact that all the pictures have ‘2007’ on them, when clearly it’s 2008?! I really can’t be bothered to change that now! Anyway, on with the tutorial – and remember, if you have any questions or problems, just send me an email. Here we go:
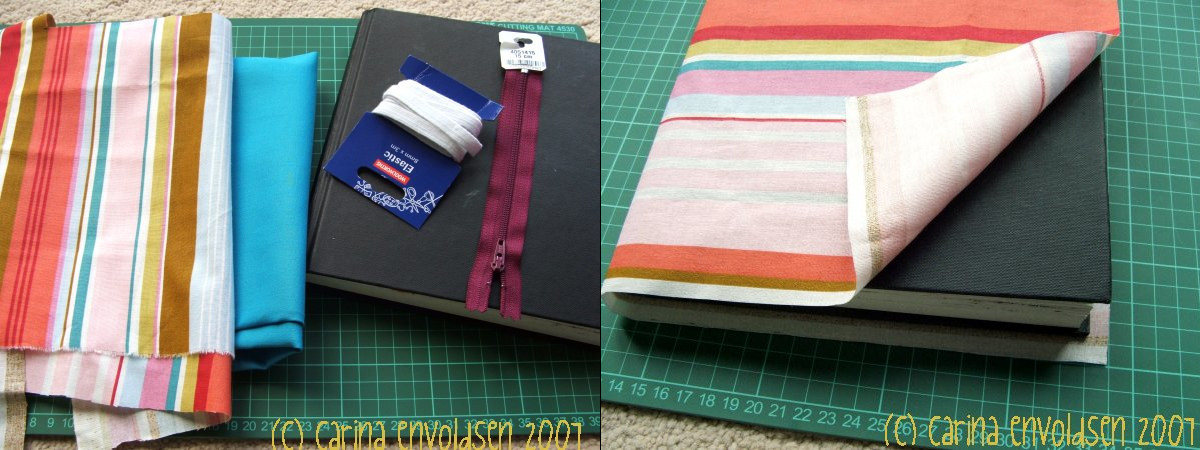
What you need: fabric (I can’t tell you exactly how much as that depends on your sketchbook, but you’ll need enough to cover it twice (outside & lining) + 4 times the width of the side ‘panels’), zipper, which obviously must be shorter than your sketchbook, elastic (optional), scraps of felt and all the usual stuff you need for sewing.
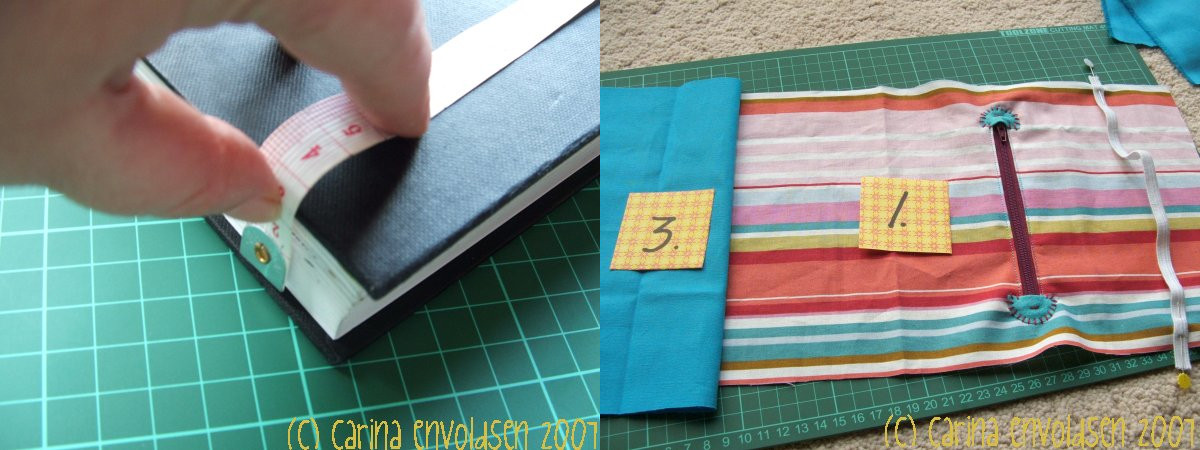
First wrap your outer fabric around the sketchbook while shut, cut the fabric so you have a piece that’s about 1cm bigger than the sketchbook on all sides.
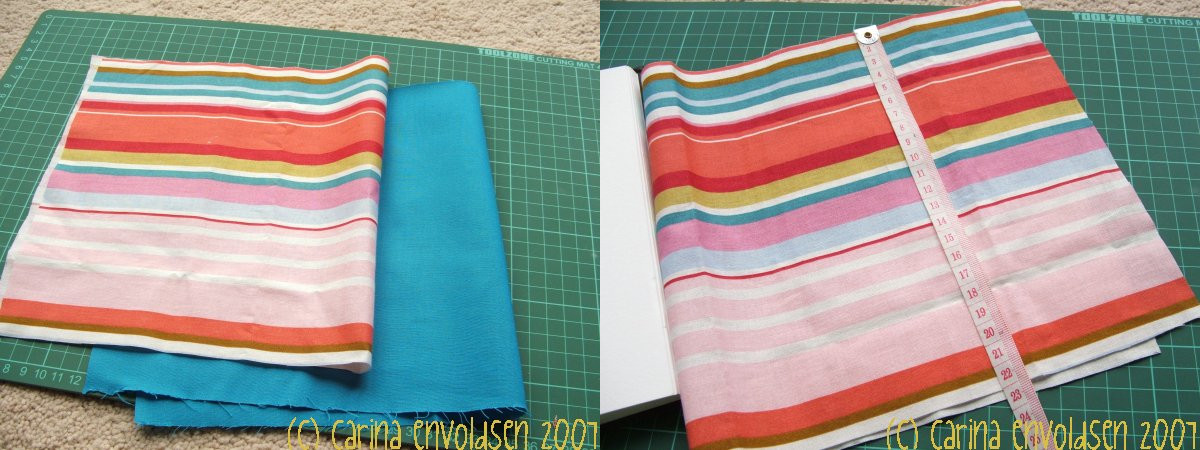
Now place the outer on the lining fabric and cut a piece the same size. Now you have two pieces!
Next you will need your measuring tape. Measure the height of your outside fabric + add a couple of centimetres. Write that number down. Yes, the sides will be taller than the outer fabric, this is exactly what we want.
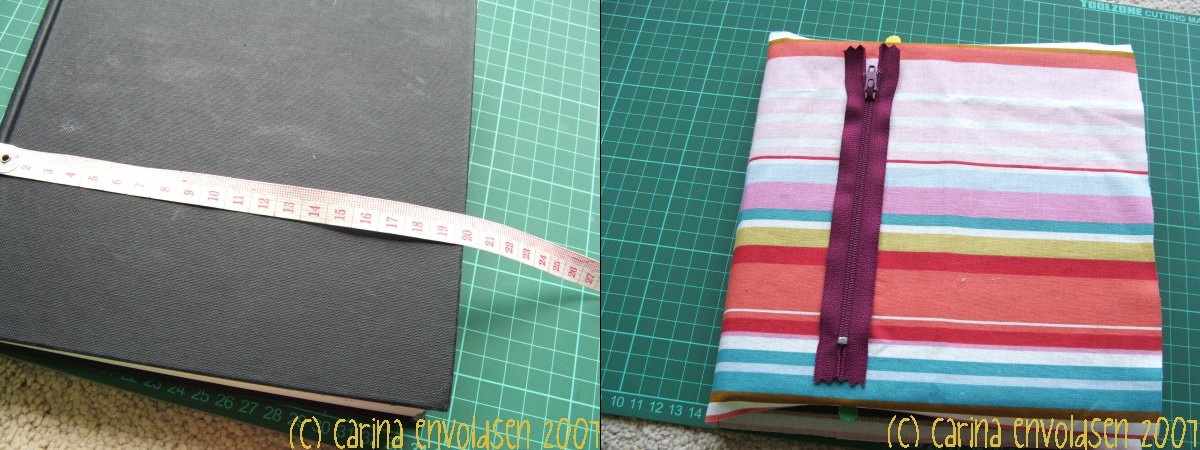
First measure the width of your book, decide how wide you want the side panels to be. I think a little smaller than half the width is a good size, but it’s up to you. Remember to add 1 cm seam allowance (x2). The sides are folded double so the actual size is twice the width of the desired width (if that makes sense). Now get your fabric and fold it in half and cut two pieces using the number from this and the previous step.
Ok, now it might get a bit daunting, we’re going to add the zipper! Actually, it’s not really that difficult, as you will see.
First, fold your outer fabric around your book and tuck in the sides with a couple of pins, just stick them in between the pages. Now place the zipper where you want it. Make a mark at each end of the actual zipper bit.
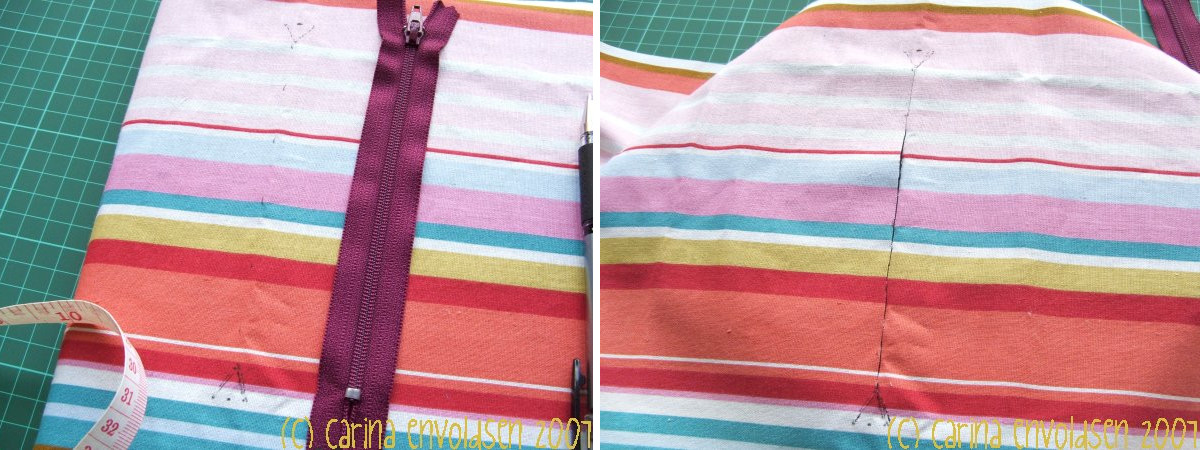
Next, draw two narrow triangles and mark a line between the points of the triangles.
Cut the two sides of each triangle (but for heaven’s sake, don’t cut the bases which are parallel with the top and bottom of the book) and along the line between them.
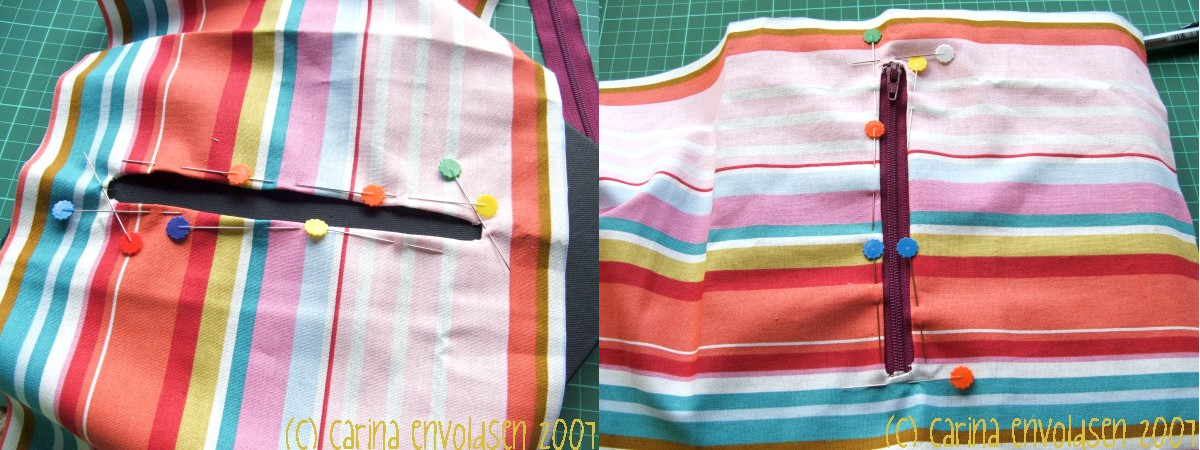
Now fold and pin the sides and triangles like in the picture above. If you’re in a hurry, you can iron the folds or do like me and leave it for a little while and go have some lunch.
Alright, pin the zipper to the fabric, make sure that the fabric is about 3 mm from the zipper ‘teeth’.
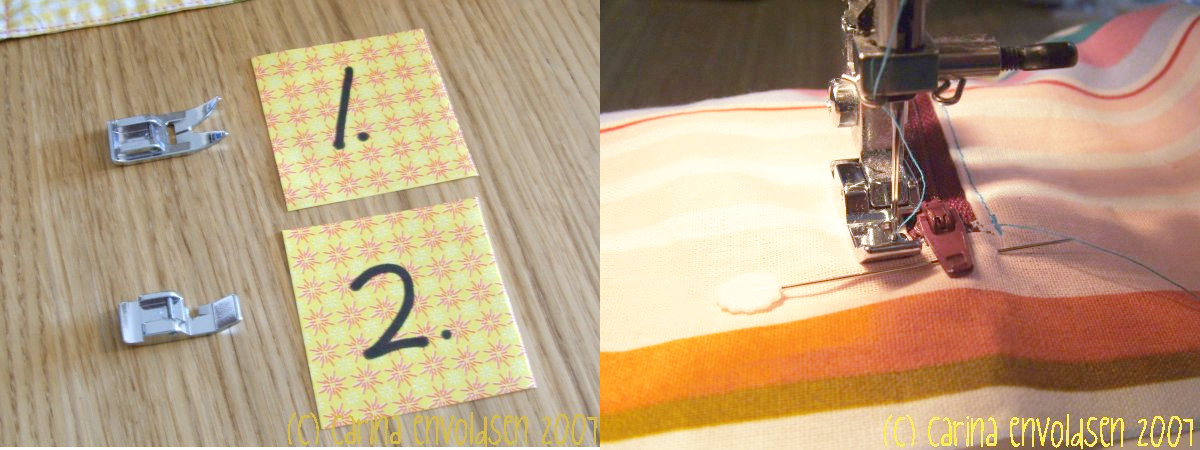
Go to your sewing machine and change the foot and quite possibly the settings on your machine. If this is the first time you’re using the zipper foot, you probably want to check your manual. As a quick reference, above you can see the normal foot (1) and the zipper foot (2) for my machine.
Sew on the zipper, stitching a couple of millimetres from the edge of the fabric. When you get to the zipper pull, stop sewing and lift the foot with the needle still in the fabric.

Like so. Pivot the fabric so you can pull the zipper pull away from you. Straighten fabric, foot down and then continue sewing.
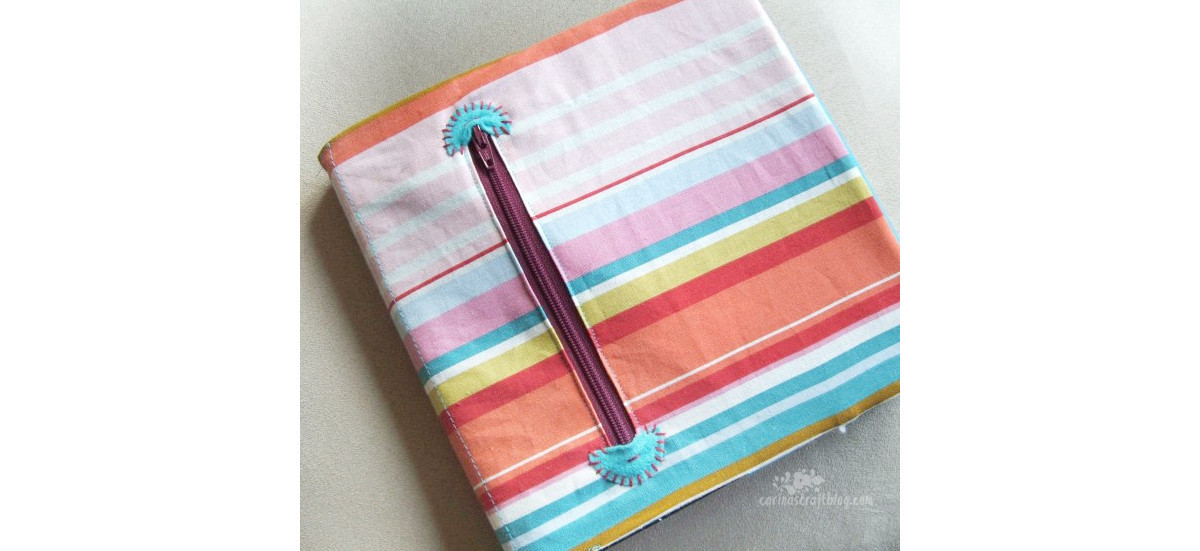
And there you have it, one zipper successfully installed. Don’t worry if the ends are a bit wonky. We’ll take care of that in the next step.
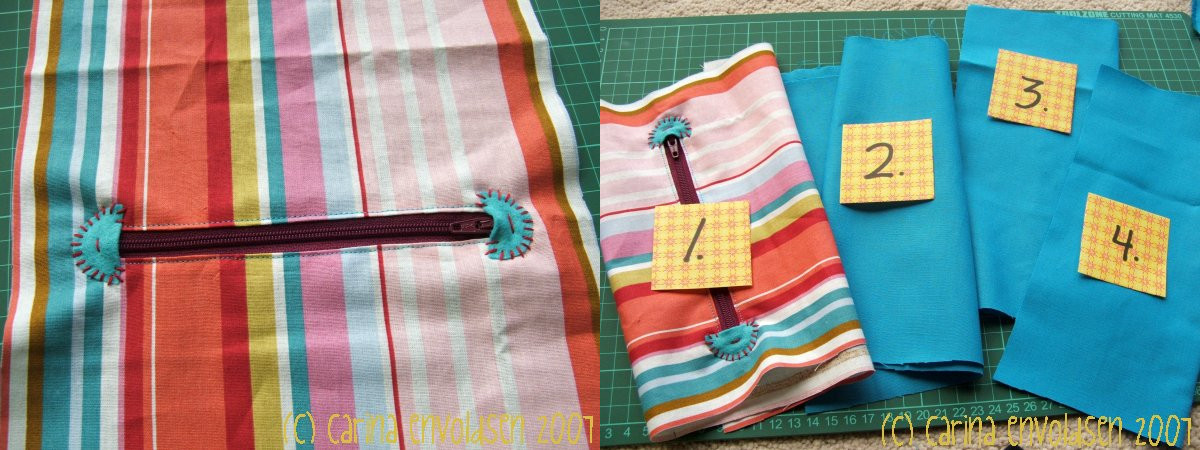
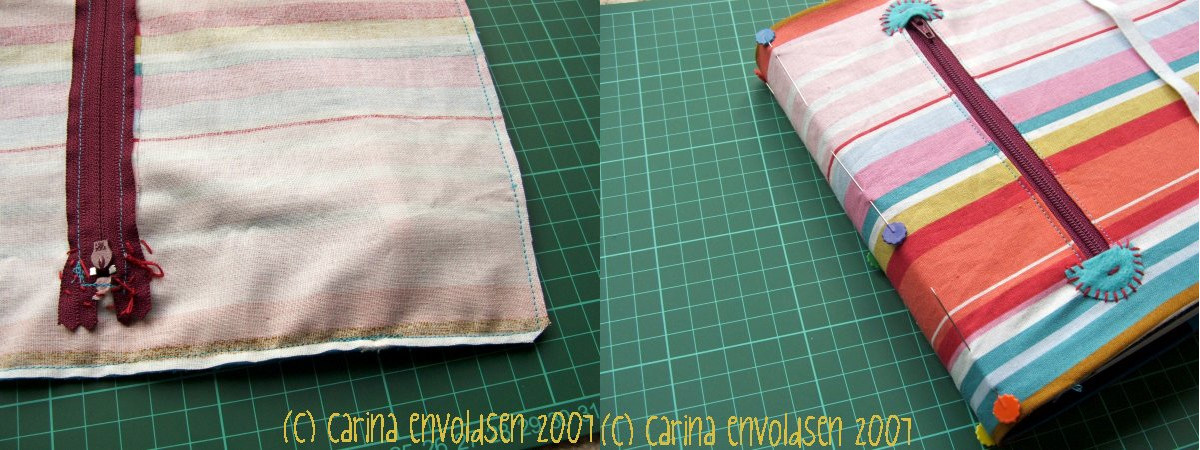
Cut a circle from your felt scrap, cut it in half and stitch on at the ends of the zipper. If you want to further decorate your cover, this is the time to do that as well.
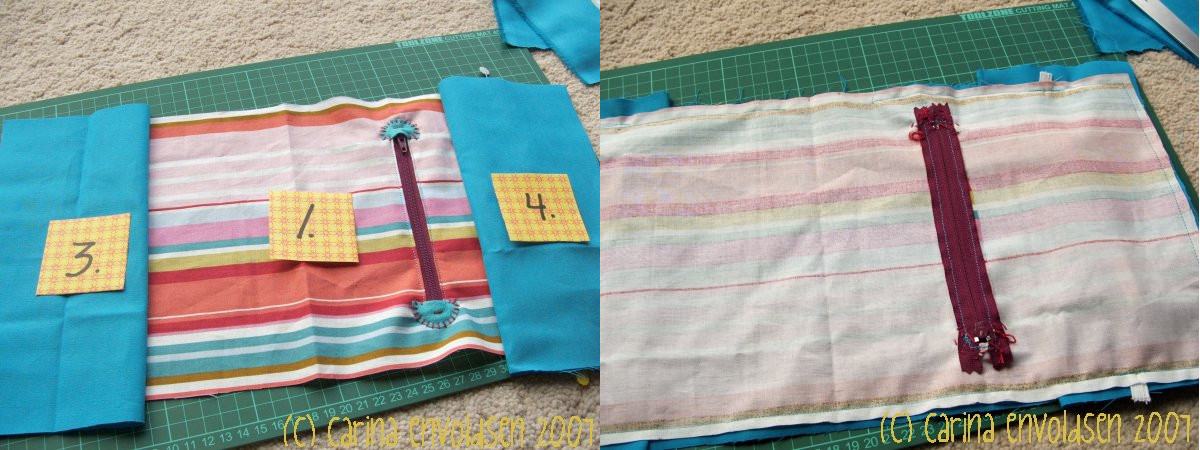
Now you have almost all your pieces ready for assembly. Outside (1), lining (2) and sides (3&4).
You just need to cut your elastic -if you want one- measure the height of your book + the thickness x2 and that is the length of the (‘relaxed’) elastic you’ll need.
Place your outer fabric with right side facing, place one of the sides on top with the fold towards the middle. Pin the elastic to the opposite side of the outer fabric, with 1 cm hanging off at each end. ~ This constellation means that the elastic will go on the back of the book when closed; if you want it to be on the front, reverse what you see in the picture above. ~
Place the last side on top of the elastic, place the lining on top of everything and pin it all together. ~ If your lining has a printed side, make sure that you put it wrong side facing you. ~
Turn and then sew everything together with the wrong side of the outer fabric facing you. Leave a gap at the bottom for turning. As you go over the elastic, go over it a couple of times to make sure it’s attached properly.
Trim the fabric and cut the corners. Turn inside out and sew together the turning gap.
Put the cover on your book, close it and pin along both sides of the spine (or draw on it with a pen that will disappear). Remove the cover and go back to you sewing machine.
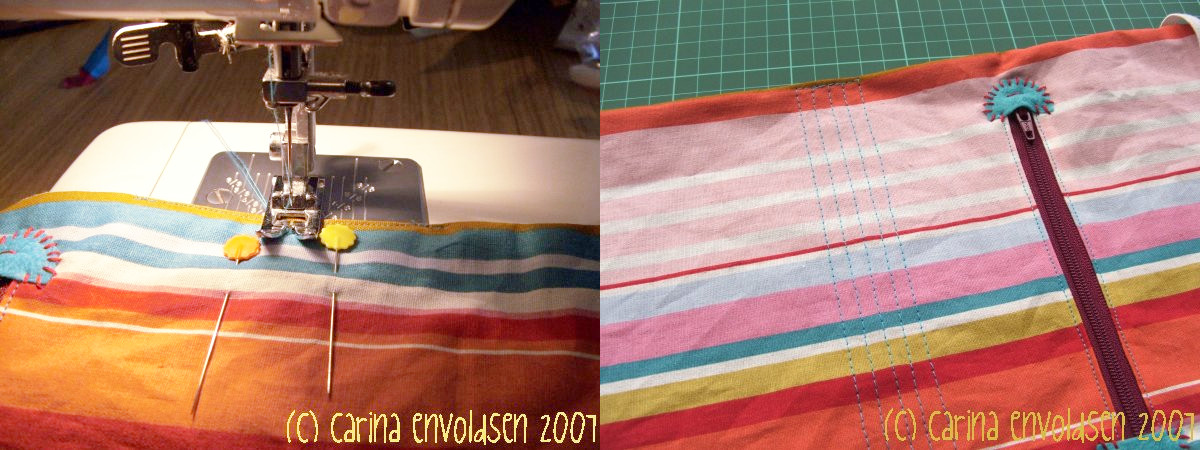
Sew down the middle between the pins. This is to stabilise the cover, but also to make the pocket on the front. I think it looks nice using a large stitch and a contrasting colour thread, but that’s entirely up to what you fancy.
Repeat a couple of times (or more, depending on the thickness of the book) on both sides. And that’s it. You’re done! Hooray! Now pat yourself on the back and then send me a picture so I can see your cover. :-)
