I have been a little bit obsessed with this stitch lately, so I thought I’d share a tutorial for it. An obsession shared is an obsession…well, don’t really know what it is, but anyway, here’s the tutorial. ;-)
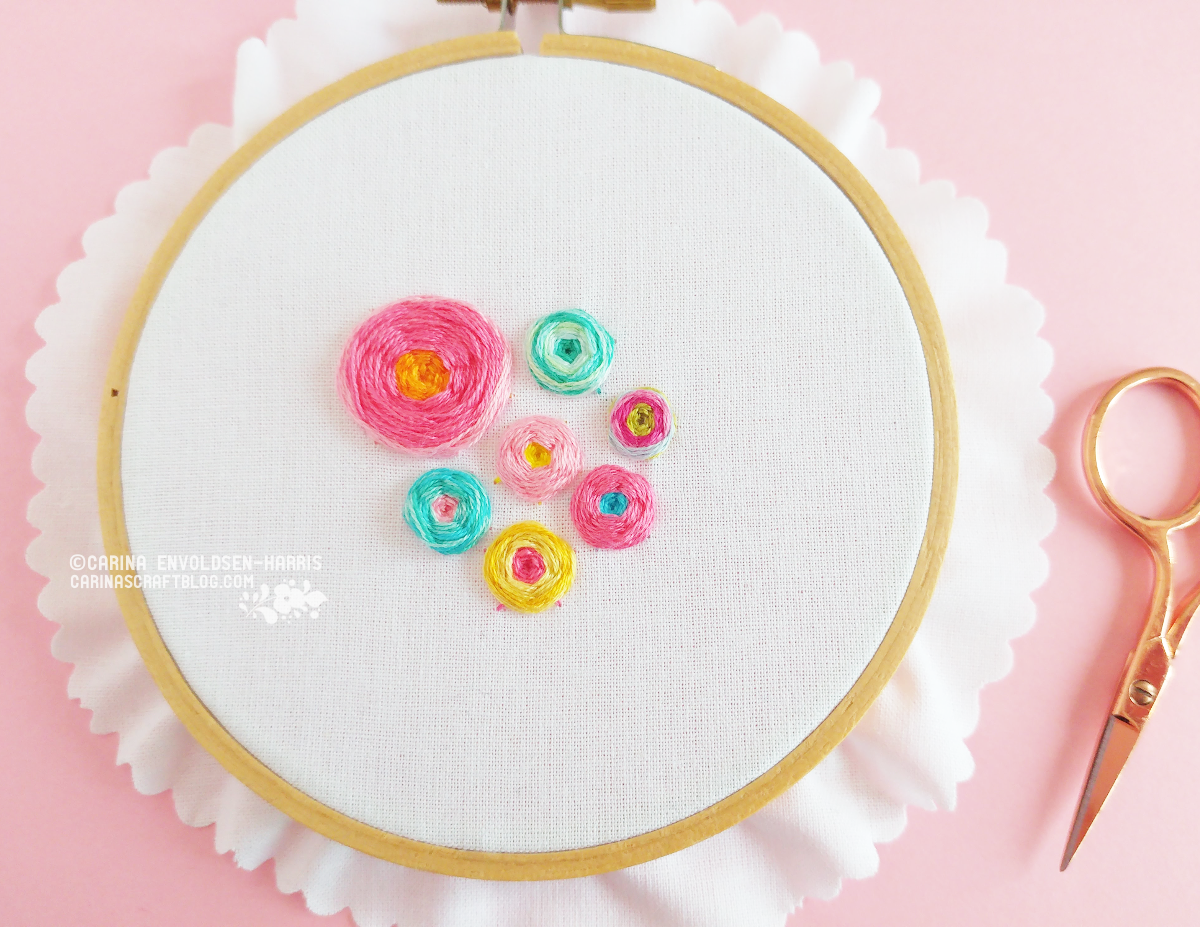
The stitch has a lot of different names, for example, woven rose, wagon wheel rose, woven wheel and woven spoke. The stitch is very effective in ribbon embroidery where you really get a petal effect, but it’s very pretty with six-stranded cotton too. Use 3 strands of floss for this stitch it gives the fluffiest roses!
In this example I’ll start with a yellow centre, then finish the rose in a different colour. You can do the roses in a single colour instead if you like. Variegated floss works very well for this stitch.
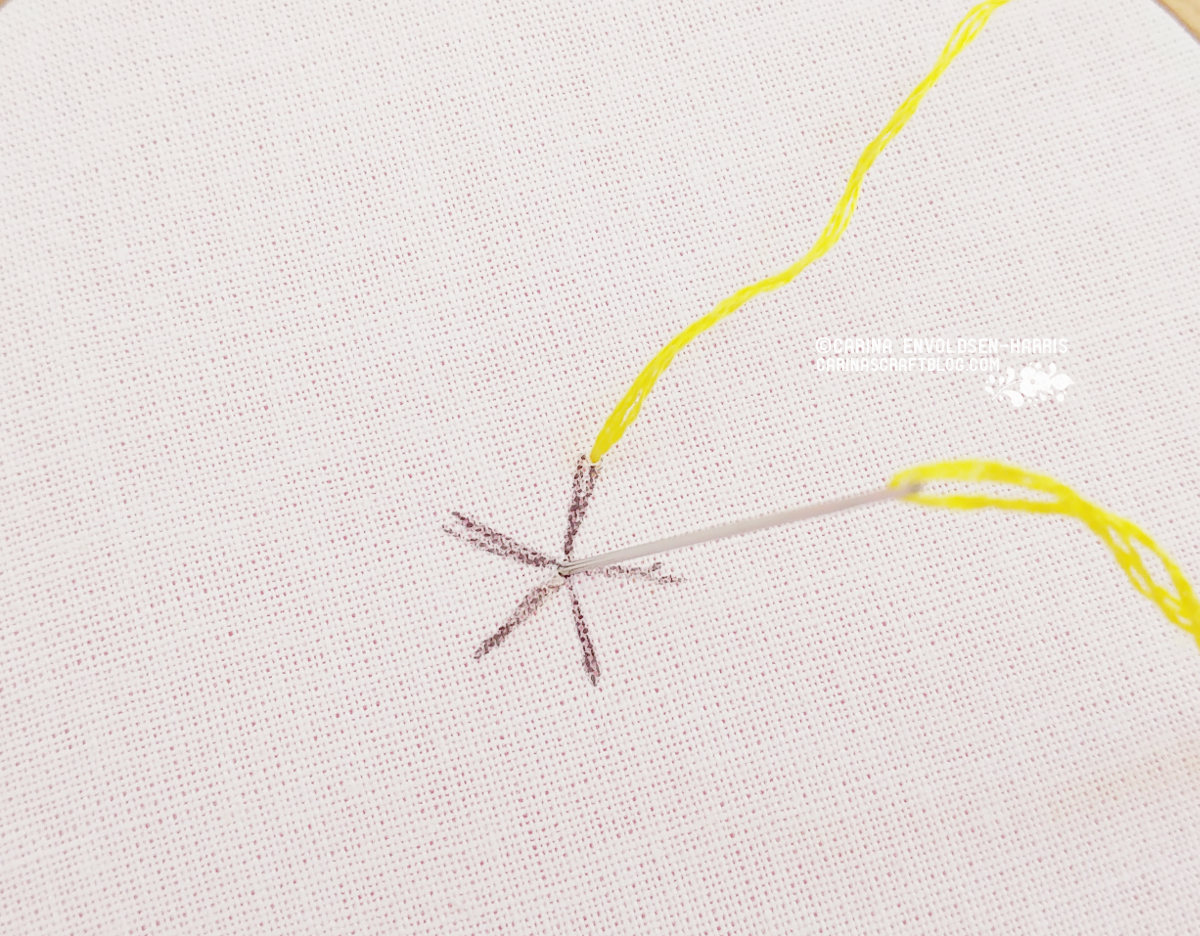
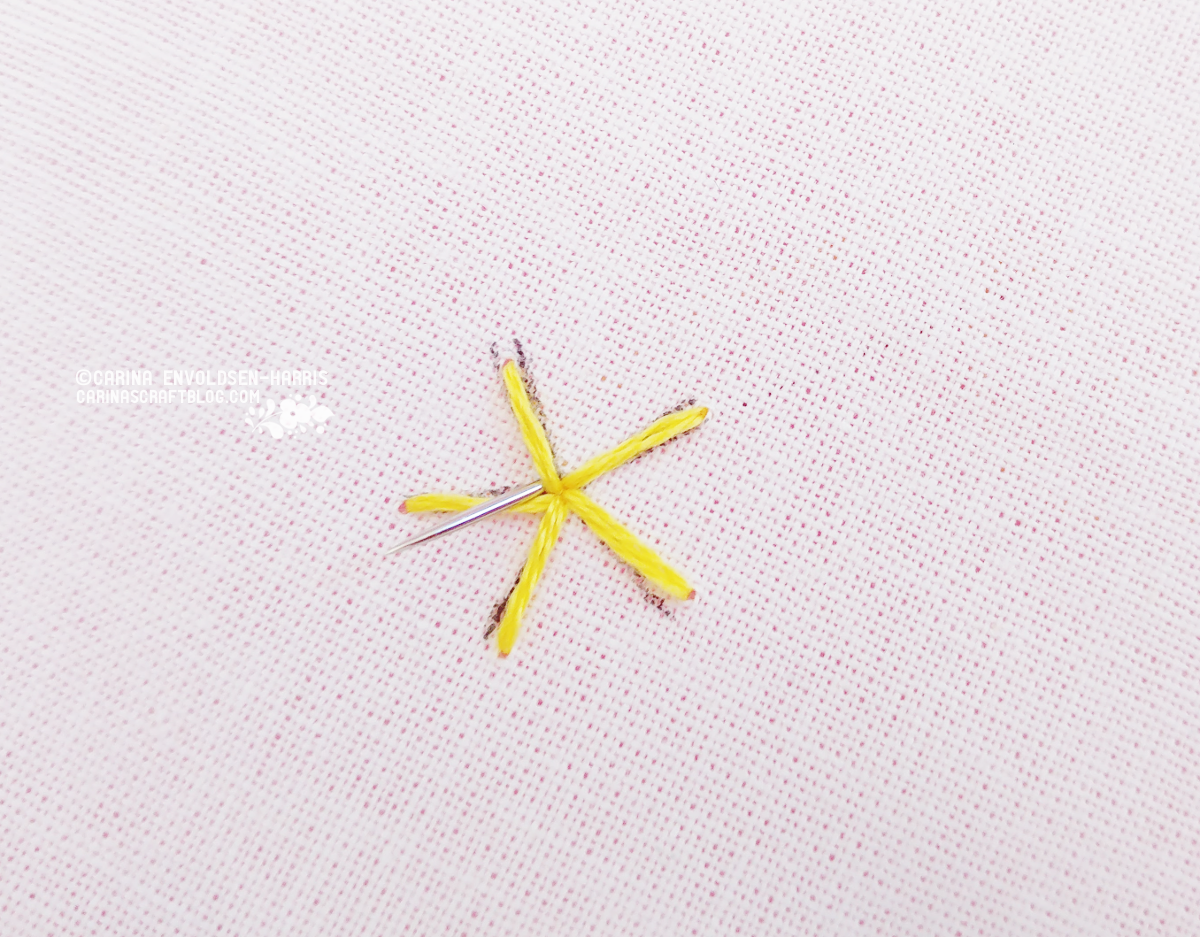
1) Draw a five spoke star. You can eyeball it instead and just start stitching but if it’s your first go at this stitch you might like the spokes to ‘lean’ up against to get things nice and even.
Bring the needle up at the end of one spoke, then bring it down in the centre.
TIP: If you want to make large spider web roses, say over 1″/2.5cm in diameter, make a 7 spoke star. This will give more places to weave the thread.
Important: The number of spokes must always be an uneven number.
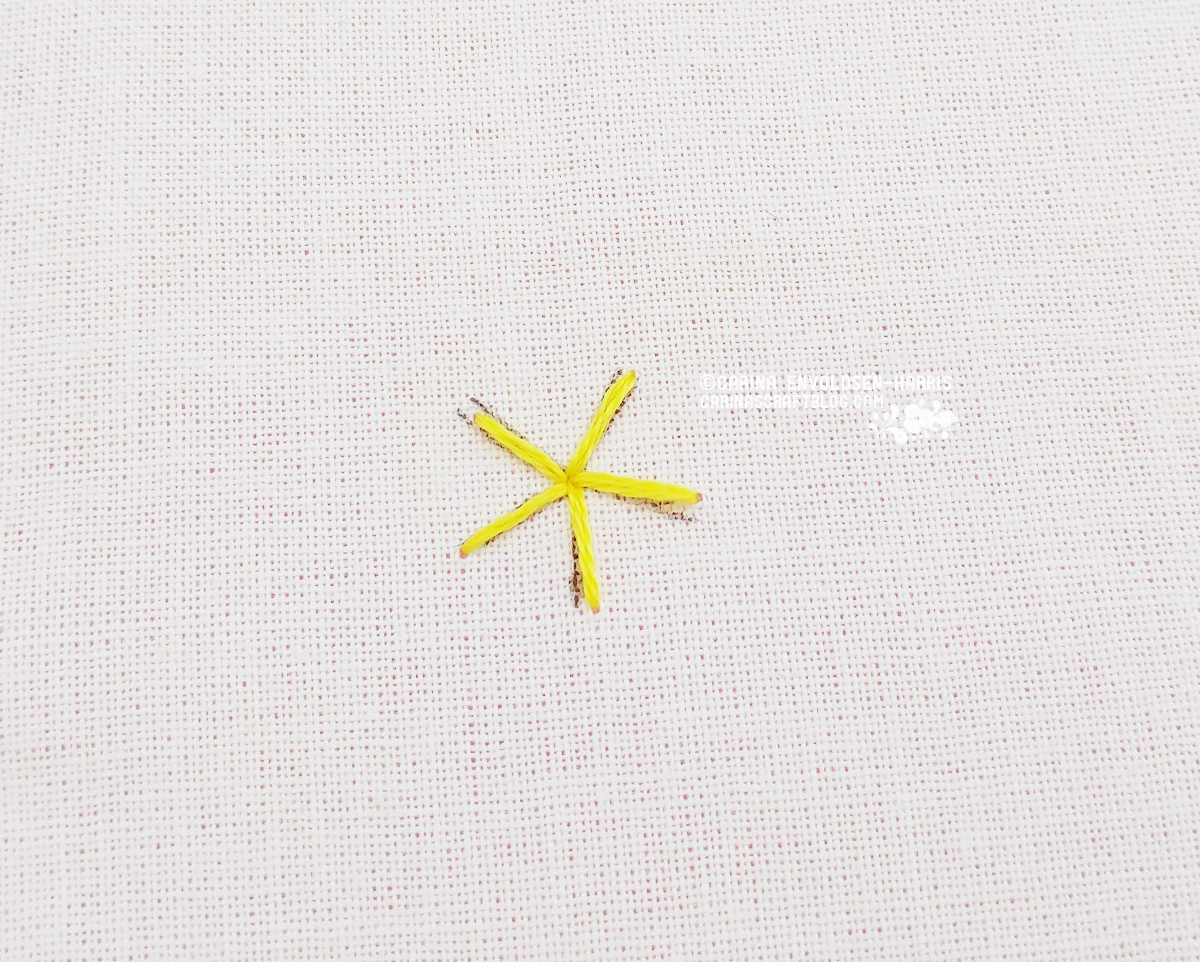
2) Repeat this for the rest of the spokes.
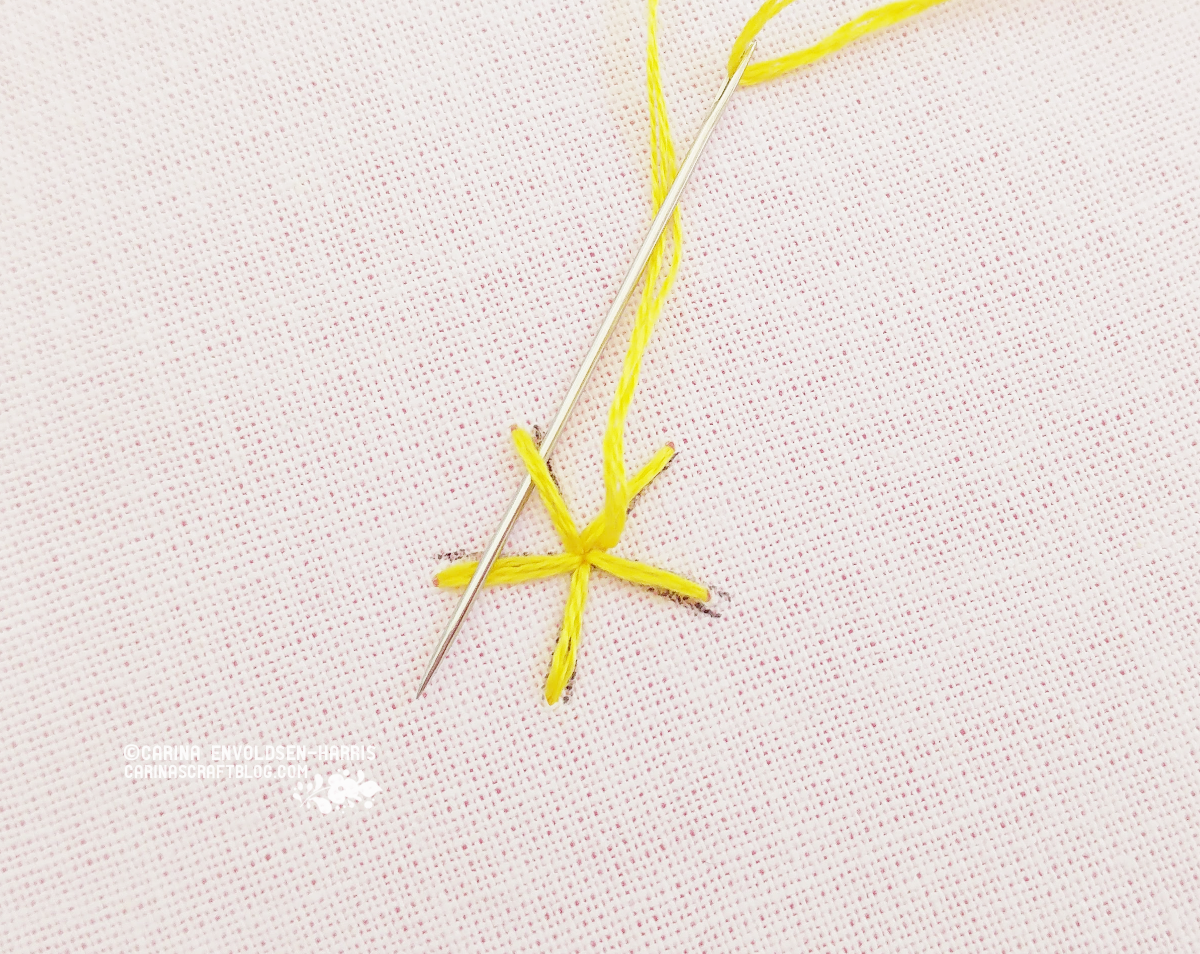
3) Optional step: when you have returned the needle to the back of the fabric, turn it over and weave the thread through the back of the stitches. This will secure it for the next step.
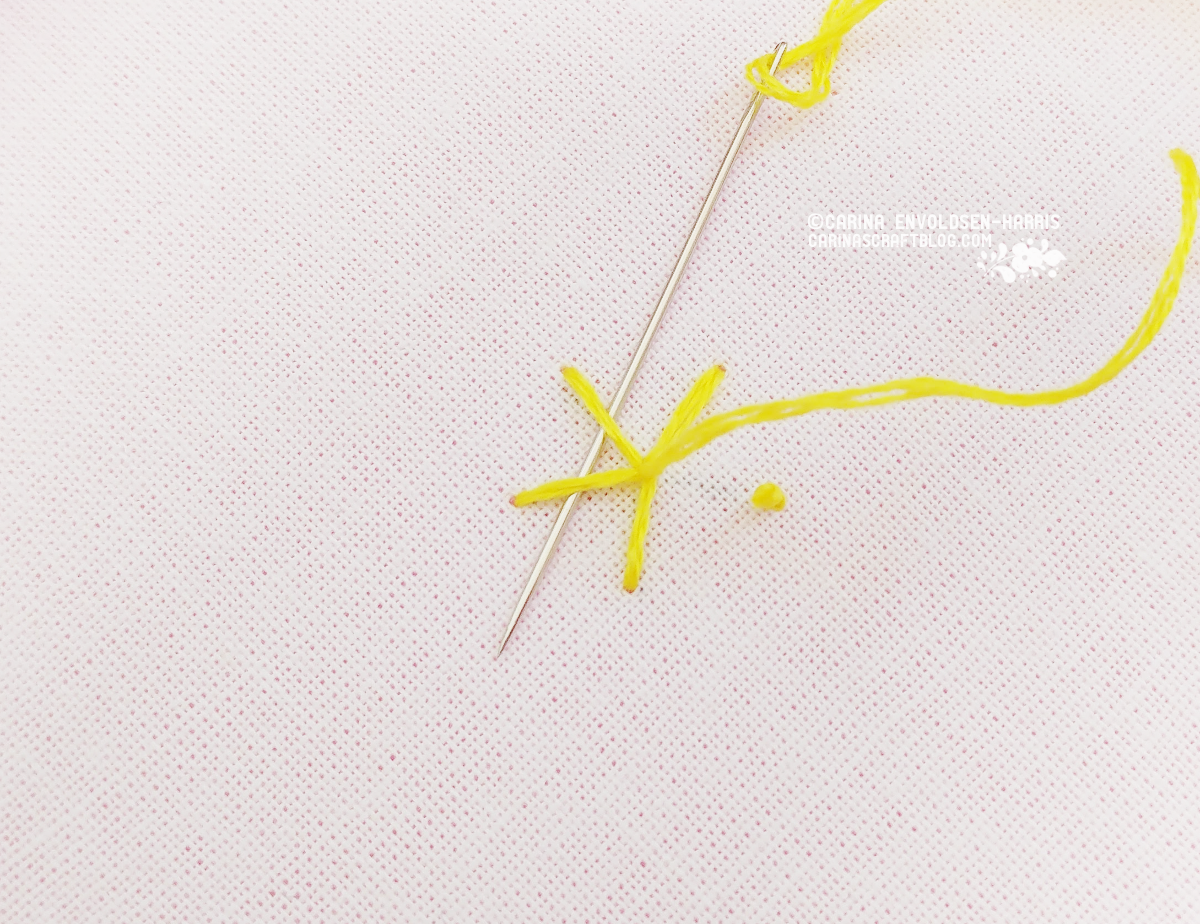
4) Bring the needle up in between two of the spokes, as close to the centre as possible. If you skipped step 3 take care not to bring the needle up too close to the centre or the last stitch may unravel.
5) Weave the needle and thread over and under the spoke stitches. Keep going until the yellow centre is the desired size.
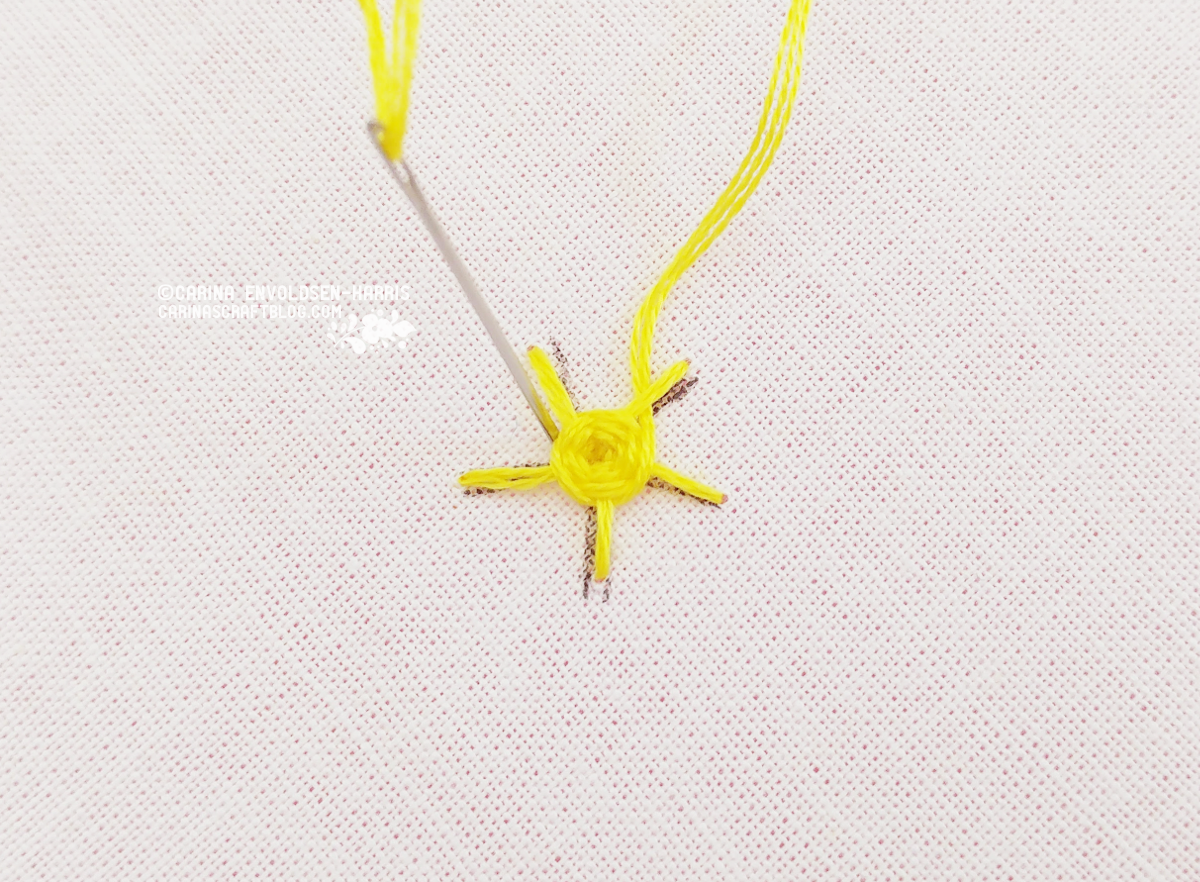
6) Bring the needle and thread to the back. Secure and cut off the thread.
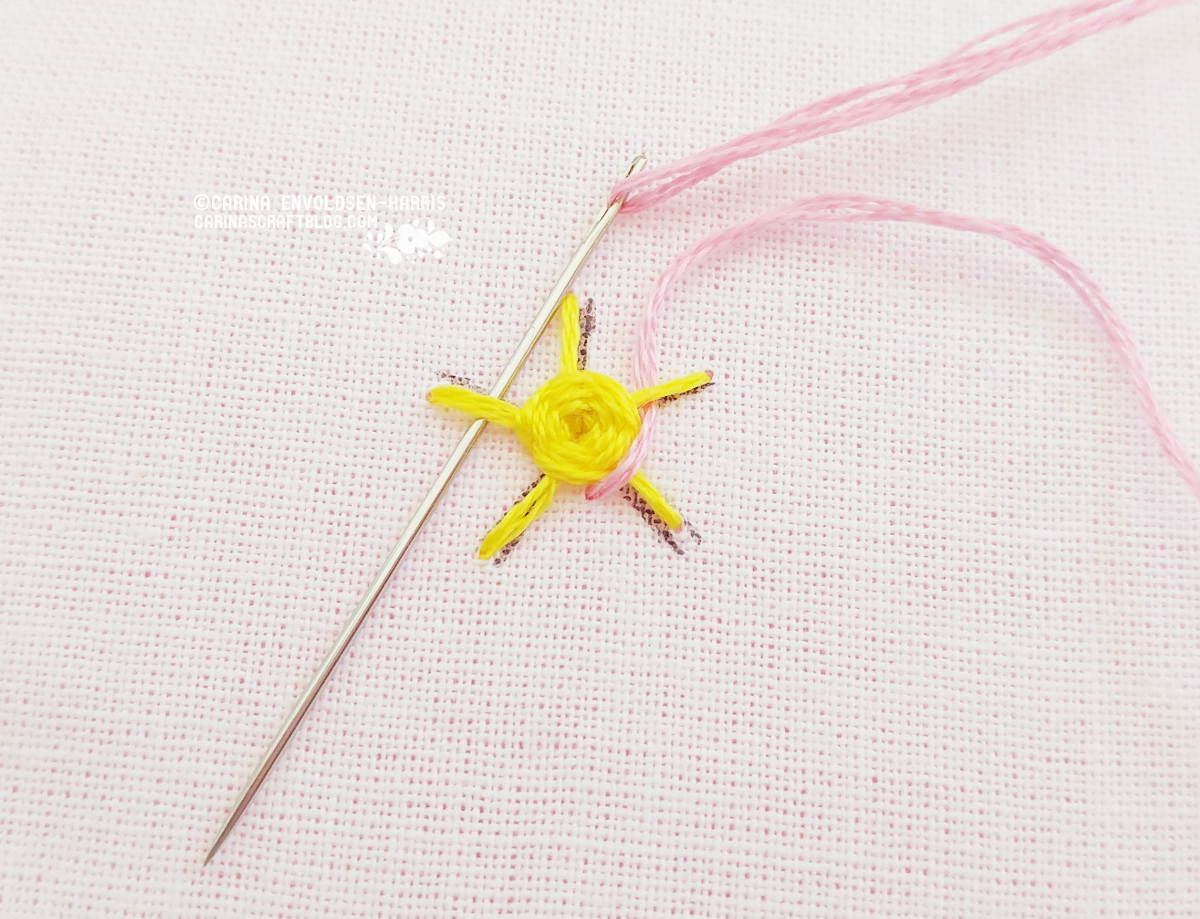
7) With the second colour, bring the needle up where you finished in the previous stitch. Carry on the weaving over and under until the spokes are completely covered. Push the needle to the back. Secure the thread and cut off the thread.
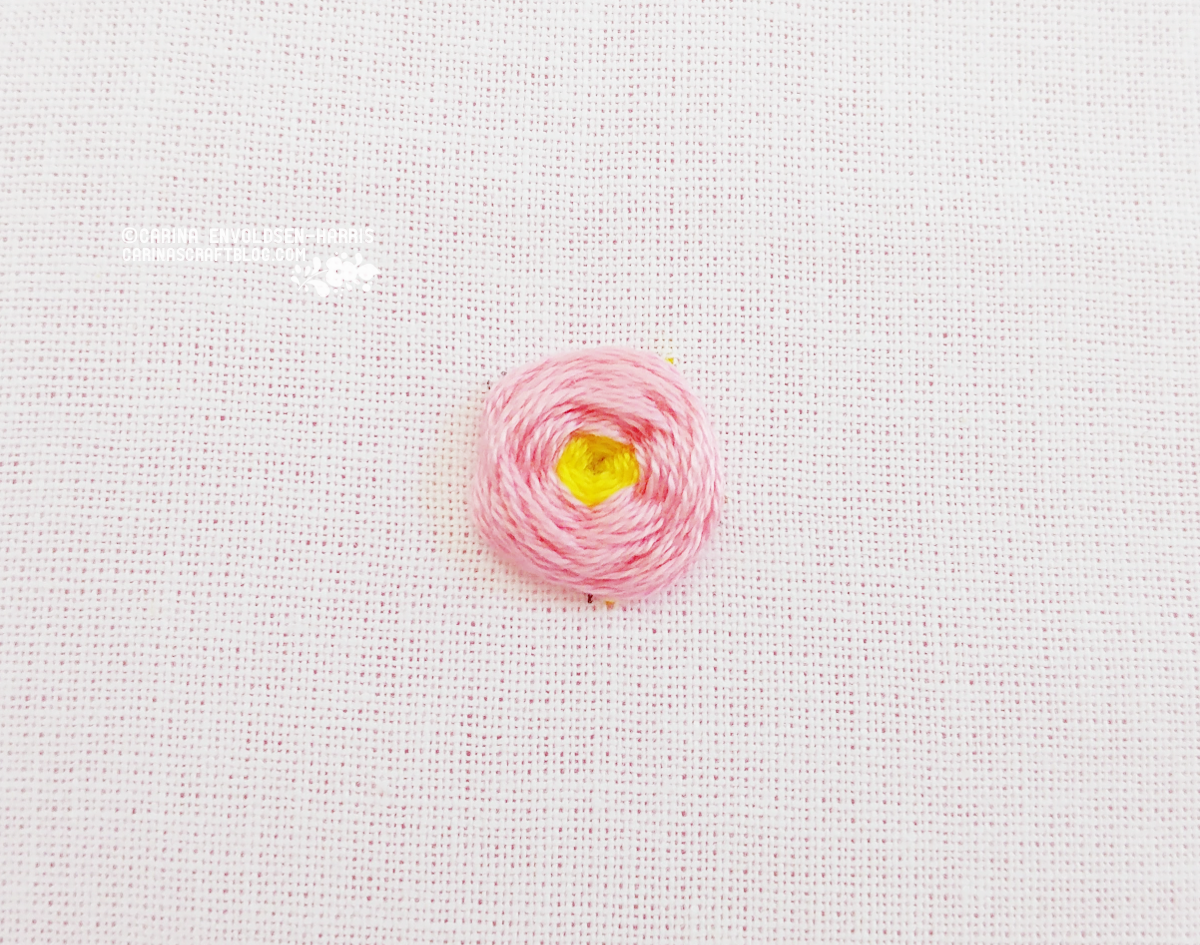
Voilá, the finished spider web rose!


One of my favorite stitches too.
So pretty!! Thank you for the thorough tutorial :)
Great tutorial! I love your yellow-centered version :)
Very helpful tutorial. Thank you.
Beautiful Rose, love the yellow center. I think I might have missed something. How many strands are used? (I think it is 6 doubled.) How long are the strands?
Author
As far as I can tell, I used 3 strands for the rose. The length was probably finger tips to elbow… you don’t need one piece of thread that is long enough to finish the rose, You can always add more.