Did you watch Great British Bake Off when it was Danish week a few weeks ago?! Obviously, I was very curious to see what exactly they would be making. I’d read in the synopsis for the episode that the technical challenge would be ‘spherical’ and of course there’s only one thing that could be: æbleskiver.
They’re a fried pancake ball type thing and very delicious. In Denmark, people mainly eat it during the winter months. In the GBBO episode, the bakers made them with cinnamon spiced bits of apple. Although the name literally means ‘apple slices’, hardly anyone in Denmark makes æbleskiver with apple anymore, it is very old skool. And makes it more complicated to make. ;-)
During December, you will find stalls selling piping hot æbleskiver in most cities and larger towns. Walking along in the freezing semi darkness of a Danish December afternoon balancing a paper tray of æbleskiver, your fingers alternating between frozen because you took off your gloves to eat your æbleskiver, and burning because the æbleskiver are hot, now that’s hygge! :-D
In Denmark, you can buy these frozen in the supermarkets, but of course nothing beats homemade. And for my people, as Tony would say, i.e. vegans, there are no ready made options available, so we have to make our own. Below is my recipe. Other recipes you will find are different. Some people add cardamom, some don’t. Should you add cinnamon? If you want it to taste like Christmas, yes of course! ;-)
A few things, before we start:
Æbleskiver pronounciation: æble is pretty much like English ‘able’ but the ‘a’ sound is longer. And skiver is kinda like English ‘skewer’ but the first ‘e’ sound is longer too and the ‘w’ sound is like a ‘v’ sound, so ‘skeever’. Aableskeever.
Our kitchen is pretty dark this time of year, so I hope you can see what’s going on in some of the pictures, despite weird glare and shadows from the light.
There are two different directions for making the æbleskiver batter, depending on whether you have fresh or dried yeast, so just keep an eye out for that.
Ingredients
40 grams of vegan margarine
375 ml plant milk of choice
35 grams fresh yeast or 1 sachet of dried yeast
60 grams of sugar
300 grams of flour
3/4 teaspoon salt
1/2 teaspoon cardamom
1/4 teaspoon cinnamon
1/2 teaspoon vanilla extract
125 grams of plain soy yogurt
Plant margarine to fry
Thin wooden skewer. In Denmark, the turning instrument of choice is a wooden knitting needle. I bought knitting needles specifically for turning æbleskiver. :-D
Æbleskive pan. This pan has seven holes (I wouldn’t recommend using one with more than seven holes) and is usually made of cast iron and heated on the hob. In Denmark, electrical pans are common but I don’t think you’ll be able to find them outside of Denmark. Simply type ‘æbleskive pan’ or ‘aebleskive pan’ into your favourite search engine and you should get a few results. I know they are available on Amazon. I think they cost around £20.
To serve:
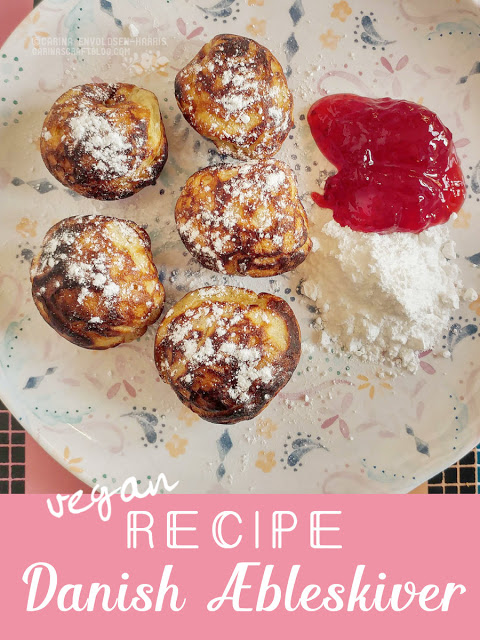
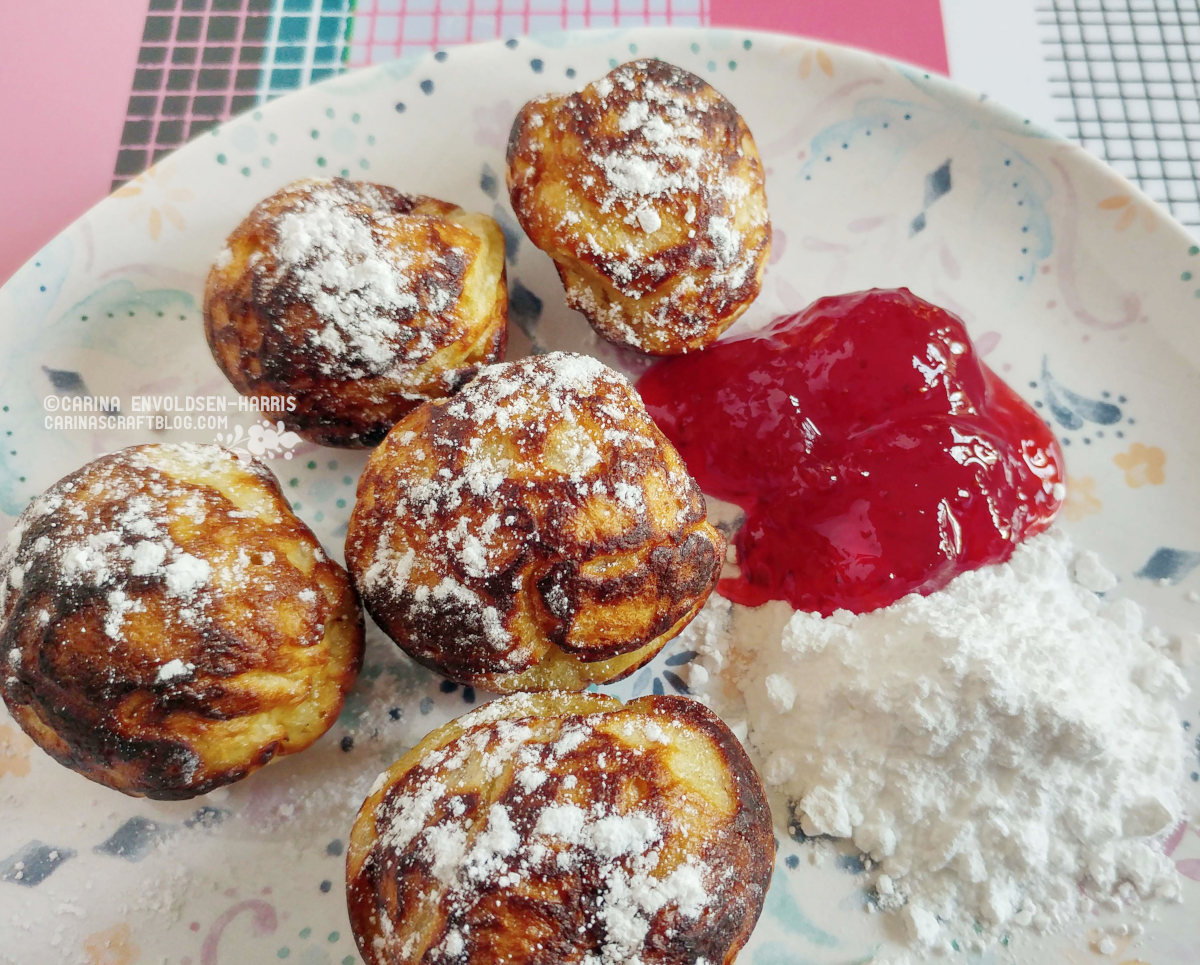
Strawberry jam* (seriously, you don’t need fancy strawberry dipping sauce, Paul!)
Icing sugar or/and granulated sugar
(*Raspberry jam if you prefer.)
Batter – Fresh yeast method:
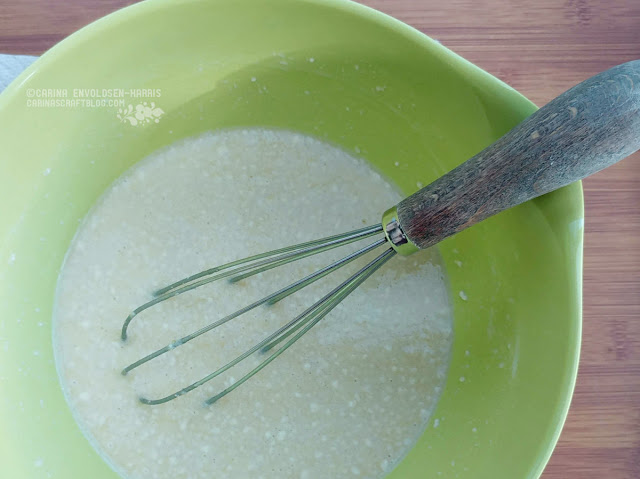
Heat the margarine and plant milk in a saucepan until the margarine starts to melt. Take off the heat and allow the margarine melt completely. The temperature of the liquid should be around 37°C.
Dissolve the yeast and sugar in the warm liquid.
In a large bowl, mix together flour, salt, cardamom and cinnamon.
Add the milk & margarine liquid, vanilla extract and the yogurt. Mix well.
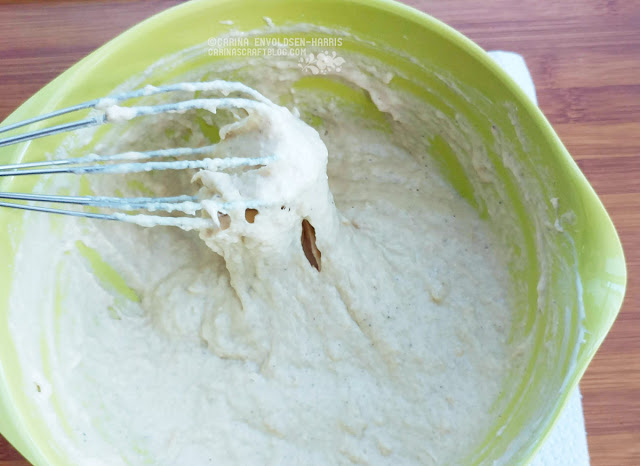
The result should be a thick batter. If it is more like a bread dough, stir in a couple of table spoons of milk.
Cover with cling film or a damp tea towel. Leave in a warm place to rise until it is twice the size.
When the batter is ready, do not beat it down! Carefully move the bowl to where you will be making your æbleskiver.
Batter – Dried yeast method:
Heat the margarine and plant milk in a saucepan until the margarine starts to melt. Take off the heat and allow the margarine melt completely. The temperature of the liquid should be around 37°C.
In a large bowl mix 100 grams of flour with the dried yeast.
Add the milk & margarine liquid and mix well.
Cover with cling film or a damp tea towel. Leave in a warm place to activate the yeast for about 15 minutes.
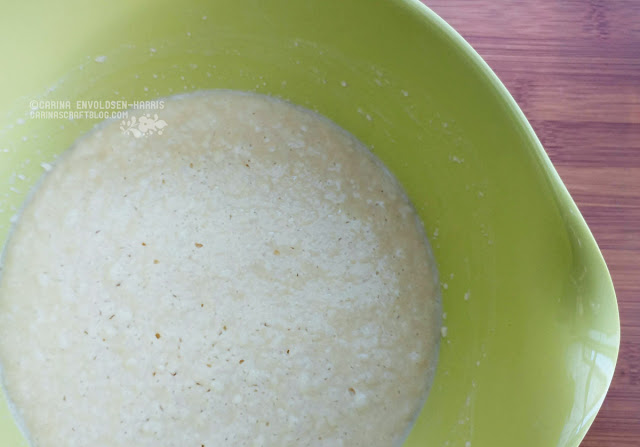
The mixture will start to bubble when it’s ready.
Mix the rest of the flour with salt, cinnamon, cardamom and sugar.
Add this to the yeast ‘starter’ along with the sugar.
Mix well, then add the yogurt.
The result should be a thick batter. If it is more like a bread dough, stir in a couple of table spoons of milk.
Cover with cling film or a damp tea towel. Leave in a warm place to rise until it is twice the size.
When the batter is ready, do not beat it down! Carefully move the bowl to where you will be making your æbleskiver.
Baking the æbleskiver
The batter should look like this when ready. Remember, do not beat it down.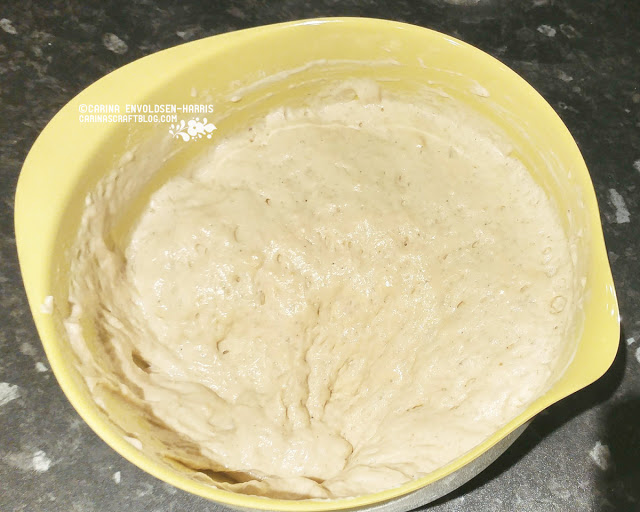
Heat the pan to a medium heat. You want it hot enough that it will cook your æbleskiver all the way through, but not so hot the outsides will be a burnt mess. My pan is an electrical one with no temperature controls, but it you have one that you use on the stove, experiment with the hob/gas setting to get the right temperature.
Before making a proper pan-full, I would do a test, where you fill the holes less. Especially if this is a new pan or you have never made æbleskiver before.

Drop a tiny bit (about the size of a pinky nail) of margarine in the holes. It may spit for a few seconds. Once it has ‘calmed down’, fill the holes 3/4 way up, approximately 1 spoonful of the batter.
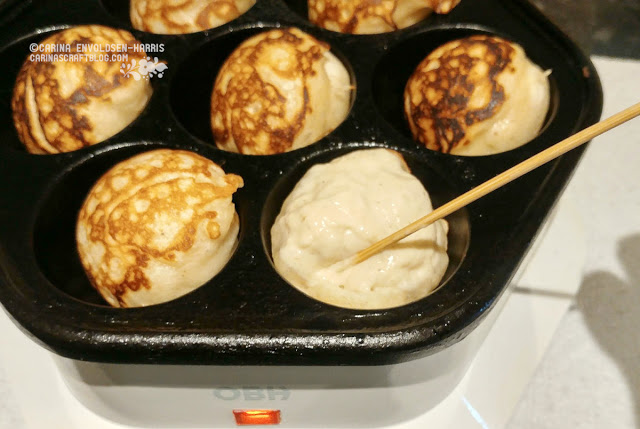
I think you can just see along the edge of this last one here that the sides of the æbleskiver start to solidify, so now it’s time to turn them over!
Grab your knitting needle and insert just below the top edge of the æbleskive.
By the way, if you want to add apple pieces, this is when you do it: add the apple piece and then turn the æbleskive.

Lift up the edge of the æbleskive and pull towards you so the æbleskive turns over.
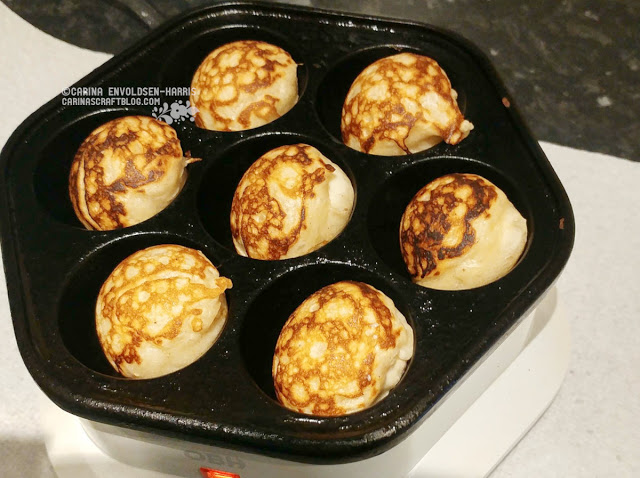
Turned over æbleskiver.
Often there’s a ‘gap’ between the top and bottom, you can see it quite clearly in the middle and middle right æbleskive.

I like to turn my æblesiver a second time, onto the sides, so that gap gets baked directly too, but you don’t have to do that.
It takes approximately five minutes to bake a pan full, but obviously, it depends on the pan you’re using. The æbleskiver are done when the knitting needle comes out clean when you test them.
However, if it still seems a wee bit batter-y but you are worried the æbleskiver will burn if you leave them to bake for longer, they are perfectly fine to eat. The recipe is vegan so it’s not like there’s raw egg in it. ;-)
Æbleskiver should be golden brown. If your æbleskiver are more on the burnt brown side, try adjusting the temperature of your pan. Or cook each sides twice but for a shorter time.
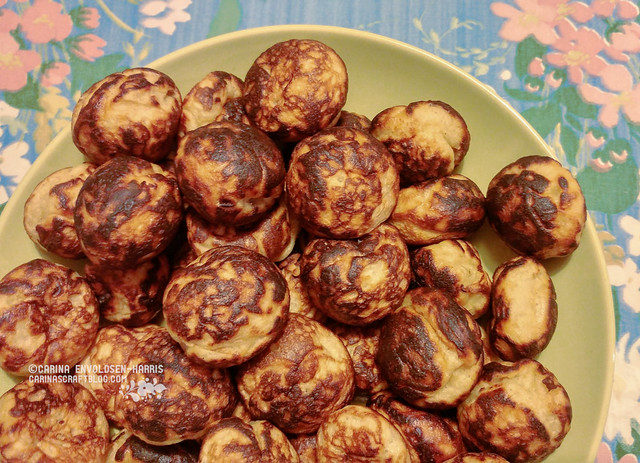
My æbleskiver recipe makes quite a large batch! It’s just the two of us, usually, so I freeze them for an easy treat on cold November Sunday afternoon. :-)
You can heat them for about 30-60 seconds in your microwave oven. Or if you’re reheating a large batch, in your regular oven for 50-10 minutes at 170°C.
Serve with strawberry jam, icing sugar or/and granulated sugar. Pull an æbleskive apart, dip each half in the jam and then in the sugar. Enjoy! :-)