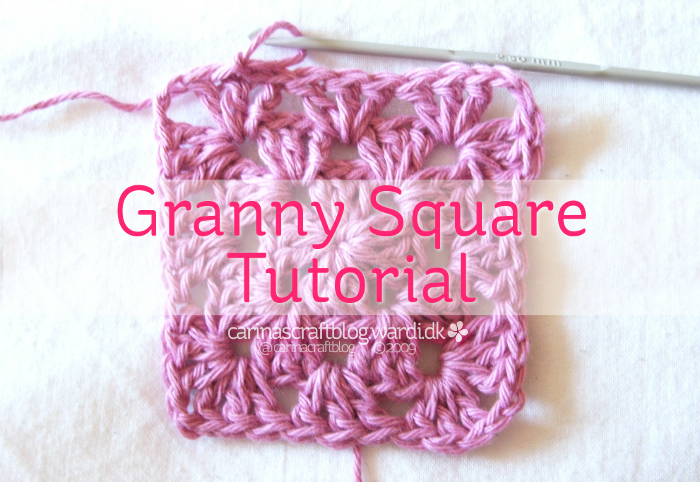
As promised, here is the granny square tutorial! I am sorry it’s taken me a little while to get it to you, but here it is at last! The best thing about the granny square is that you don’t have to fiddle with trying to get the hook into stitches (only a tiny little bit, anyway), it is all crocheting into chain spaces. Which makes it very quick to do once you get the hang of it.
July 2012 – Please note: my interests have changed and I do very little crochet these days. I’m sorry I do not have the time to answer emails about help with crochet. Try the Ravelry site for help instead. Thank you for understanding. :-)
Please respect my copyright. Please do not copy this tutorial and post it on your own site or blog in any form. This includes translations of the tutorial. Please respect the time and effort that goes into writing and photographing a tutorial. If you see this tutorial posted on someone else’s site or blog in any form, please let me know. Thank you. Happy crafting! :-)
Por favor, respeta mis derechos de autor. Por favor no copies y pongas este tutorial y mensaje en tu blog en ningun formato. Esto incluye traducciones del tutorial. Por favor, respeta el tiempo y esfuerzo puesto en escribir y fotografiar este tutorial. Si ves este tutorial en cualquier tipo de formato en alguna pagina o blog, por favor, dimelo. Gracias. Felices creaciones. :-)
This is of course just one method of making a granny square – there are plenty others to be found on the interwebs and in books (and maybe from your actual granny?!). But it’s the method that works for me. I hope the explanation makes sense. If not, please leave a comment or email me and I’ll try to make fix it.
Also, I have included both the US and the UK terms (in italics) for the stitches. Normally, I’d use abbreviations for the stitches, but I know a couple of you might want this in other languages, so I have written it all out to make it a bit less confusing (I hope!) when it goes the likes of Google’s translator. ;-)
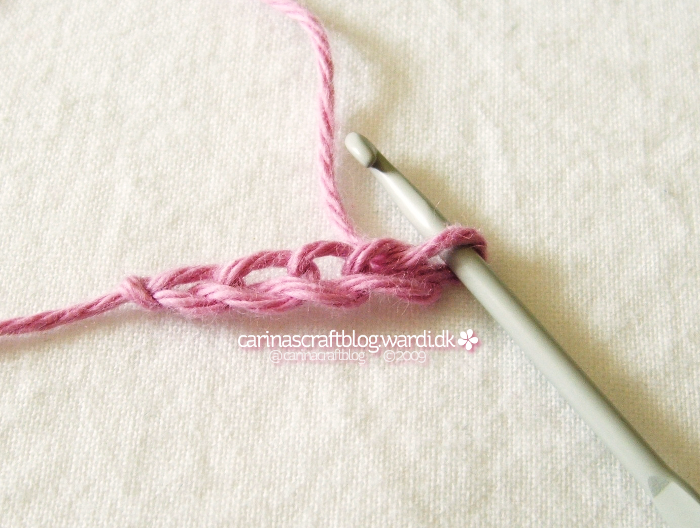
First, make a chain of 4.
Then, make a double crochet/treble in the chain stitch furthest from the hook.
Make another double crochet/treble in the same chain stitch. Now you have the first side completed.
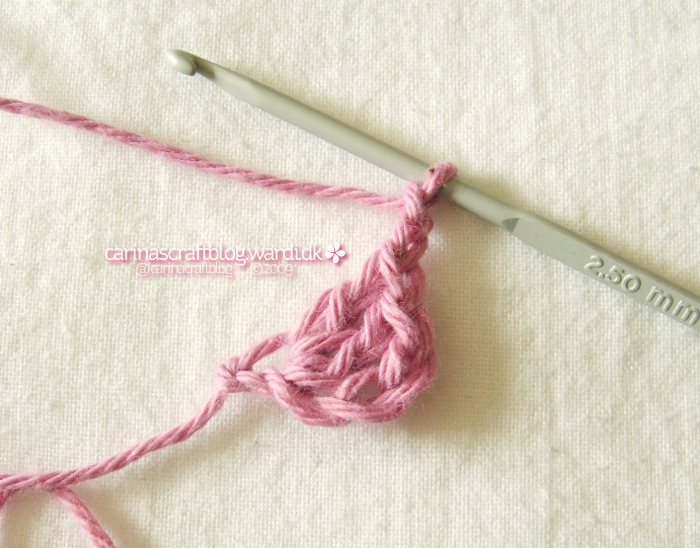
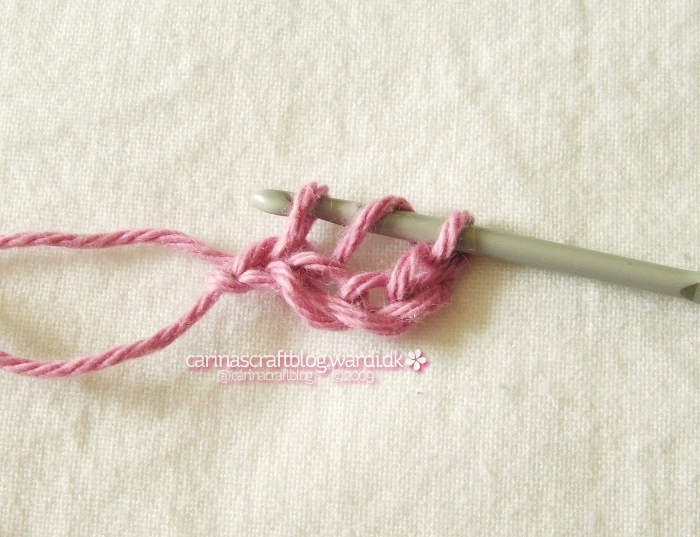
Chain 2.
Make 3 double crochet/treble in the same chain stitch.
Chain 2 again, make another 3 double crochet/trebles in the chain stitch and finally chain 2.
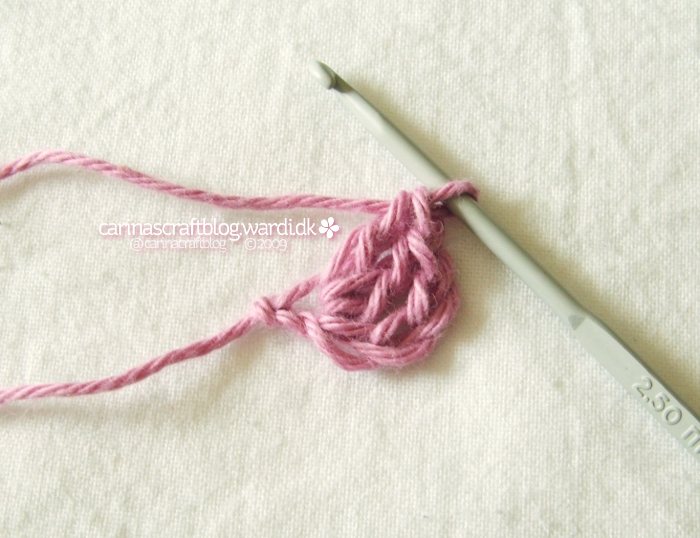
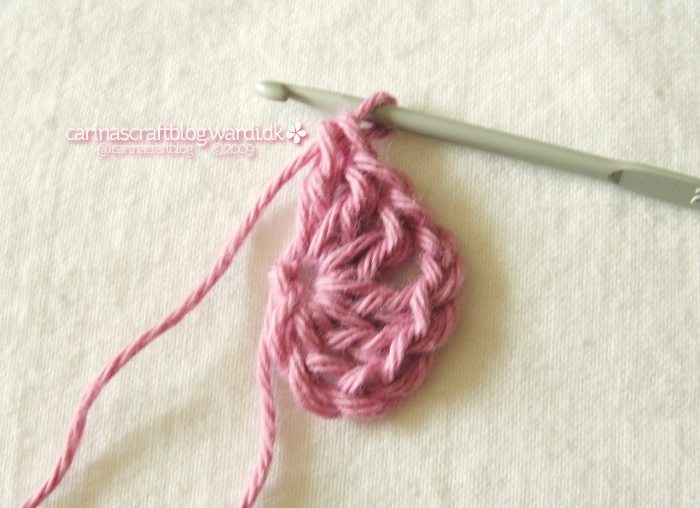
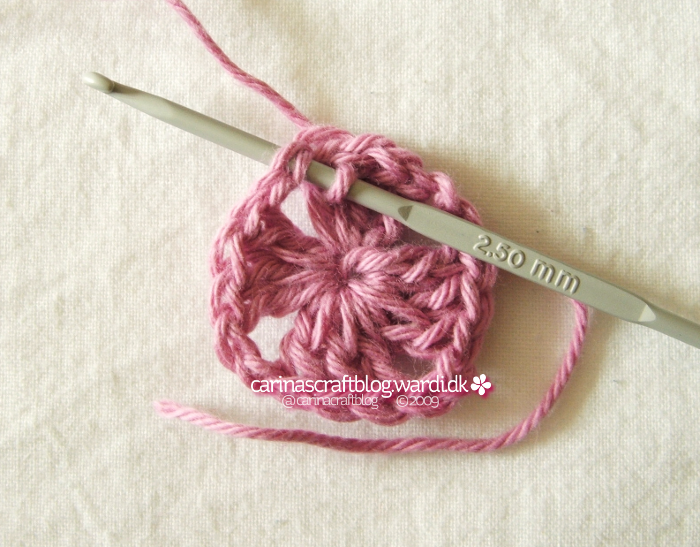
Join with slip stitch/single crochet in the top of the original chain and then slip stitch/single crochet your way through the top of the double crochet/treble stitches – as indicated by the arrows. Make sure you go through both of the ‘legs’ of the V of the stitch.
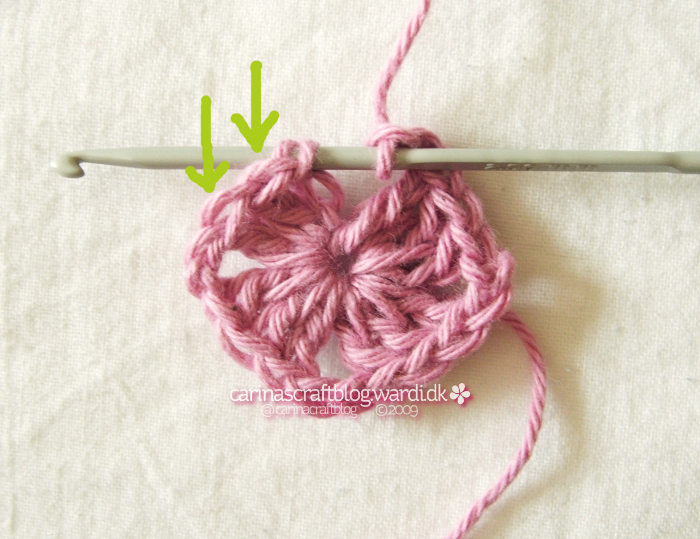
Now you get to the chain space. If you are continuing with the same colour, as I am here, just make a slip stitch/single crochet around the chain and then chain 3.
However, if you are changing colour, make the slip stitch/single crochet into the first chain stitch, then make a slip stitch/single crochet around the chain and then chain 3.
This should ensure that your second colour is fastened properly.
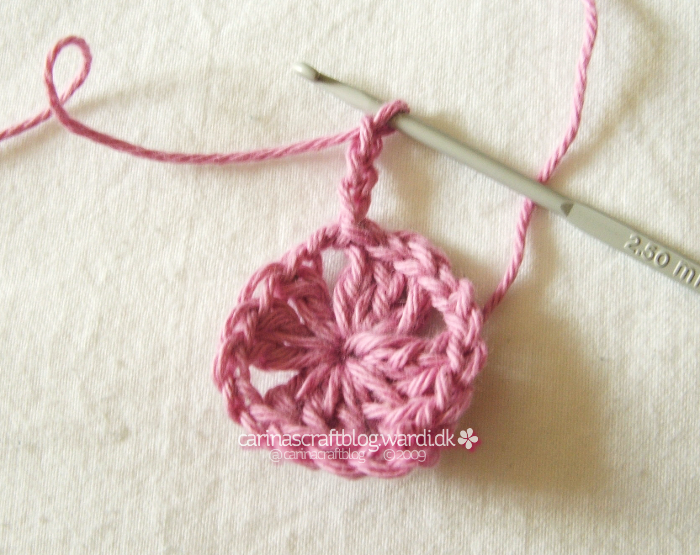
You should now have someting that looks like this.
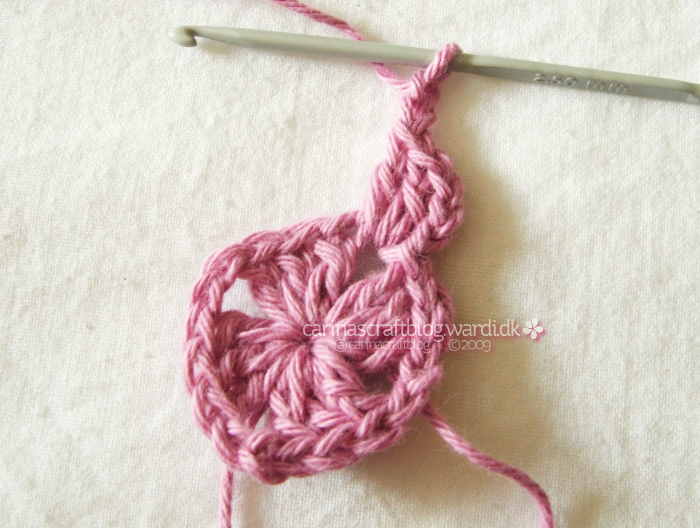
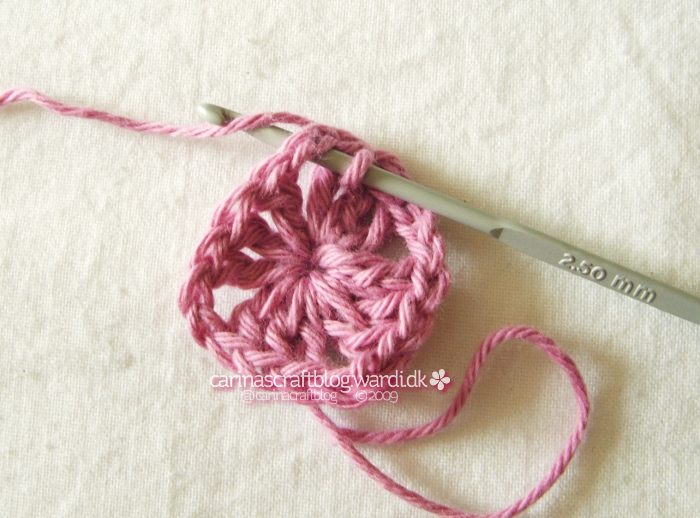
Make 2 double crochet/treble in the chain space, then chain 2. Make another 3 double crochet/treble in the same chain space. That is the first corner completed. For the following corners, make 3 double crochet/treble, chain 2, 3 double crochet/treble in each chain space.
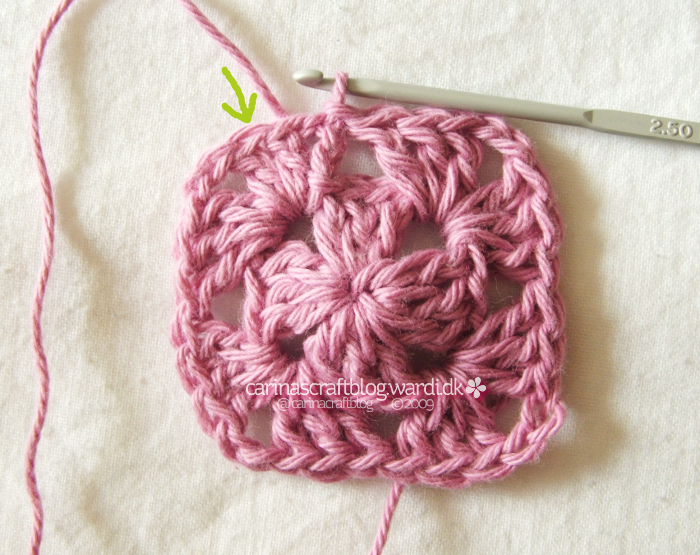
You should now have something like this. Slip stitch/single crochet into the top of chain 3 you did at the beginning of the round. Then, like you did in the last round, slip stitch/single crochet through the top (arrow) of the double crochets/trebles to get you to the first chain space.

Repeat the first corner of the previous round, then make 3 double crochet/trebles in the next space and continue like this until you get to the end of the round. Every other round will be like this one, but with an increasing number of space between the corners. You should not make chain stitches anywhere else but in the corners.
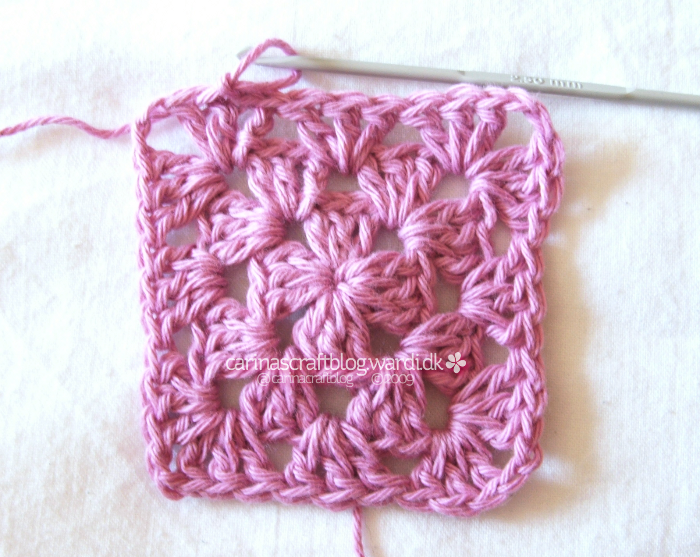
I hope the explanation was clear enough that you now have something fairly like this. Please keep going! Make it as huge as you possibly can. Or stop now and make more little ones that you can stitch together. :-)
Did you find this tutorial useful? :-)

Carina!! I don't know whether to THANK you, or curse you!! I have been wanting to learn how to make Granny Squares forEVER, but could never find anyone to teach me, OR a tutorial that made sense to me… until NOW! Thank you SO much. I stayed up until 5am working on mine and am paying for it today, but happily. On a side note, I know most patterns rely on abbreviations for stitches, but the writing style (and EXCELLENT photos) you employed here made it MUCH easier for me to know exactly what I should be doing. I'll try to get some photos soon so you can see what you helped me create. Thanks again!
Thank you so much I have been really struggling but I will always keep trying thanks again