One of the things which took me a while to learn, when I started sewing, is the importance of clipping corners and making notches in curves. But this is something which is actually really important to know to achieve a nice end result in your sewing. Whether you make bags or softies or something else.
So I’ve written a small series of posts dedicated to curves and corners.
Today’s post is about outward corners. If you’ve ever made a cushion cover or a pillow case, or a bag, you will have sewn outward corners.
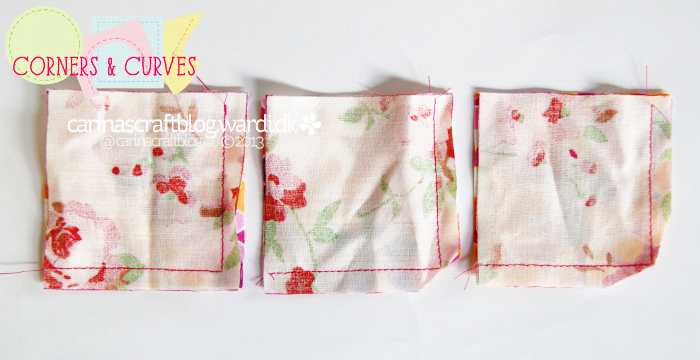
Here are three examples of outward corners. As you can see, from left to right, one hasn’t had the corner clipped, but the other two have, the one on the right more so than the one in the middle.
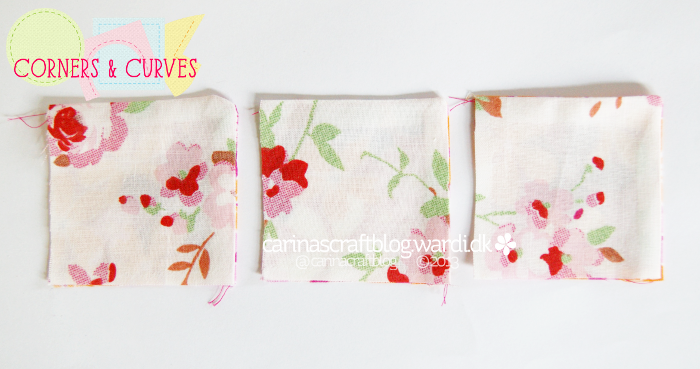
Here are the same examples, now with right sides turned out. See the difference between the corner on the left and the other two? In these examples there isn’t a huge difference between the middle and right examples, but if I had used a heavier fabric, it would have made a very noticeable difference.
Once you turn an outward corner right side out, the material in and around the corner, will all be squashed together in a much smaller space. You can see that bunching together in the example on the left. No matter how much you press that corner, you will never get it to lay flat and have a sharp point. There’s just too much material in the way.
But when you cut that material away, the problem is solved and you get a nice crisp corner.
When you cut the corner you want to cut close to the seam but not so close that you risk that the fabric will start to come apart. Or indeed risk cutting the actual seam. About 2mm is usually a good distance, but it does depend on the fabric.
