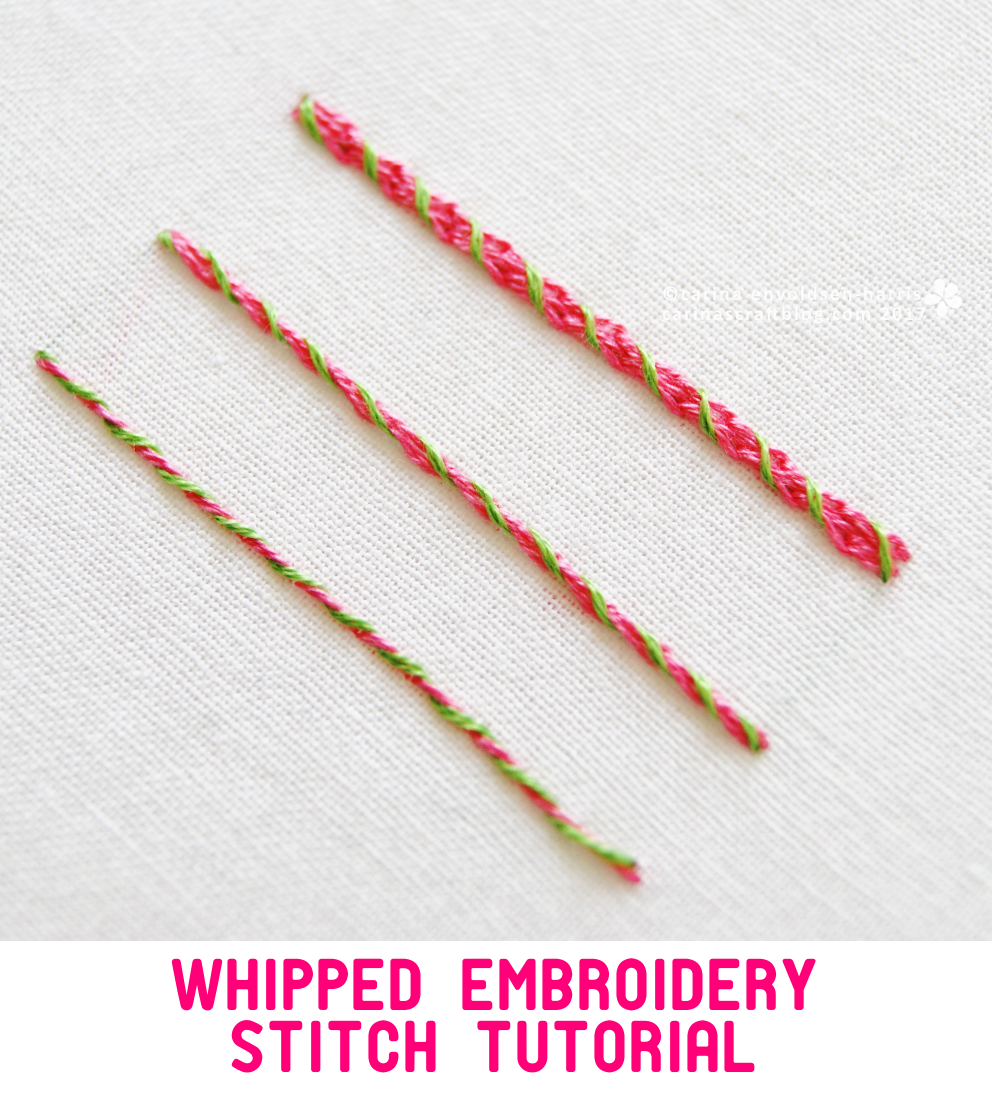
Whipped stitches are one of my favourite ‘special’ embroidery stitches/techniques. I love the twisty-stripy effect you can achieve with it. And it’s easy too!
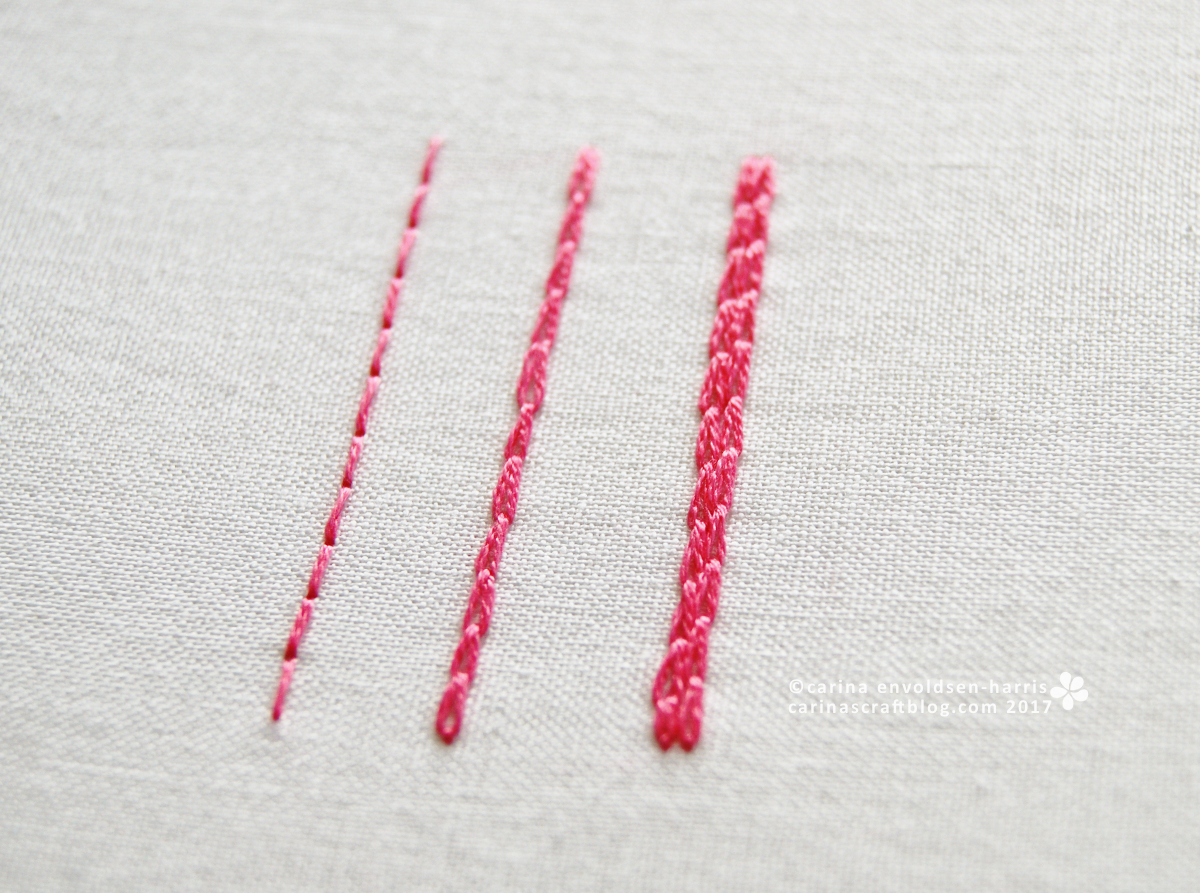
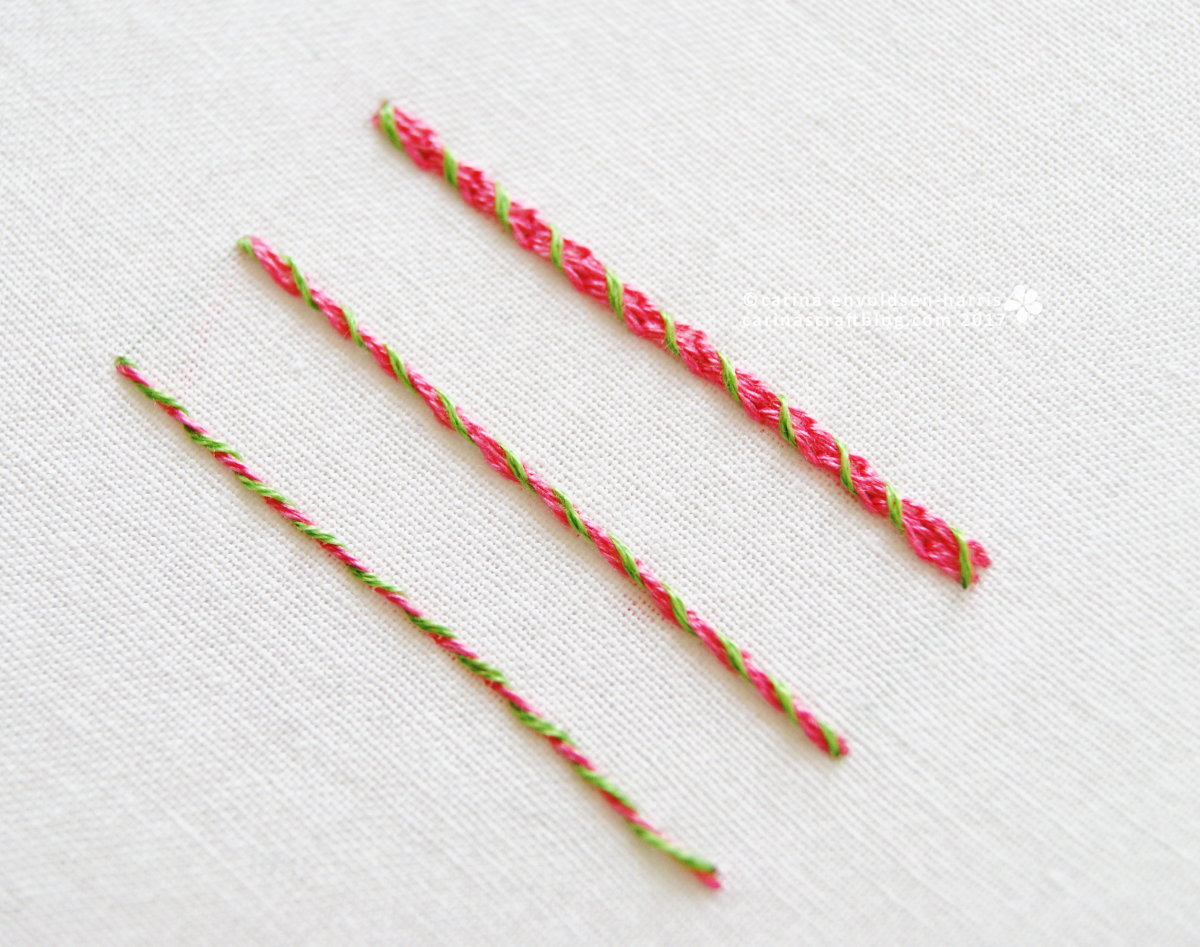
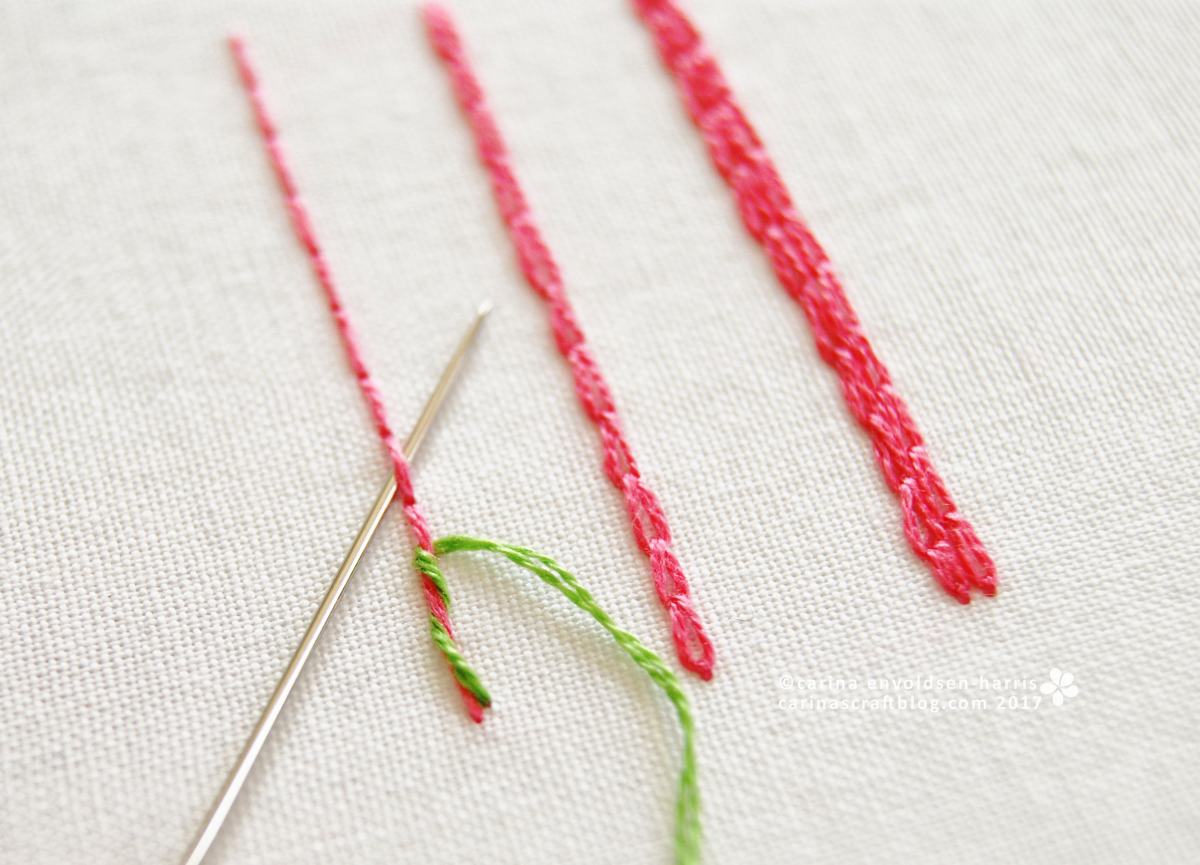
You start with a foundation stitch, usually something like running, back or chain stitch. In my example I am using back stitch, chain stitch and a double row of chain stitch.
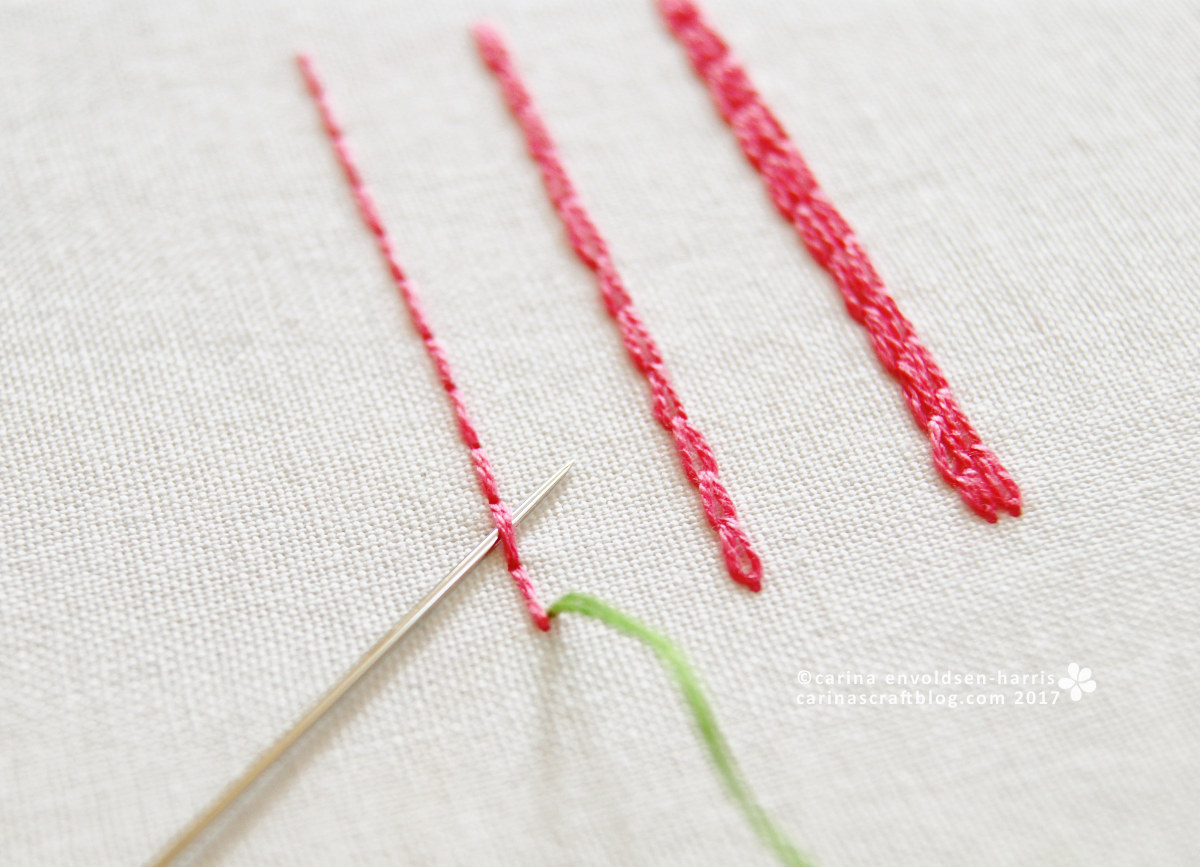
At one end of the foundation stitch, bring the needle up just to the side of the end point of the stitch. Then slide the needle and thread under the following stitch from the opposite side. I brought my needle up on the right side, so I’m sliding the needle under from the left.
Notice that the whipping is entirely above the fabric. The only times when you insert the needle in the fabric is at the start and finish of a line/row of stitching.
Continue along the line of stitches, always sliiiiding from the same side. When you get to the end of the line, simply push the needle through the fabric at the very end and tie of the thread.
It is exactly the same principle for the chain and double row of chain stitches. Pretty cool, huh? :-)
You can create lots of cool effects with this technique. The double, or triple, row of chain stitch would be great for making candy canes! Use contrasting colours to make a simple border that really pops, or use similar colours for a subtle shaded effect. You could even go crazy and whip the same stitch more than once, using different colours.