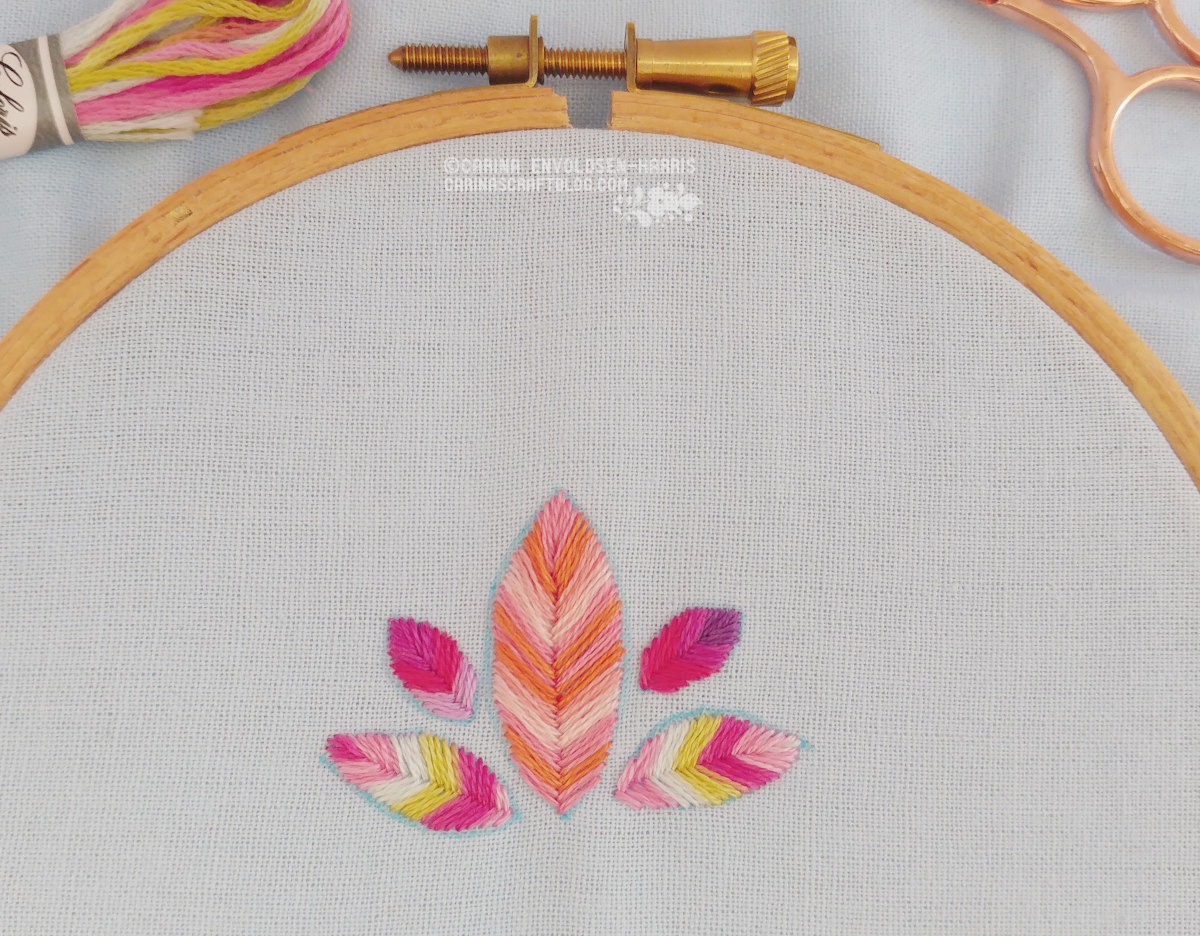
I really like this stitch, fishbone stitch. Especially when using variegated threads, I love seeing those patterns emerge. It’s most often used for leaves, but just look at my little sample there, they look more like feathers. And I think it can be used for lots of different shapes too. Like hearts, for example.
It’s a pretty easy stitch, but it takes a bit of practice to get the sides nice and even – I’m still working on that! ;-)
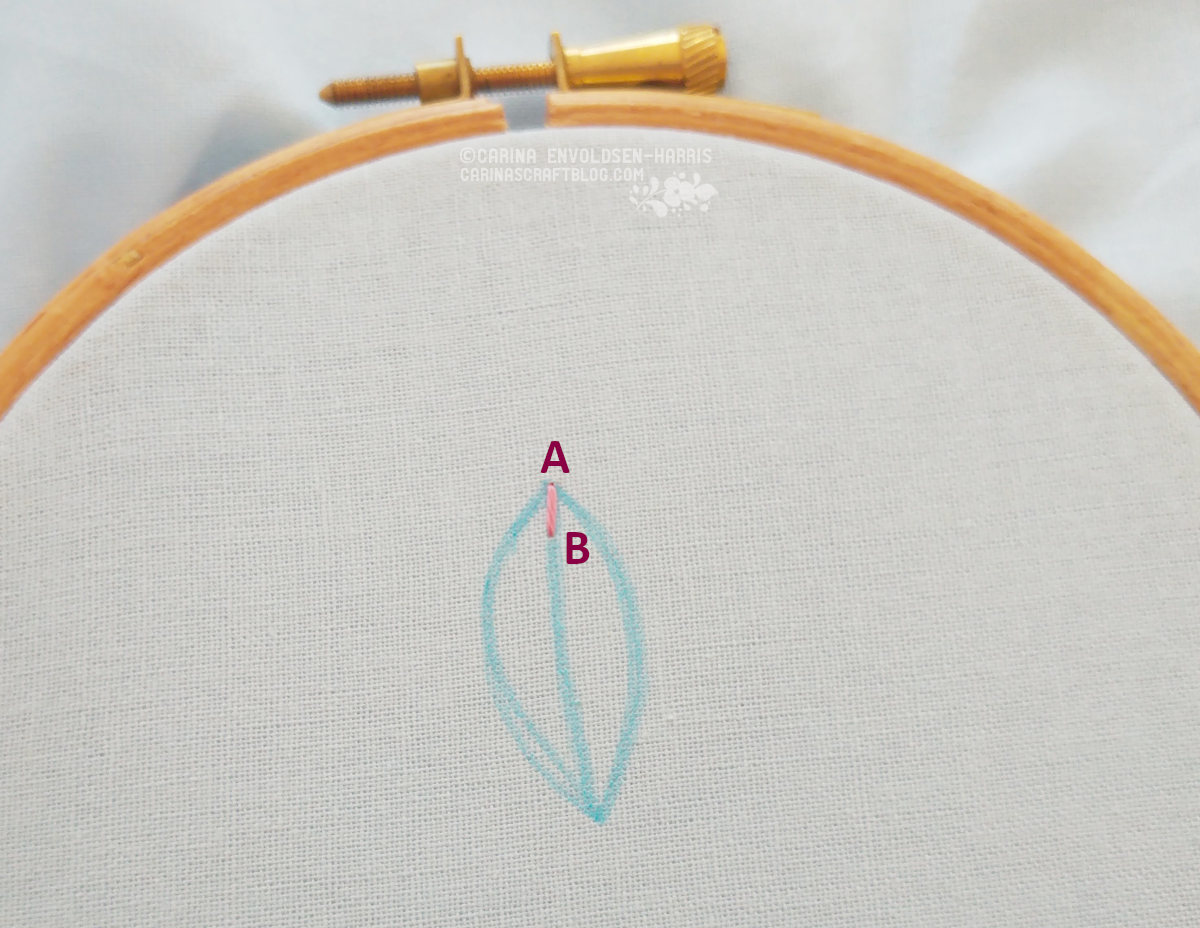
In this example I’m doing a leaf shape, so I started by drawing that on my fabric. This is mainly as a helpful guide, don’t get too hung up about it* if your leaf doesn’t end up following the shape exactly.
Step one
Make a small straight stitch (approximately 4mm) at the tip of the centre line, bringing the needle up at A and inserting it at B.
*The perfectionists among you are of course completely welcome to get hung up about it, and unpick things to make them just so. ;-)
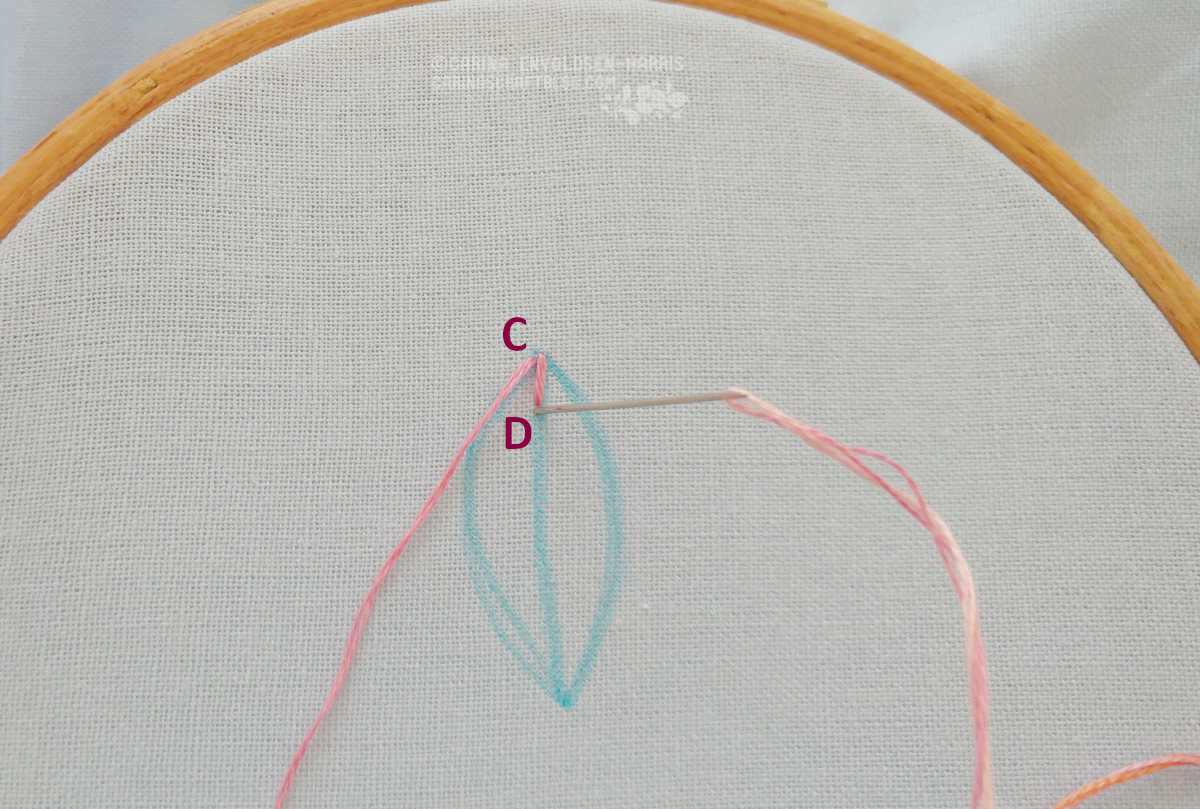
Step two
Make a small stitch slightly to the left side of the centre line, bringing the needle up at C and inserting it at D.
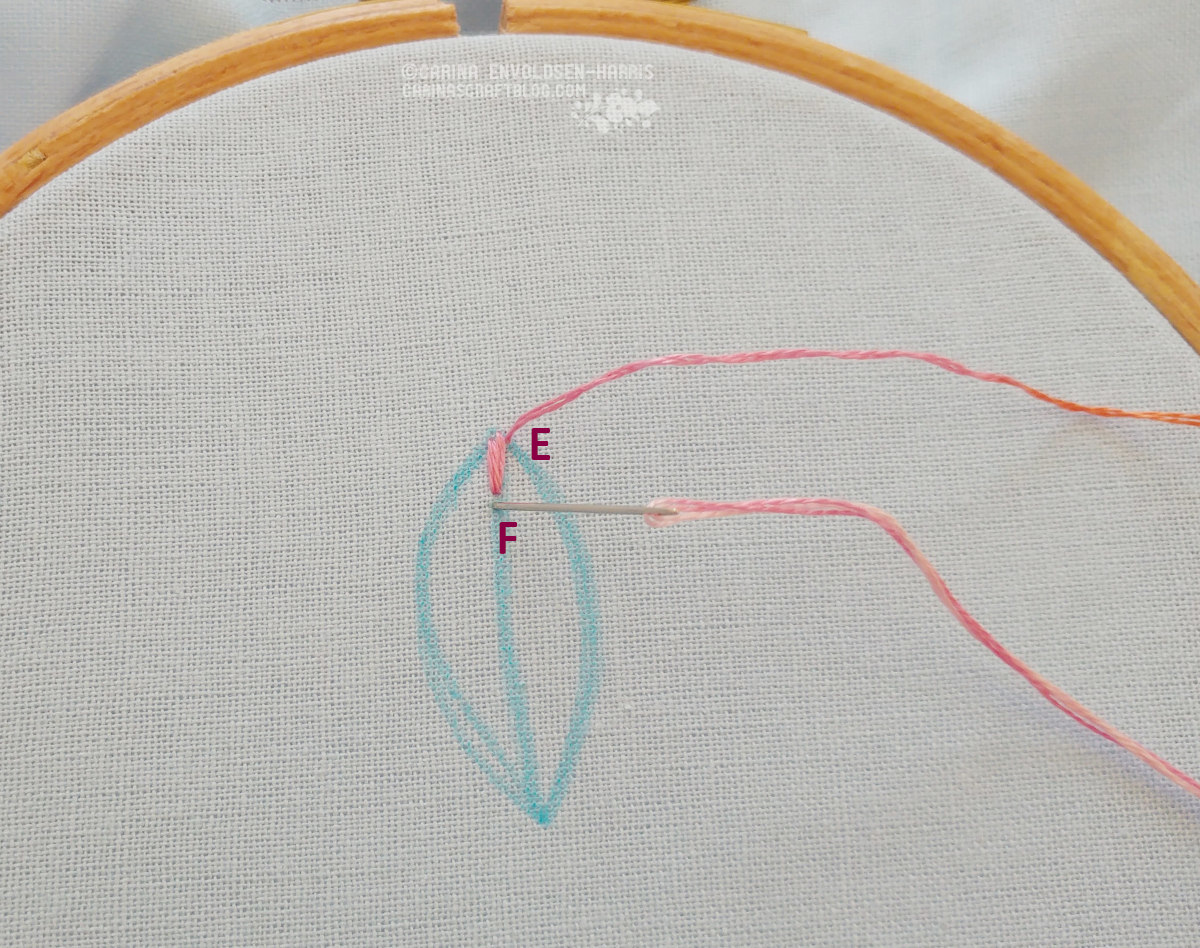
Step three
Make a small stitch slightly to the right side of the centre line, bringing the needle up at E and inserting it at F.
Notice that the needle is always inserted along the centre line.
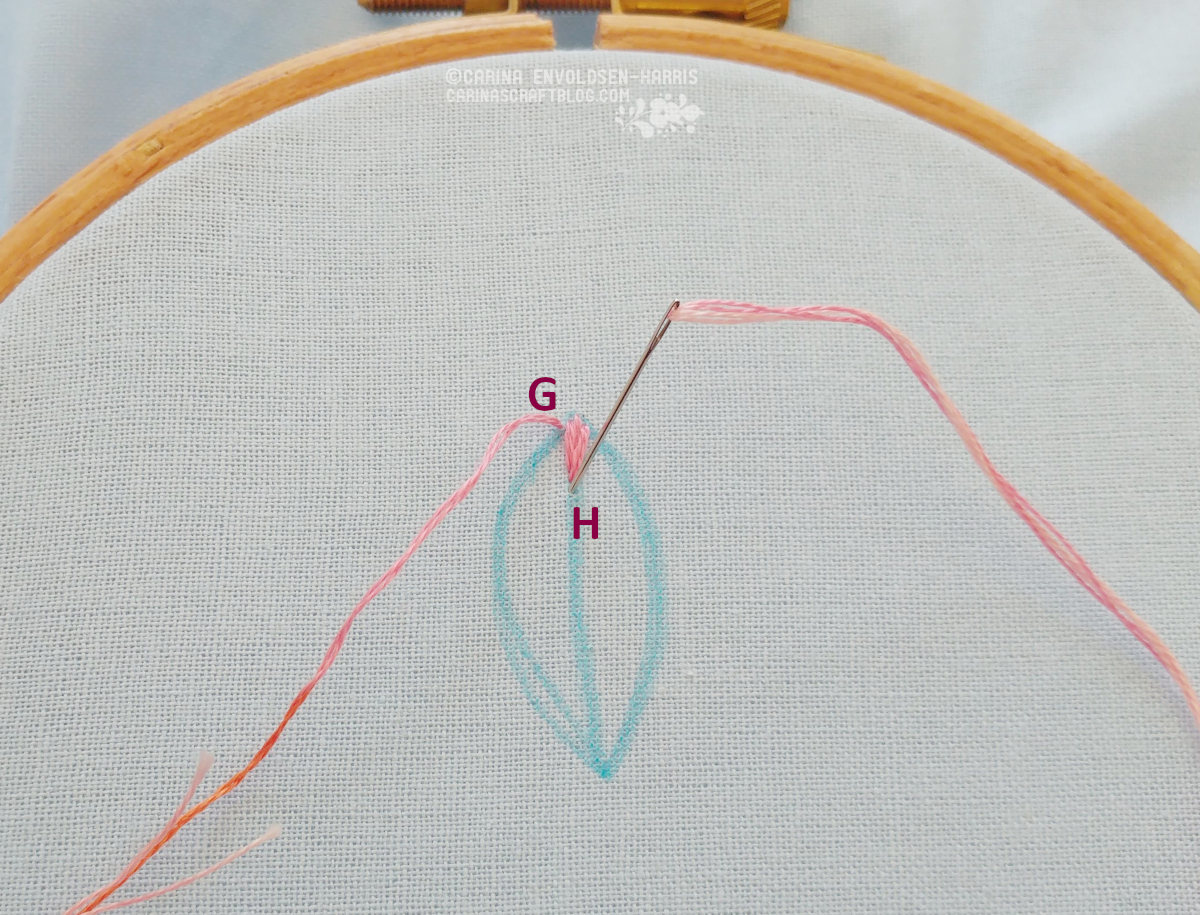
Step four
Make another small stitch slightly to the left side of the centre line, bringing the needle up at G and inserting it at H.
Step four is basically a repeat of step two and I think you can probably guess that step five would be a repeat of step three. :-)
To fill the shape you alternate between making a stitch on the right and left side of the centre line, moving down the sides until you have filled the whole shape.
When you are done, you should have a shape that looks similar to the ones in the top picture. :-)


Thanks so much for this tute Carina, I love how this looks! I am definitely going to try this on my next embroidery design!