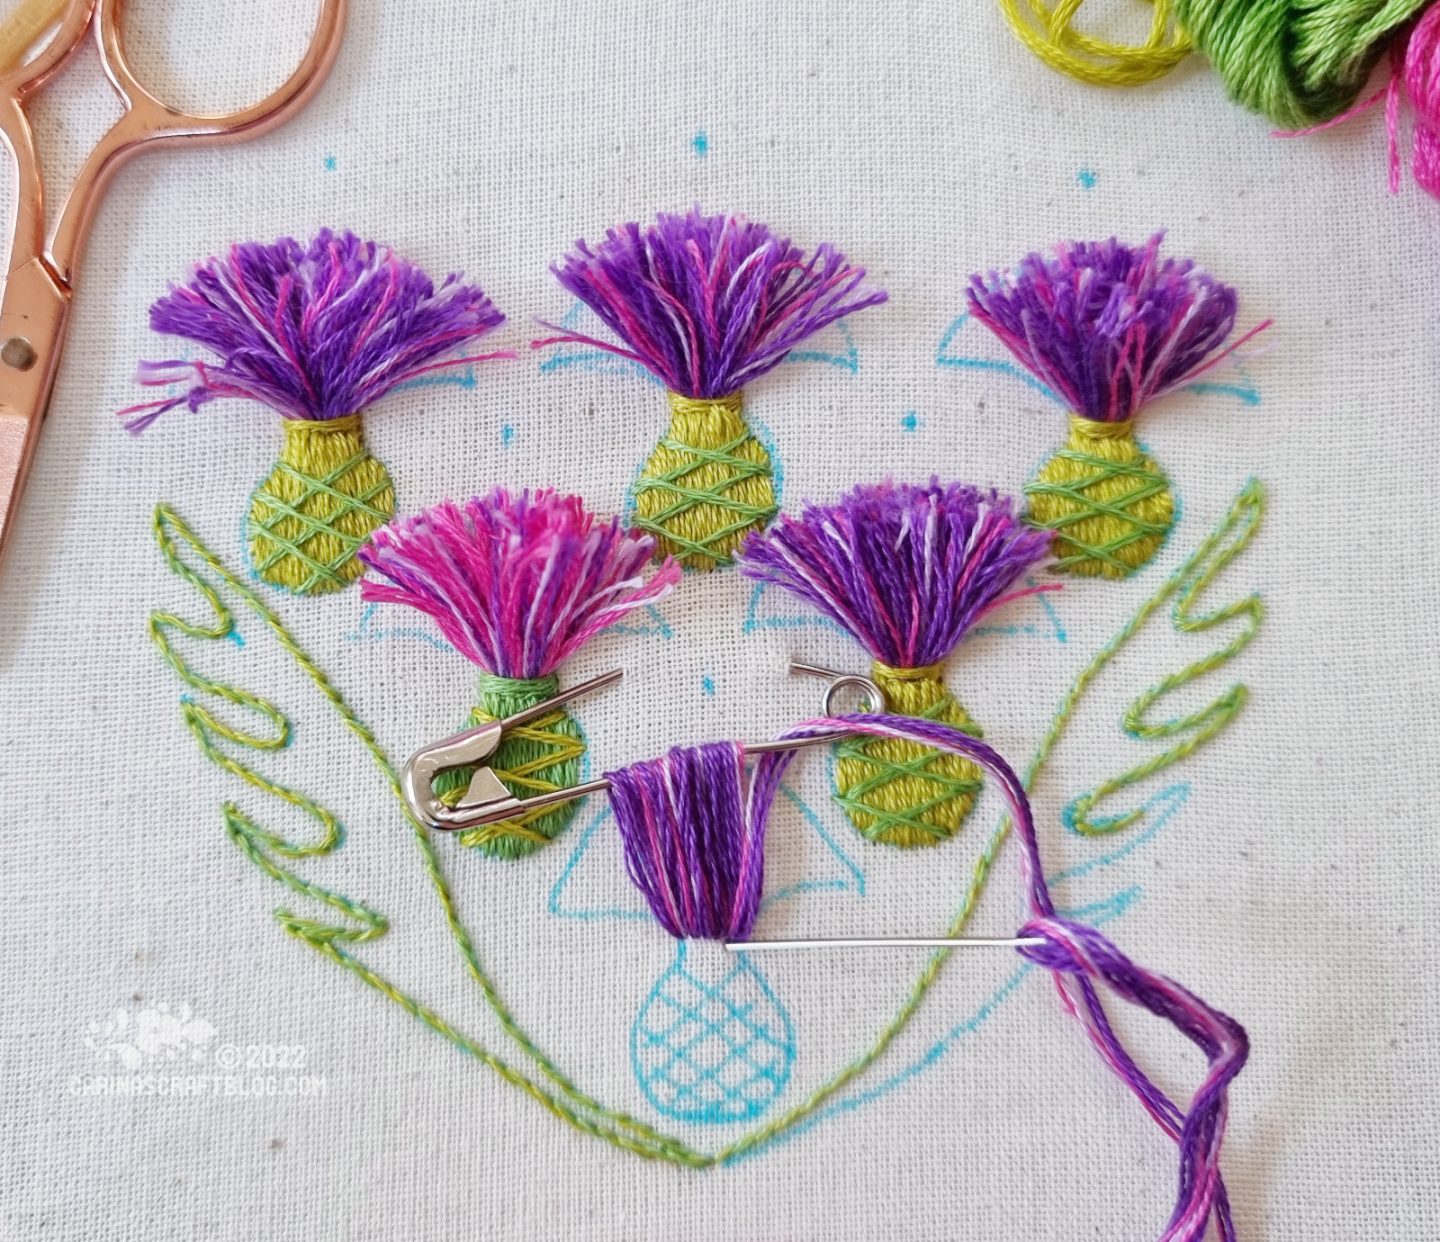
Thistles will make an appearance in the last pattern in the Wheel of The Year project so I have made a tutorial for the stitch used for the thistles: tassel stitch. It is a fun stitch! And of course you can use it for other fluffy things besides thistles.
There are a few ways you can make the tassel stitch, but I find that the method below, using a safety pin, gives the best result. And it gives you more control, plus the tassel is actually attached to the fabric. In one of the alternative methods for the tassel stitch, you simply loop thread around your fingers and then place that on the fabric and secure it. That is not a wrong way to do it, I just find that is more awkward and gives me less control over the end result. :-)
When I was working on this tutorial, I was enjoying stitching the thistles so much I made a wee pattern so I could stitch even more! :-) You can download the thistle-y pattern here if you would like something to practice on. Or just enjoy stitching the fluffy thistles. The pattern shown in the picture above is included along with four others.
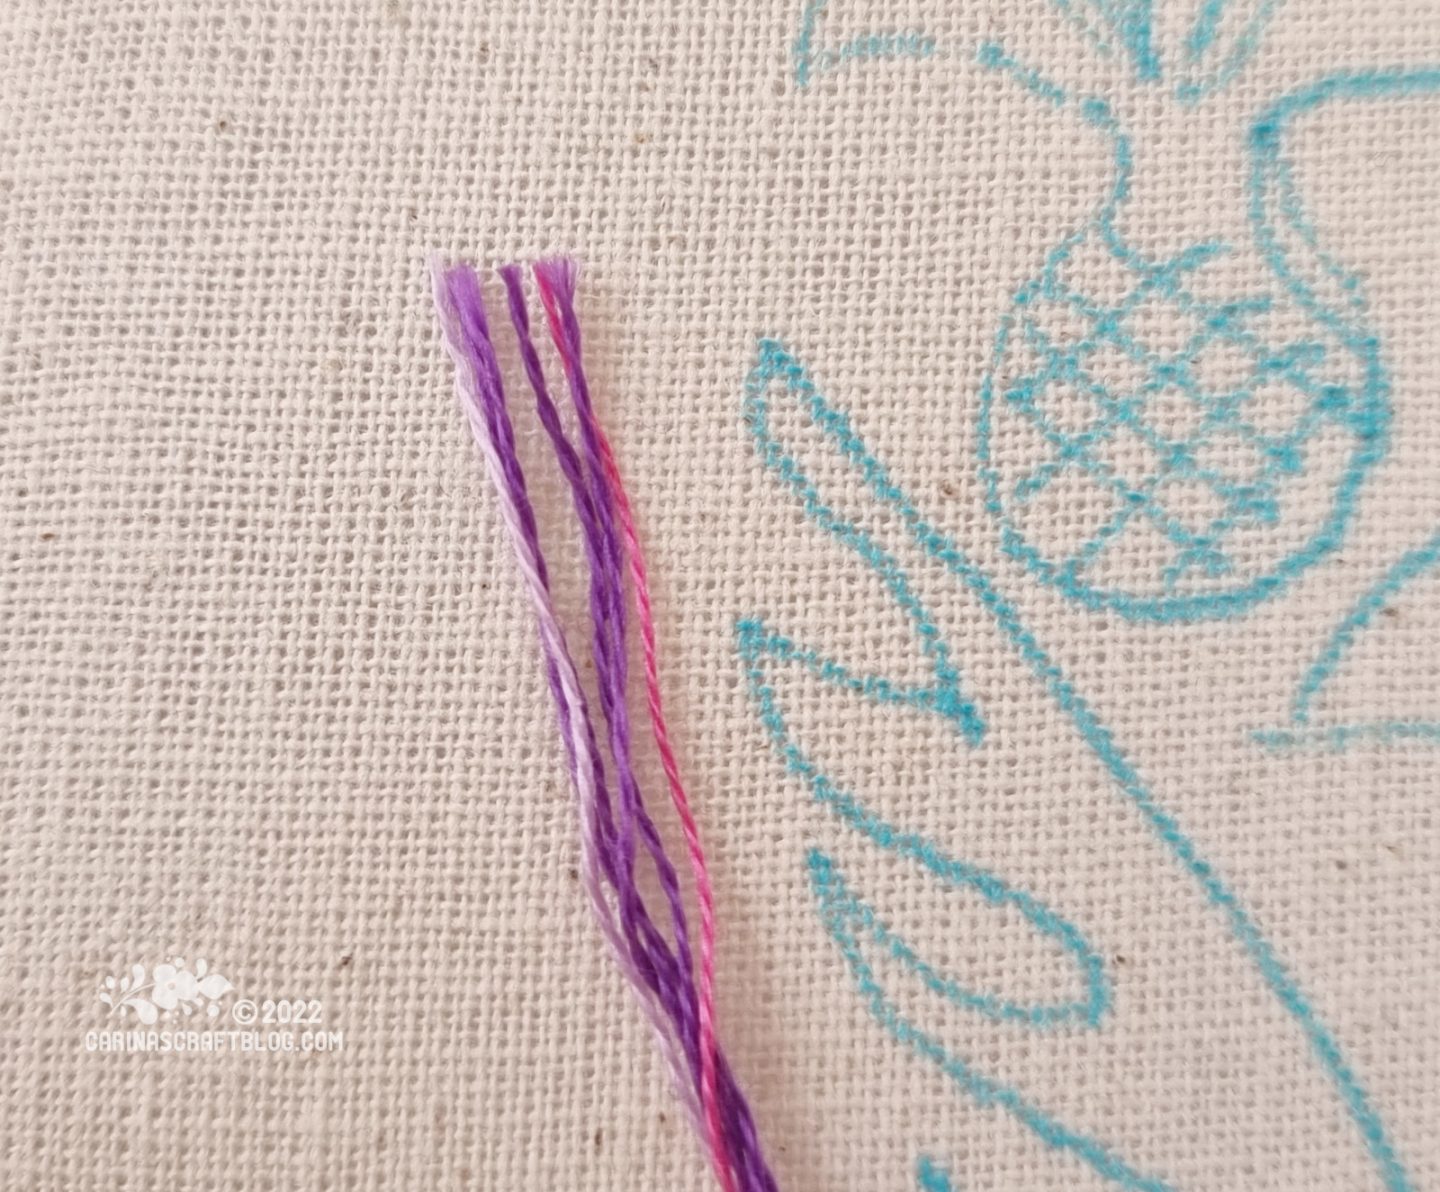
1) To really fill the thistle shape, use six strands of thread. To give it a bit of colour variation, in the example I am using this ‘mix’: 4 strands of 3837 with 1 strand of 209, and 1 strand of 3805.
If you can’t be bothered with faffing with mixing the threads, pick a variegated purple thread and you will get a similar result. :-)
With some fabrics and/or needles it can be awkward to pull six strands through the fabric. If that is the case for your fabric (maybe test it before you start), then instead make extra passes where you use 3 or 4 strands.

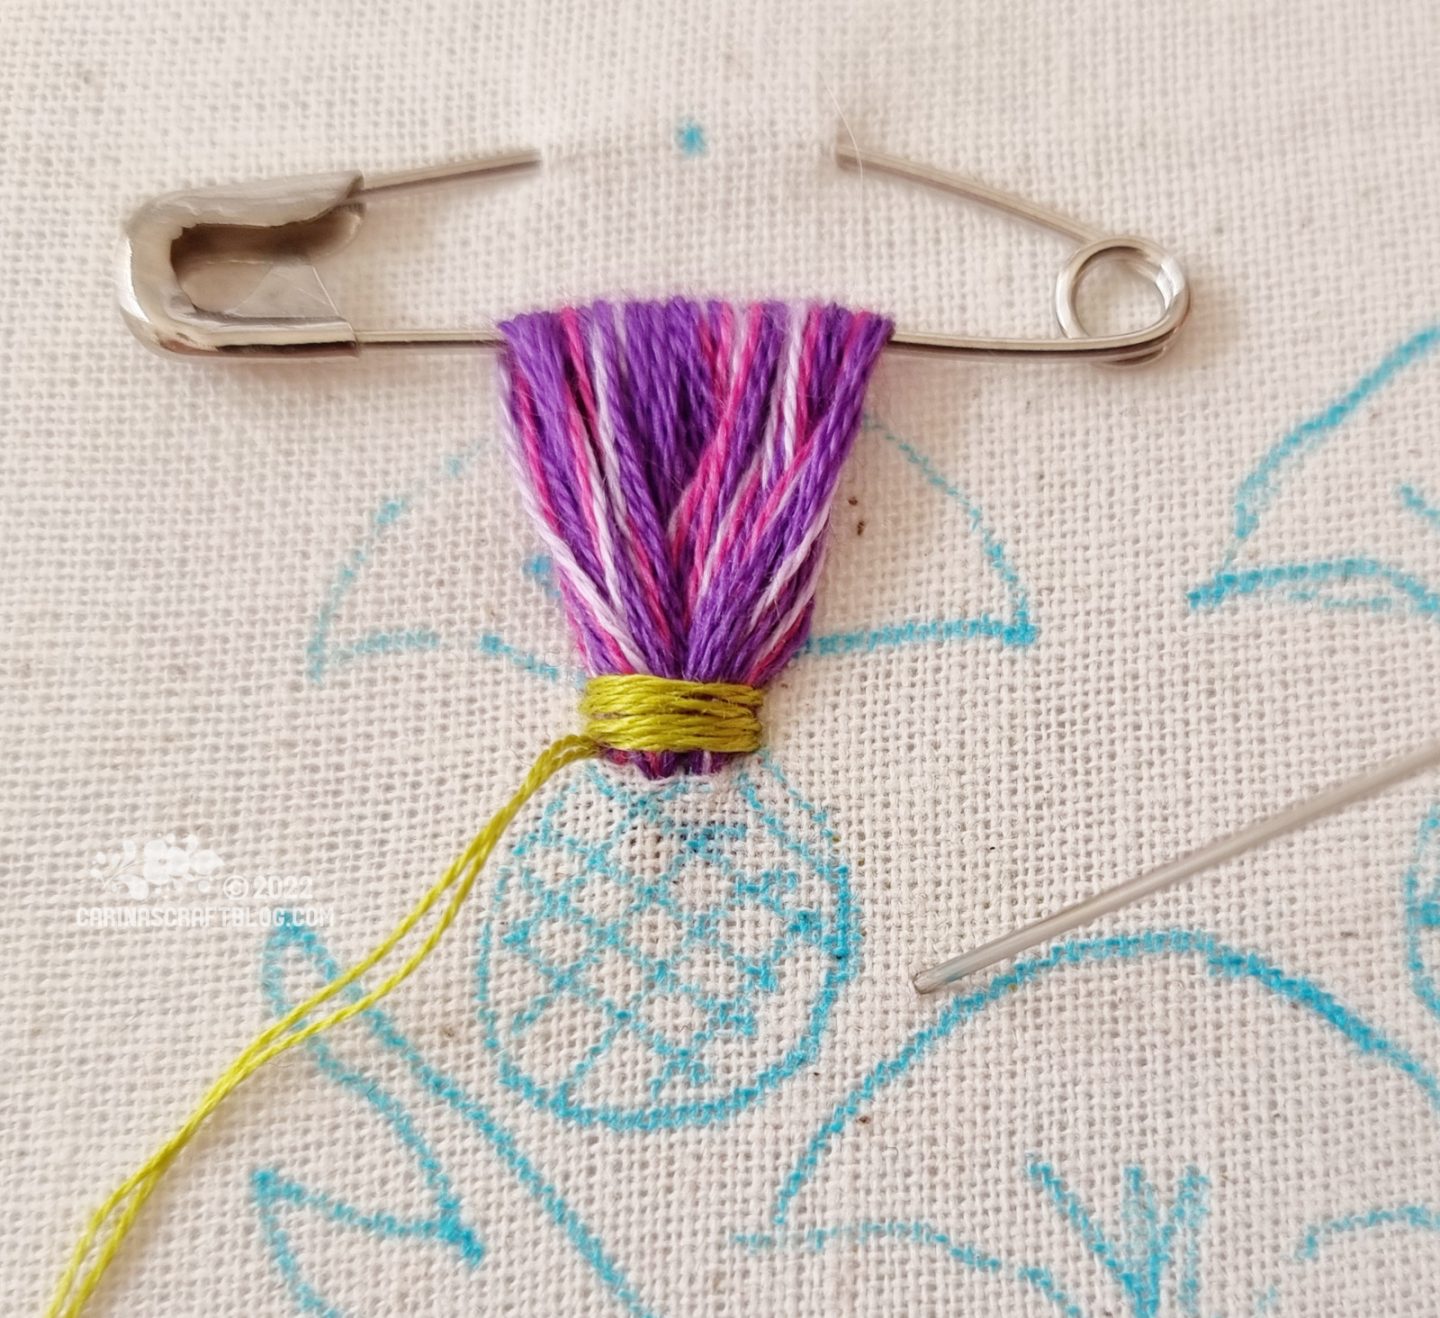
2) Start by attaching a safety pin above the upper edge of the thistle. The bottom edge of the safety pin should just touch the upper edge of the thistle.
If you want, you can measure the distance where you attach the pin and mark it (with a wee dot) above each thistle as I have done in the example.
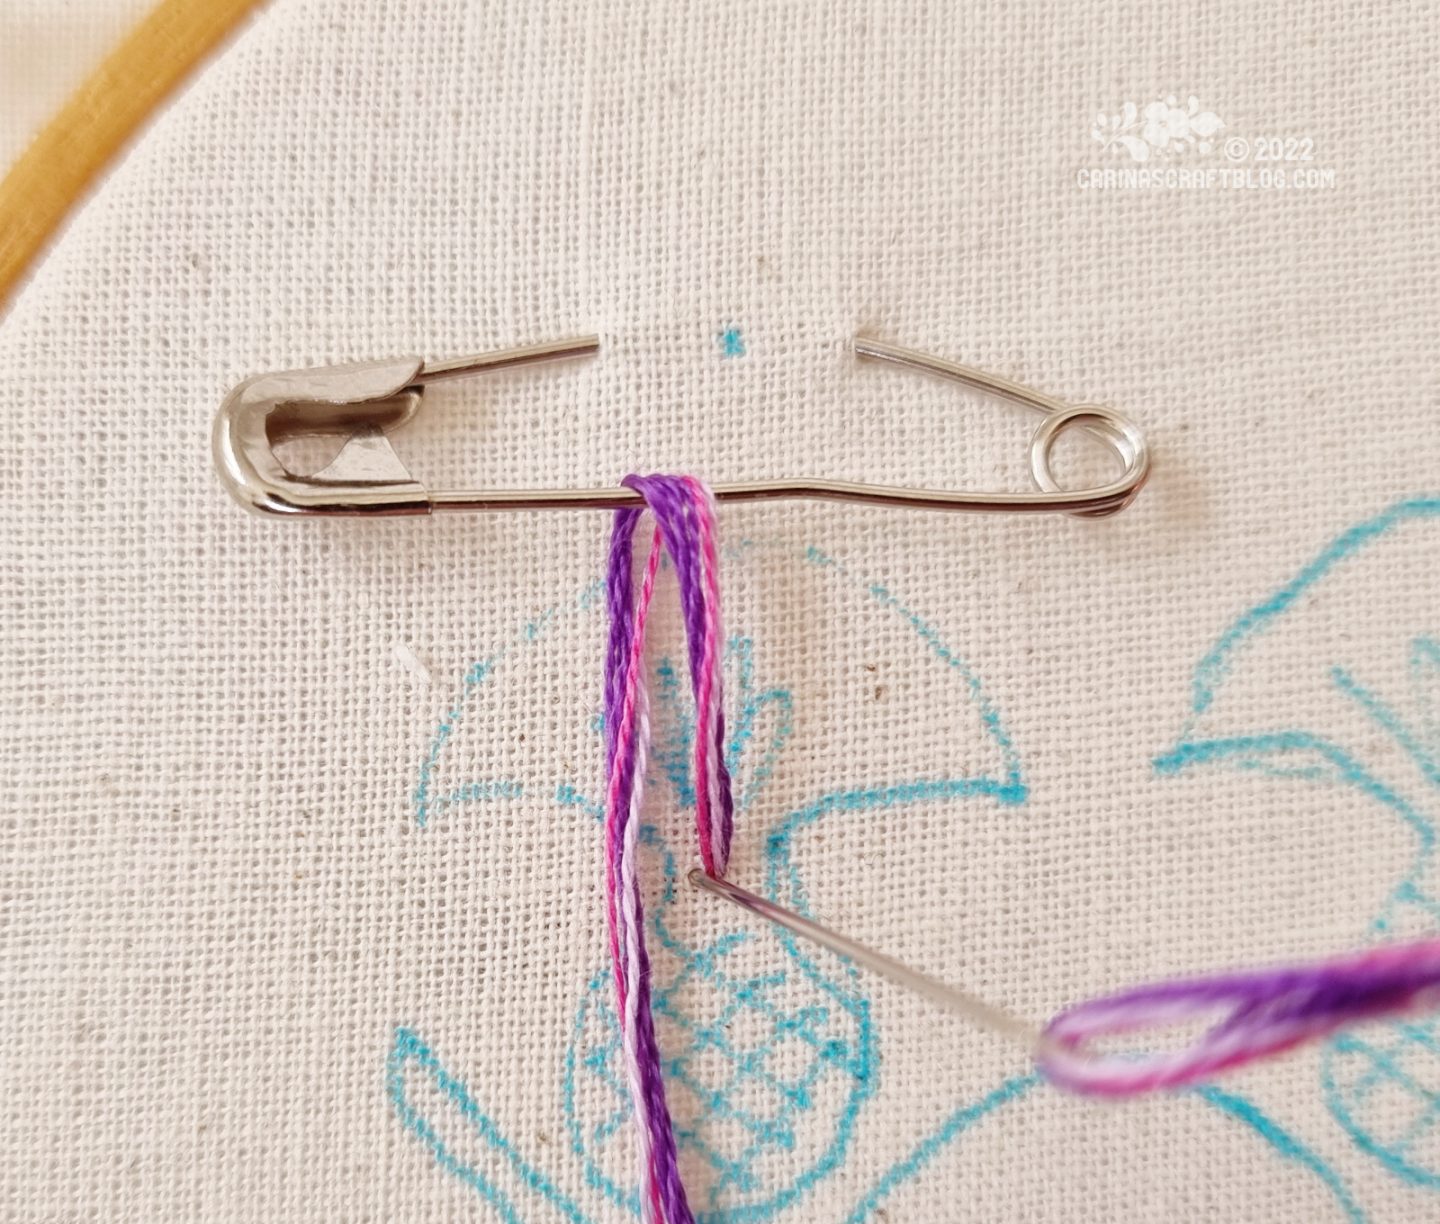
3) Bring the needle up at the narrowest point of the thistle. Loop the thread around the bottom prong of the safety pin, then insert the needle through the same hole where you brought it up. Take care not to catch the knot on the back. Make one pass of looping the thread around the safety pin across the whole of the narrow point.
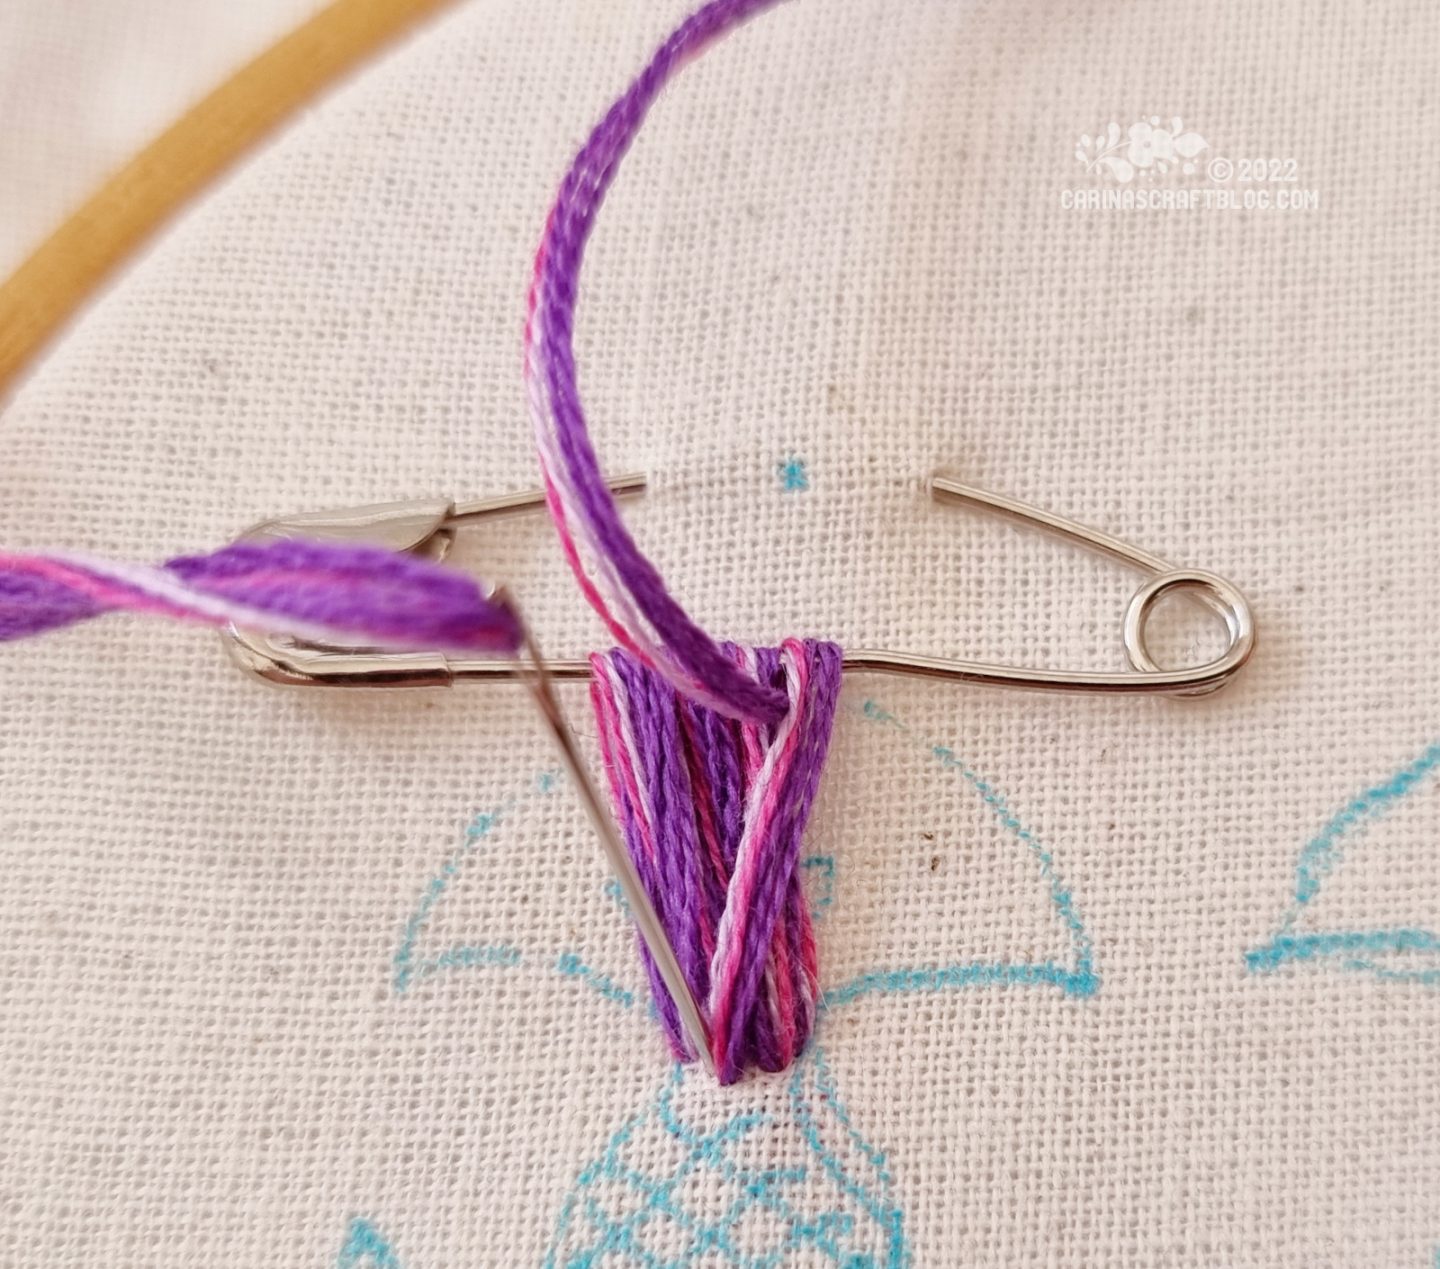
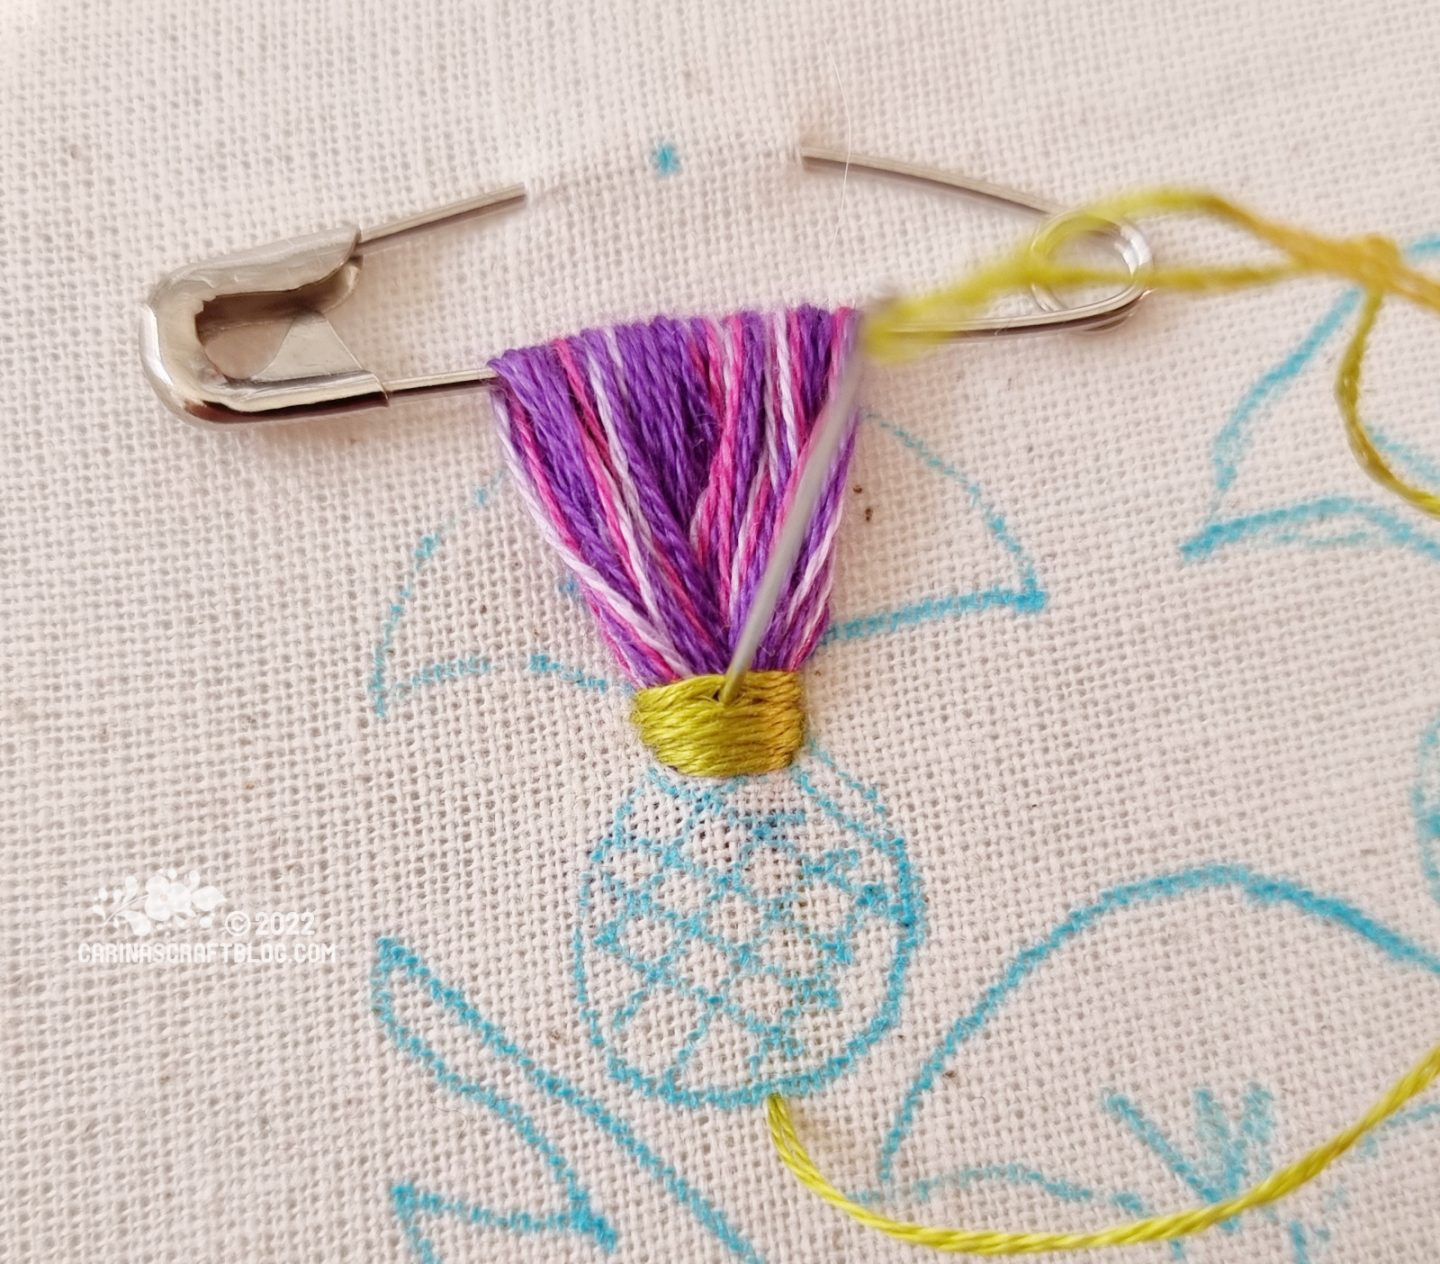
4) Next make another pass where you bring the needle up and down just below the first row. Go in between the previous loops as you move across. When you have completed the second pass, bring the
thread to the back and tie off. Or, if you want a thistle that is very fluffy, make another pass.
Fluffy thistles! :-)
5) With 2 strands of a green colour, make 5-6 stitches across the bottom of the purple loops.
6) Bring the needle up at the centre of the bottom edge of the flower and insert the needle into the green stitches from the previous step. Fill this bottom half of the flower with satin stitch, going through the stitches from step 5) where it makes sense.
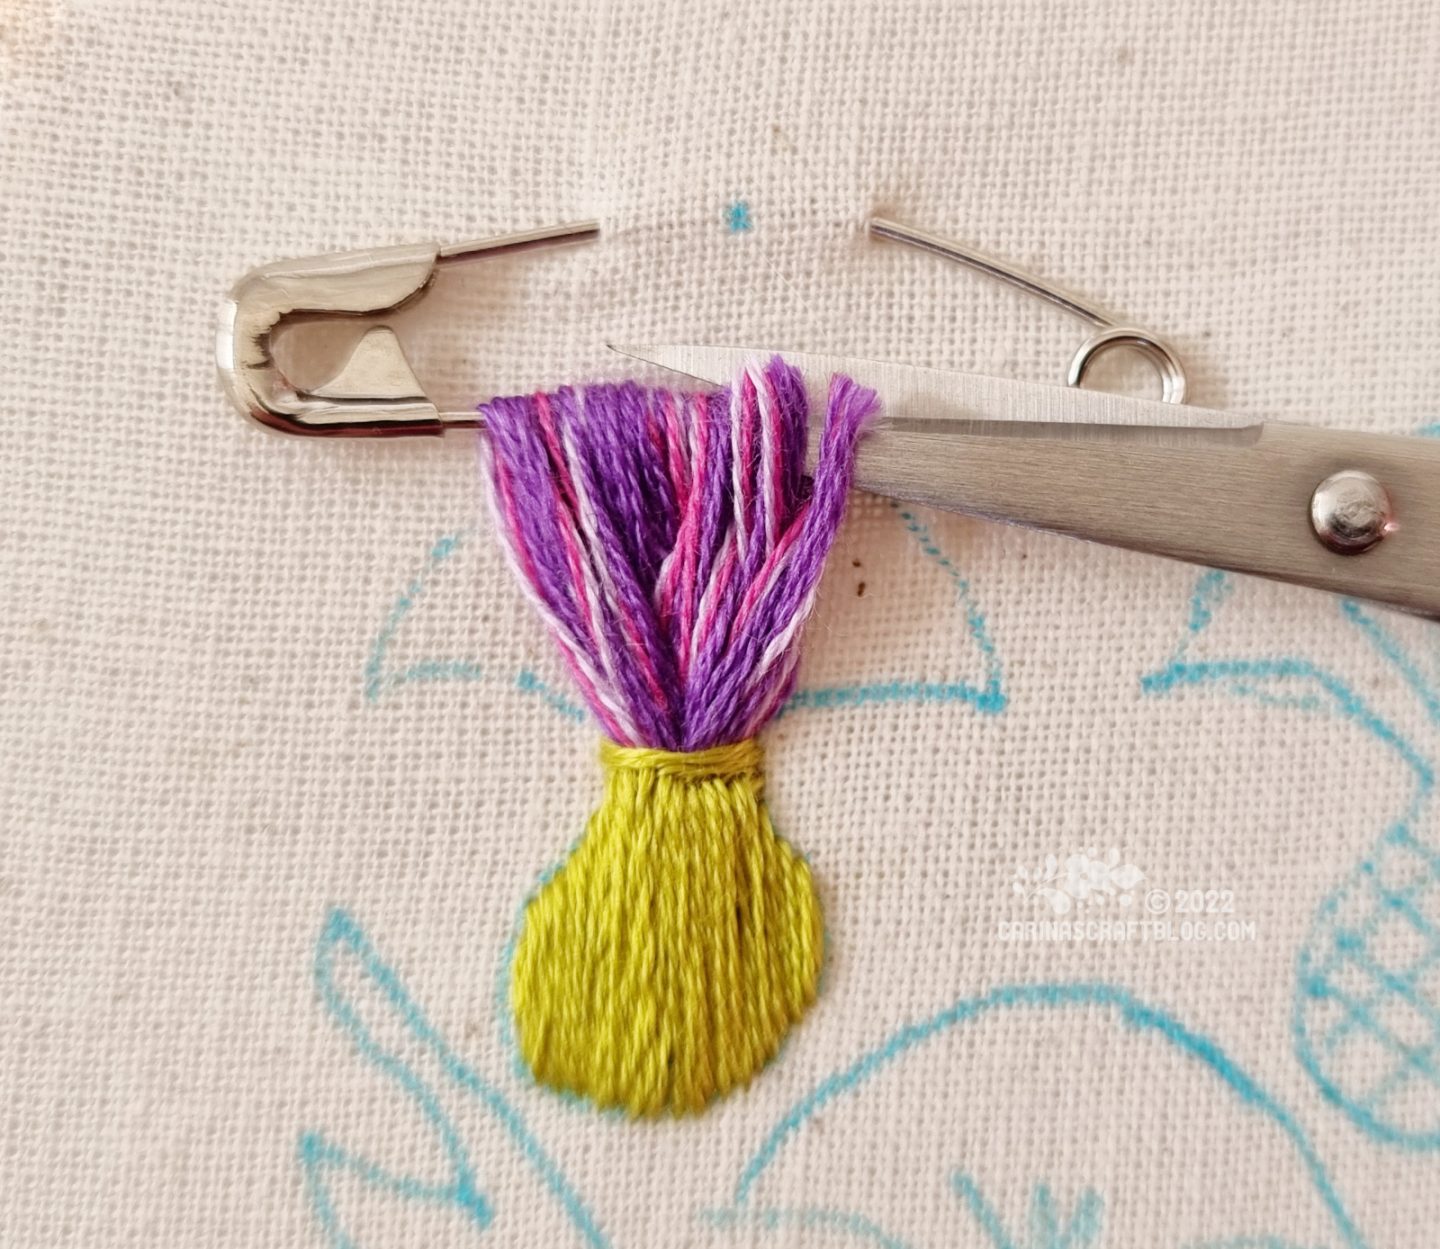
7) You should end up with something that looks like this. And now we get to the fun part: cutting the thistle loops free from the safety pin! Cut through all the loops and then remove the pin. You can also remove the pin before cutting if you prefer.
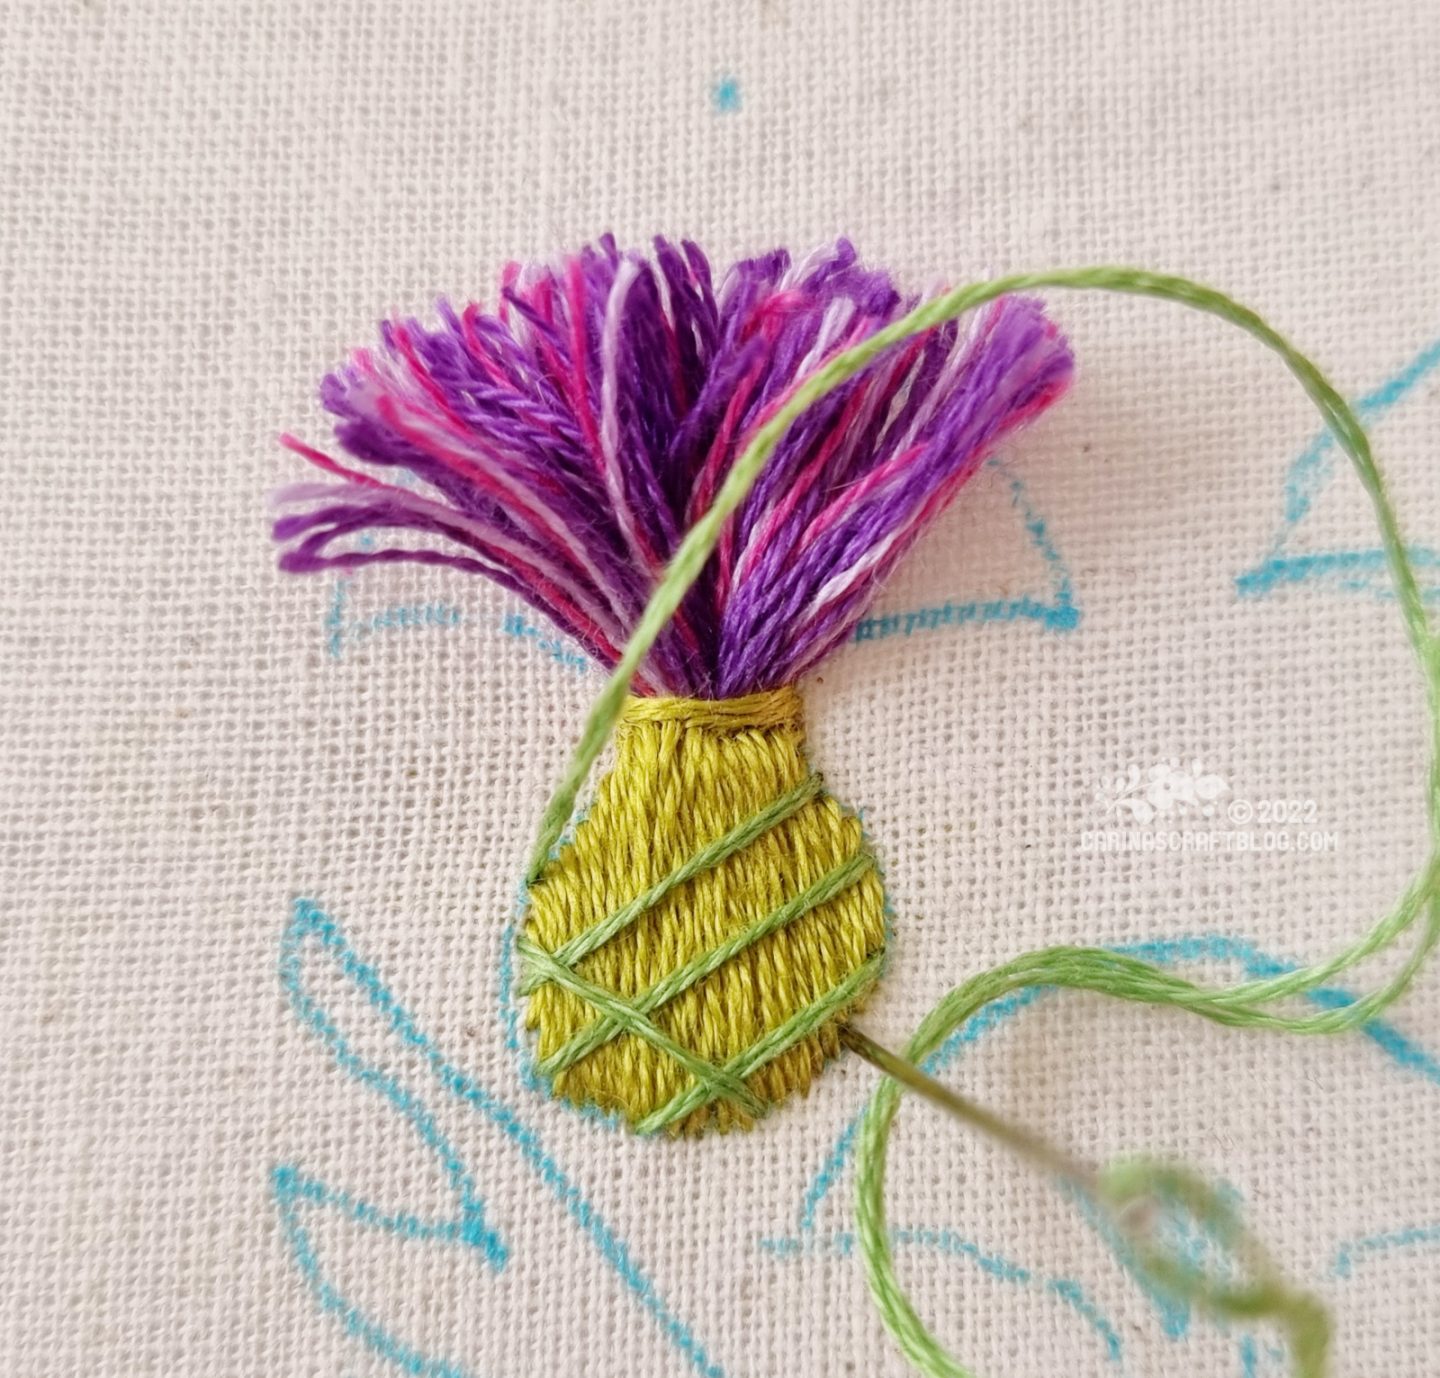
8) Next make stitches diagonally across the bottom half of the flower. Here I am using a slightly different green, but you can use the same colour as the base if you like.
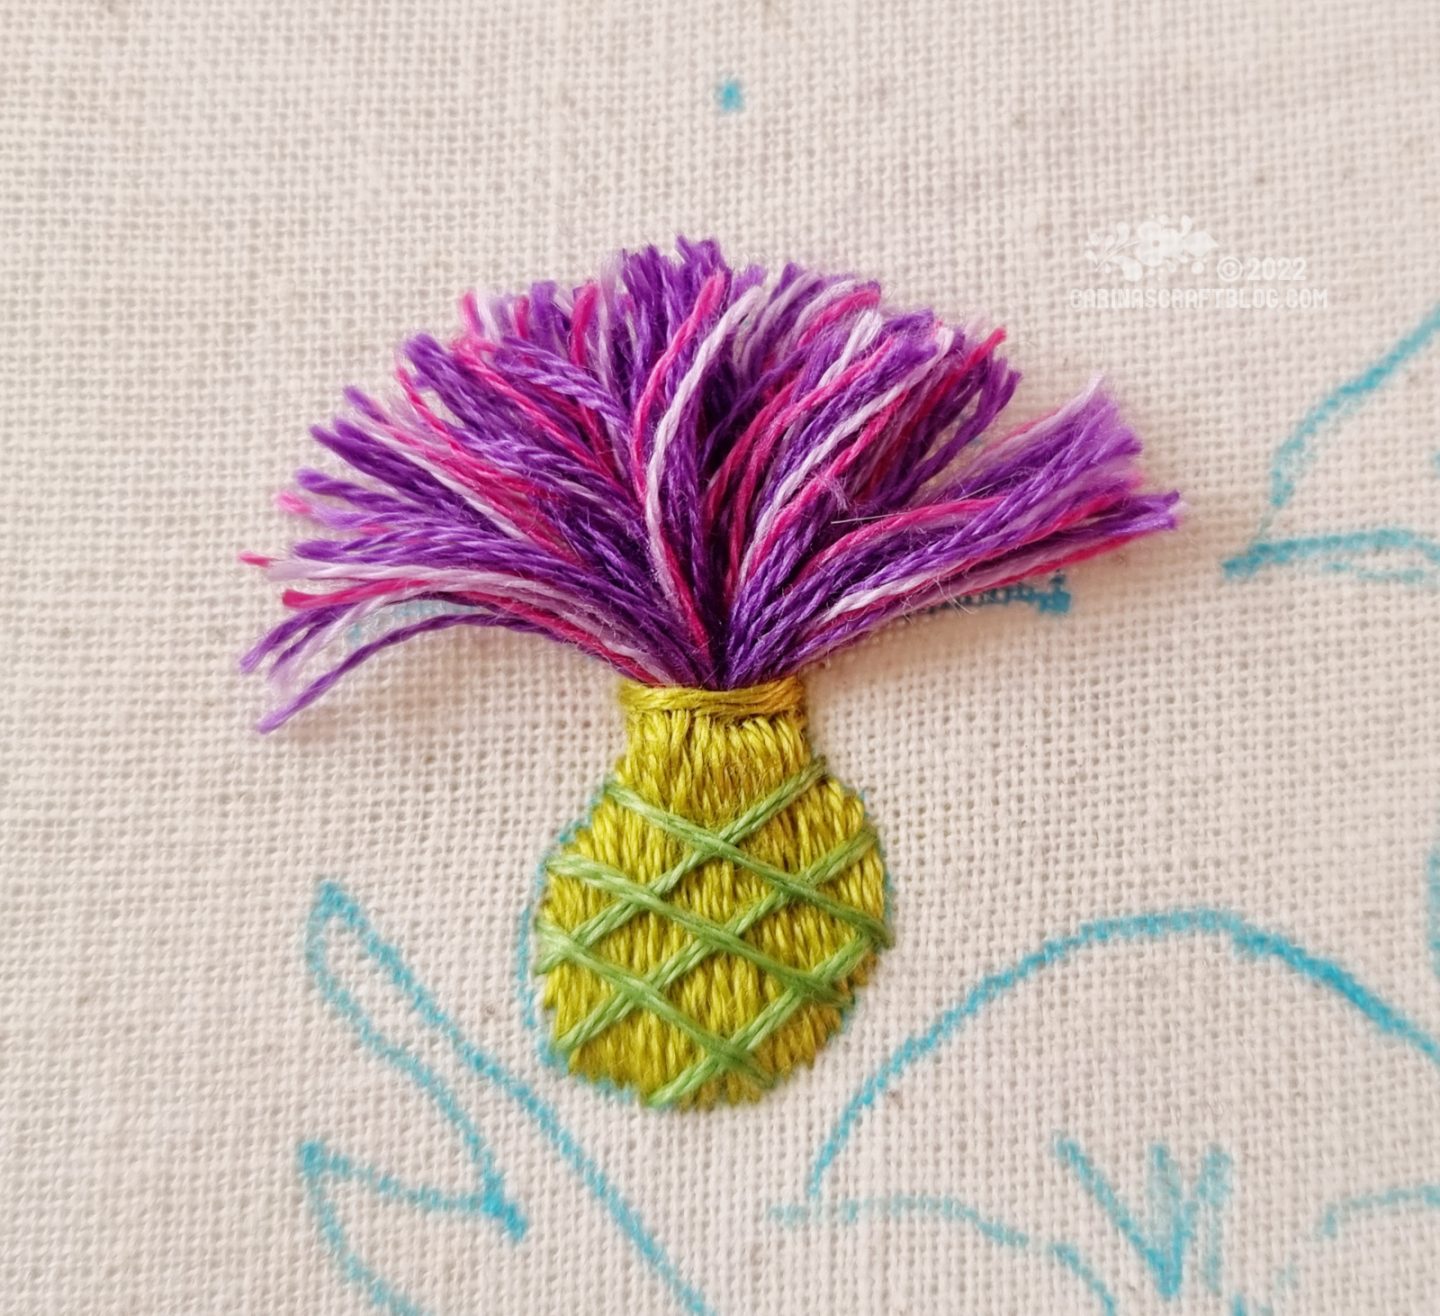
9) The finished thistle. :-)
Doesn’t it look happy and fluffy? :-)


This is so freakin’ cute. I can’t believe I’ve never seen this stitch before. Thanks for sharing!
Author
My pleasure! :-)