
Hey! When I was making the shirt for Tony, one of the things that I wondered about the most was, how the heck do you make buttonholes on the sewing machine?! I had several phone calls with my mum asking her about the buttonholes and every time she more or less said “gee, I don’t know, you just have to try it and practice”. Dang! What?! Is there no Magic Buttonhole Trick?!
Nope, there isn’t and you know why? Because it is really simple! If I can do it, you most certainly can too! There are just a few steps to it and it’s nothing to be scared of (I was, a little, I admit it!).
This tutorial is for a basic sewing machine, so if you have a fancy one that’s more like a computer and does most of the work for you, some things may be different. Just saying.
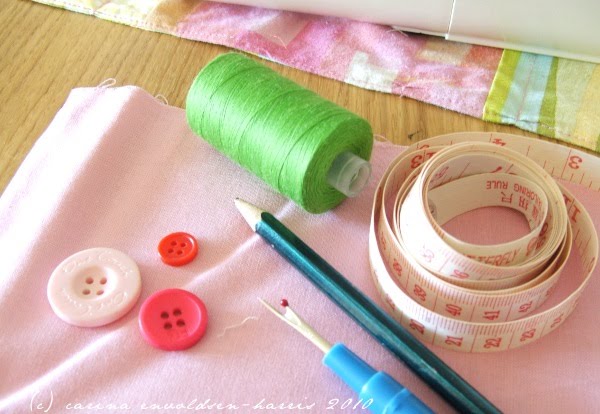
This is what you need:
Buttons!
Measuring tape
Seam ripper
A fabric marker (I used a pencil because it had the best contrast with the fabric)
Fabric -do practice on some scraps before you start making buttonholes on your garments or bags or whatever.
Sewing machine with all its parafernalia: thread, bobbin; and you don’t need to change the foot!
Ok, here we go:

On your machine you should have some dials that look something like this. You want to pay attention to the sections marked by the green lines. See how those symbols in red kinda look like buttonholes? That’s because they are all about buttonholes!
The dial on the right-hand side determine the length of the stitching of the buttonhole. If you have a small button, you want the stitching to be fairly small, but bigger for a larger button. Play with the settings until it looks the way you want.
The dial on the left-hand side tells the machine what side of the buttonhole you’re sewing. You should have 3 red rectangles because one of the settings does 2 sides.

First, measure the diameter of your button. Ok, you’ve got a number. But how big does the buttonhole have to be? There probably is a buttonhole formula somewhere, but I just measure the thickness of the button and add that number to the diameter twice.
So I guess we can make up our own formula right here. D = diameter, T = thickness, B = buttonhole. So, B = D + (2xT). It’s a starting point anyway!
And it may not always hold true, so really you should do a buttonhole test for each button you are making a buttonhole for!

Ok, so now you know how long your buttonhole is going to be. Mark it on your fabric, like in the picture. Kinda like a capitalised I.. Then mark a dot 1-2 millimetres to the left of the line at the top. This is where you insert the needle.
Although, if it is a big button, with a big buttonhole and bigger stitching, you may want to move it a bit further to the left.
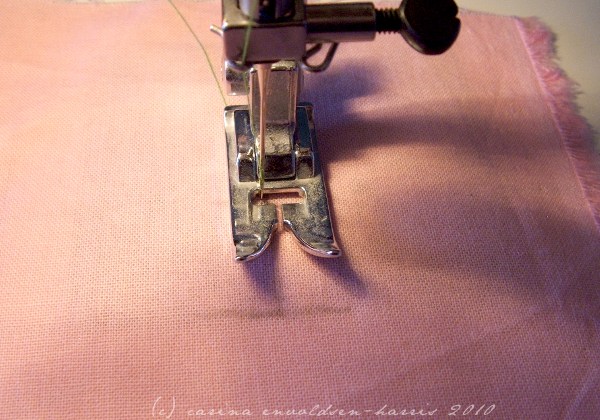
Great, we’re ready stitch. Insert the needle. Then have a look at the dials (in the picture above and) on your machine. Turn the dial to the first position, marked with 1. And sew from the top to the bottom of the line.
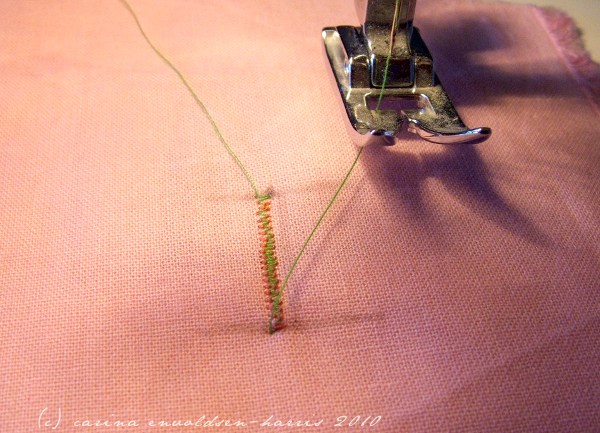
This is the result you should be seeing. But without moving the foot. And possibly not with two different thread colours..
Now turn the same dial to the middle position, the one marked with 2 and 4. It will sew in one place. So sew a few stitches. They will be the one end of the buttonhole.
This is what you should be seeing. Again, you don’t need to move the foot.
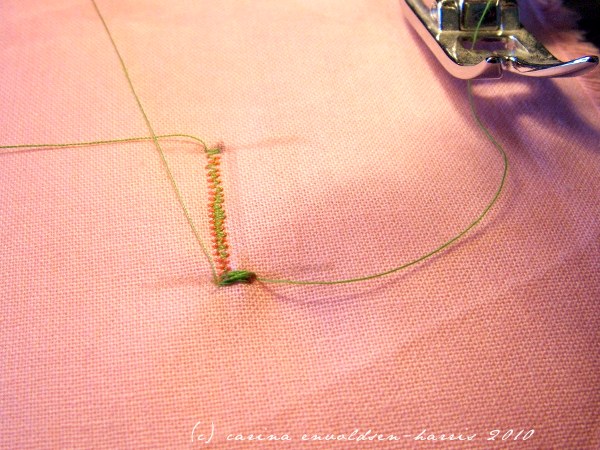
Now turn your dial to the position on the right, the one marked with 3. And sew. It will automagically sew backwards!
When you get to the other end, turn the dial back to the 2-4 position and sew a few stitches to finish the buttonhole.
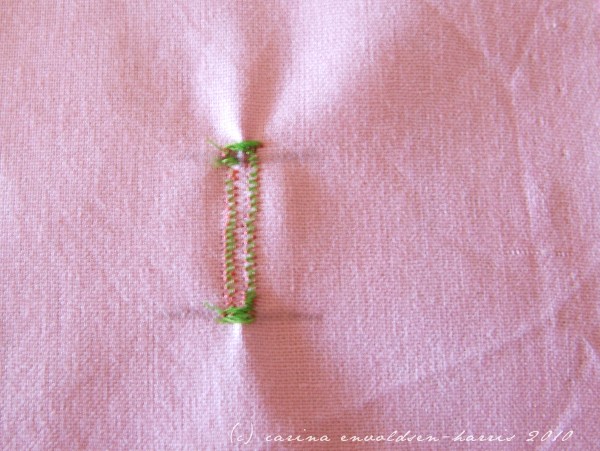
This is what you should be seeing . Again, maybe not in multi colour and maybe a bit straighter.. But you get the idea.
And that is basically your buttonhole done. There’s just one minor detail: the hole itself!
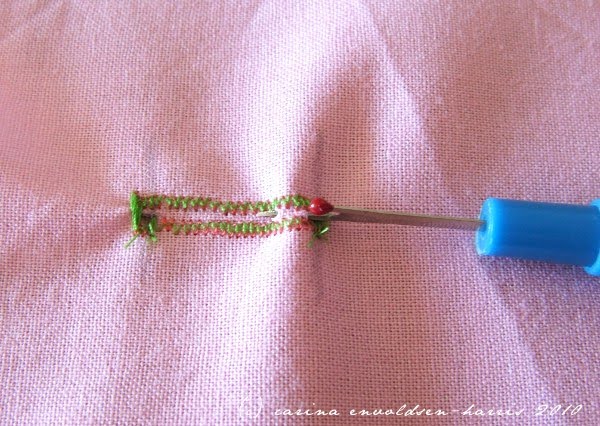
Get your seam ripper and insert it at one end of the buttonhole. Without picking up any of the stitching! And then you simply rip the fabric to make the hole. Don’t do it all in one go, a few millimetres at a time.
And if you’re worried that you may have made the buttonhole a little too big, start the ripping 1 or 2 millimetres inside the buttonhole.

Test the buttonhole and maybe trim off the loose threads inside it. And that’s it!

I used to avoid doing buttonholes on my old machine as I though it was just hassle, lol. I am so glad my new machine does it all for me, just attach presser foot, insert button into foot, place fabric, press button, sit back and watch it appear as if by magic ;)
Ha, i am glad i am not th e only one with fancy-pants machine ;P Good tutorial though I shall try it some time like that as I am sure it is agood skill to have incase my fancy machine breaks ;)
Sheesh, you guys, now you're just showing off! ;-b
another tip is to put a pin across the end, the end you are ripping towards, that way the seam ripper won't accidentally go through the stitching. It acts as stopper for the seam ripper.
Thanks for coming up with that formula! I always seem to make my button holes too small…well, amongst my many issues with button holes :)