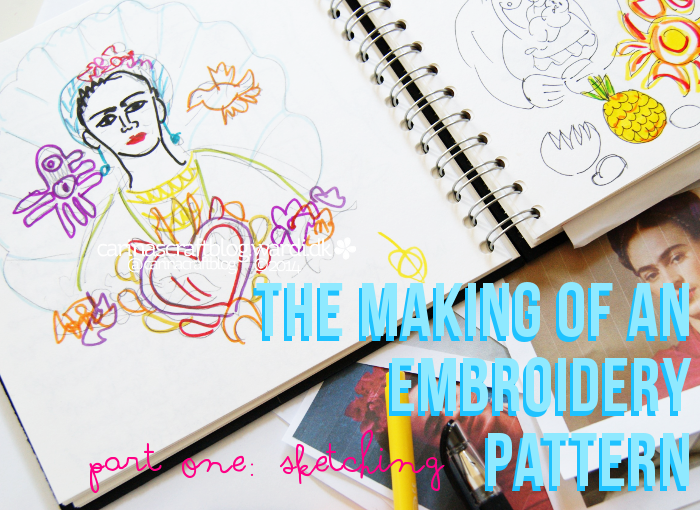
I received some kind emails (thank you!) about the Blog Hop post where I shared a bit about my process when designing a pattern. So I thought it’d be fun to share a bit more in-depth look at the process for the Frida pattern/portrait I mentioned in that that post.
I’ve been wanting to make a pattern with Frida for a long, long time, but I didn’t want to make one just for the sake of it. It had to feel right. A few months ago, the right idea had finally formed in my head. The sketch up there is the very first version of the idea.
It is partially inspired by some of Frida’s own paintings, but not one in particular.
Because I wanted Frida to actually look like herself, I printed out various photos of her and self portraits she had painted. I sketched those to get a feel for her facial features. I also started sketching elements I thought I might include in the pattern. Like flowers and birds a few jewellery ideas and other bits.

When I had settled on a selection of things I wanted to include, I drew those on tracing paper, so I could easily move them around and see them from different angles. When using tracing paper I also find it’s a lot easier to scale up a drawing.
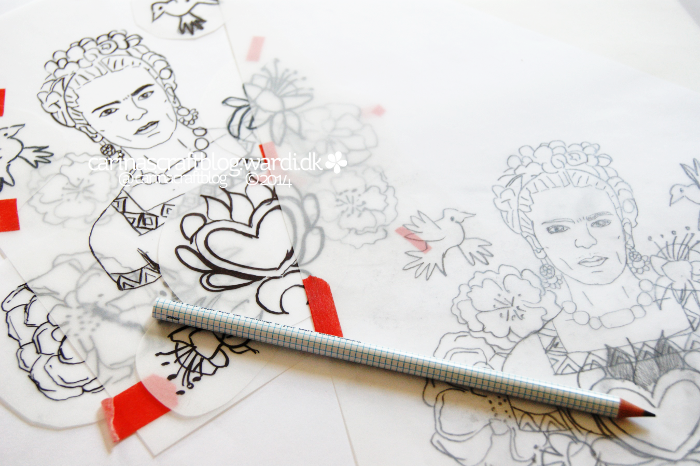
I cut out all the bits I had drawn on tracing paper and then I started positioning them around the central Frida motif, taping them down with masking tape When I had a nice grouping, I traced this in pencil.
Did you see a little while ago, someone did a retouched version of one of Frida’s portraits where they removed the uni-brow? That was kinda weird and didn’t look anything like her. The impression I get is that Frida totally owned the way she looked so why change it?
I have kept the uni-brow and the hair shadow over her lip, because that’s what she looked like. But I have toned it down a little bit, simply because it would become over powering when done with embroidery.
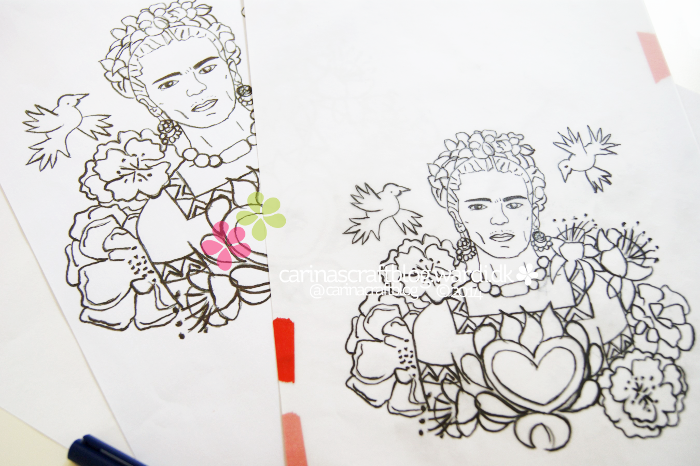
Then I traced the pencil drawing with a black felt tip pen. The final step was to scan the drawing and print it out as large as possible. I wanted the embroidery to be quite large so I could include quite a bit of detail. And also, if her face was small, it might look more like a cartoon version of her and I didn’t want that.
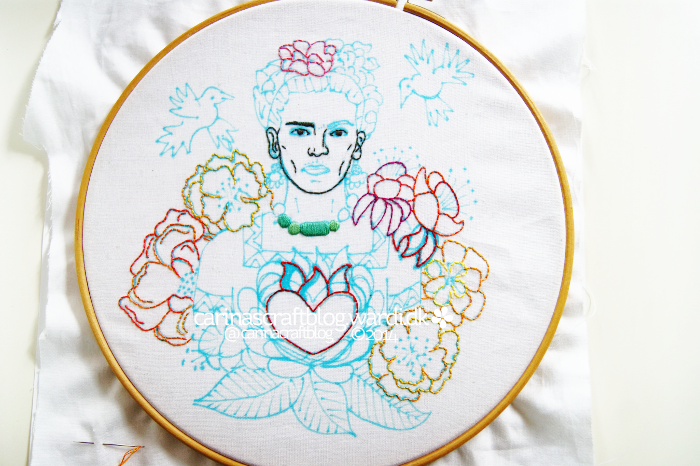
Finally I transferred the pattern to fabric and started stitching. But stitching isn’t necessarily straight forward. This is a fairly early stage of the stitching and it has changed quite a bit since.
The thing is, until you start putting the colours together on the fabric, you don’t know for sure what will work in which spot. In the next post I’ll show how the stitching progressed and changed.

