Last year I became kind of obsessed with the Swedish style of embroidery called bottensöm or bottensömmar. I blogged about my bottensöm adventures a few times. And although I haven’t done any for a little while I am definitely not done with it yet. :-)
Since a crafty obsession only gets better when you share it with others, I thought I’d share a little tutorial for bottensöm. Especially since most tutorials are in Swedish. :-)
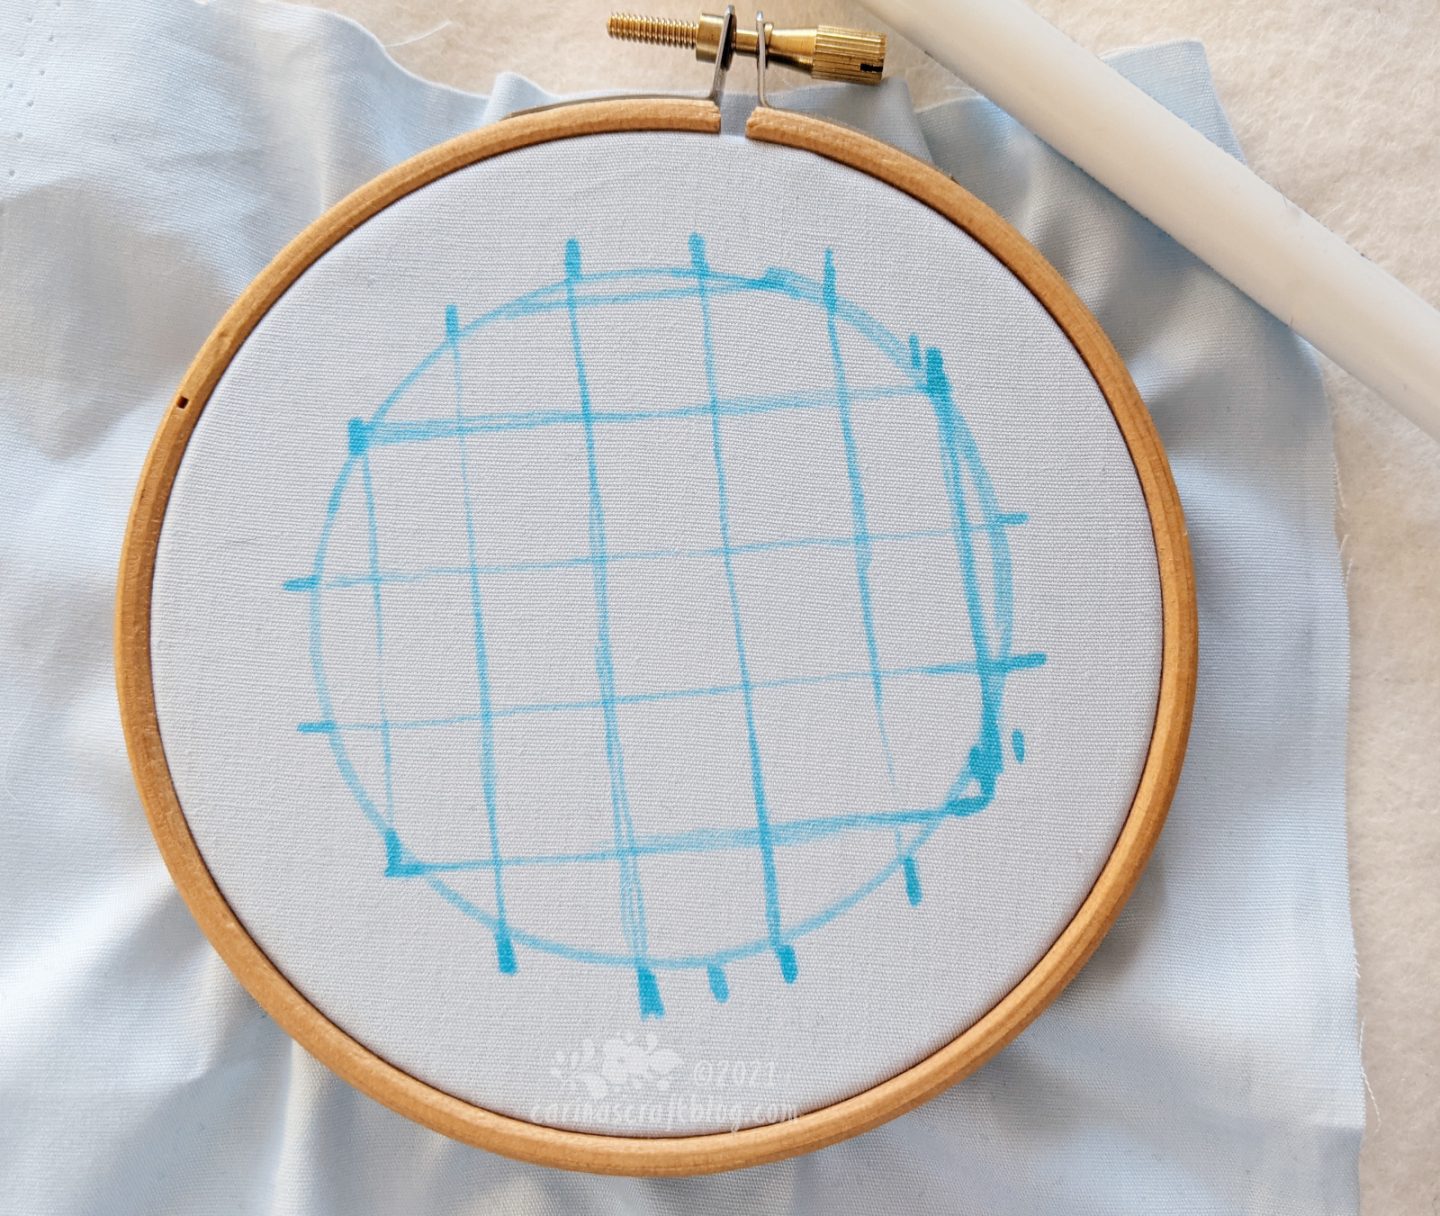
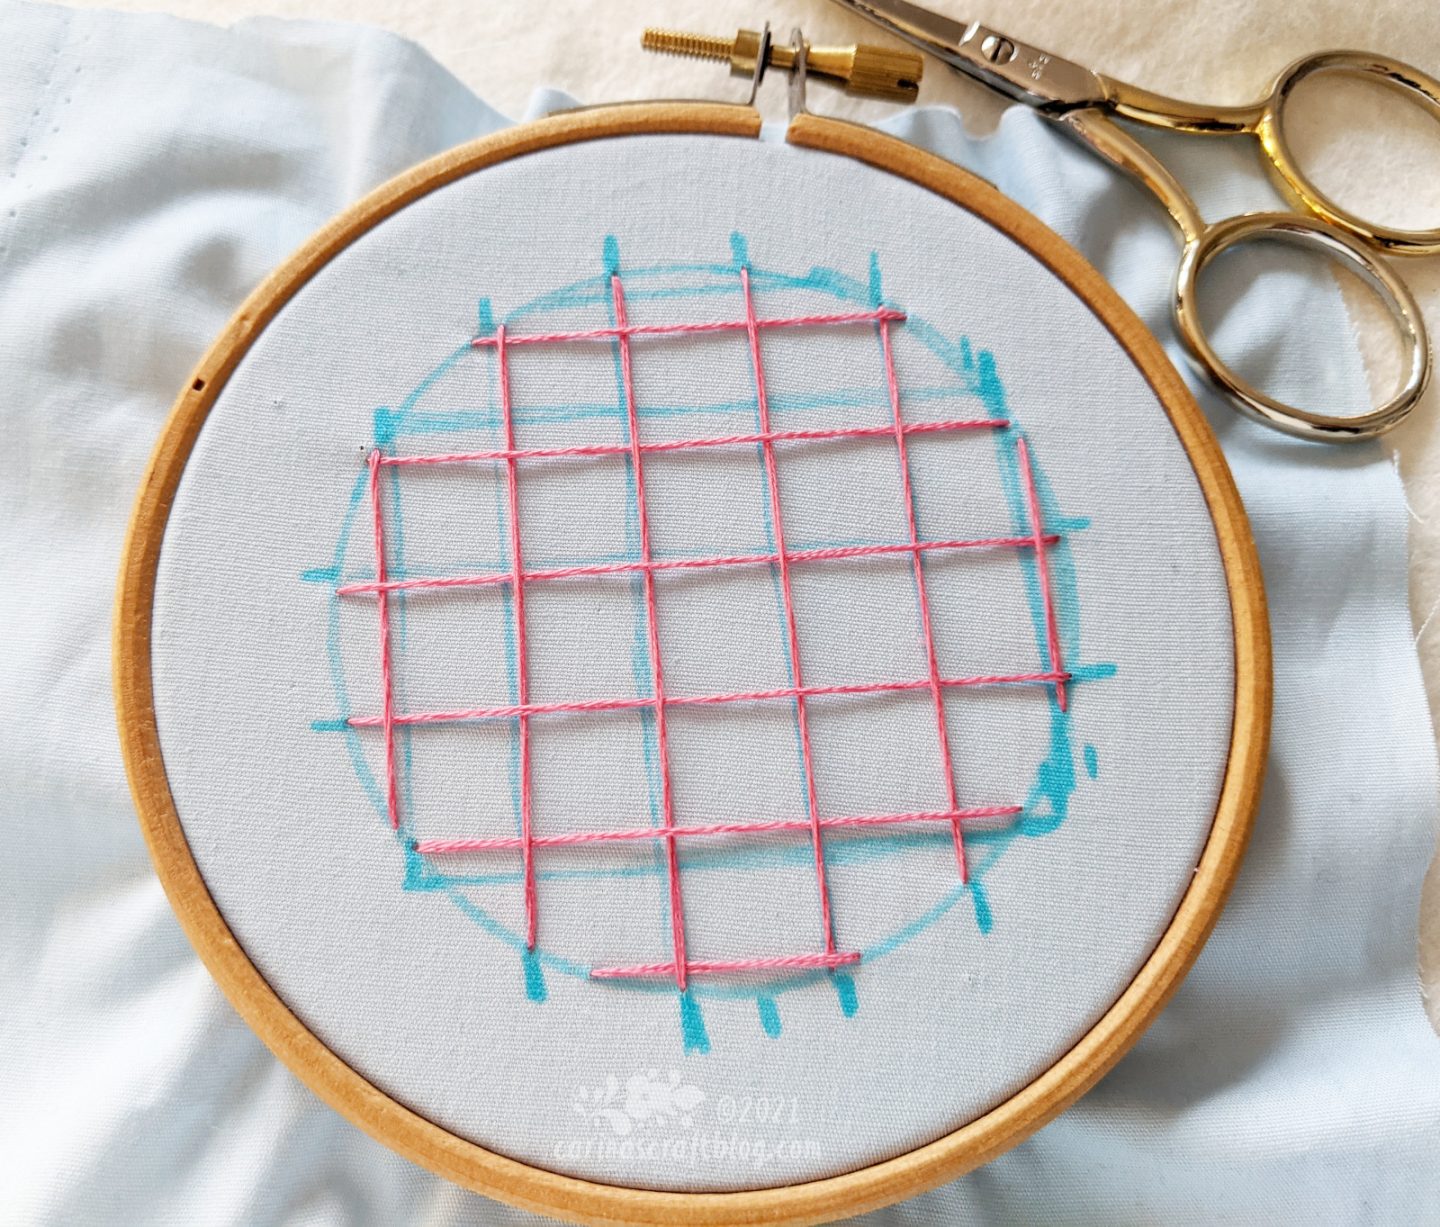
Start by drawing the shape you want to fill and then draw a grid in your shape. You may want to do it with an actual ruler of some sort and not just eyeball it as I did here! :-)
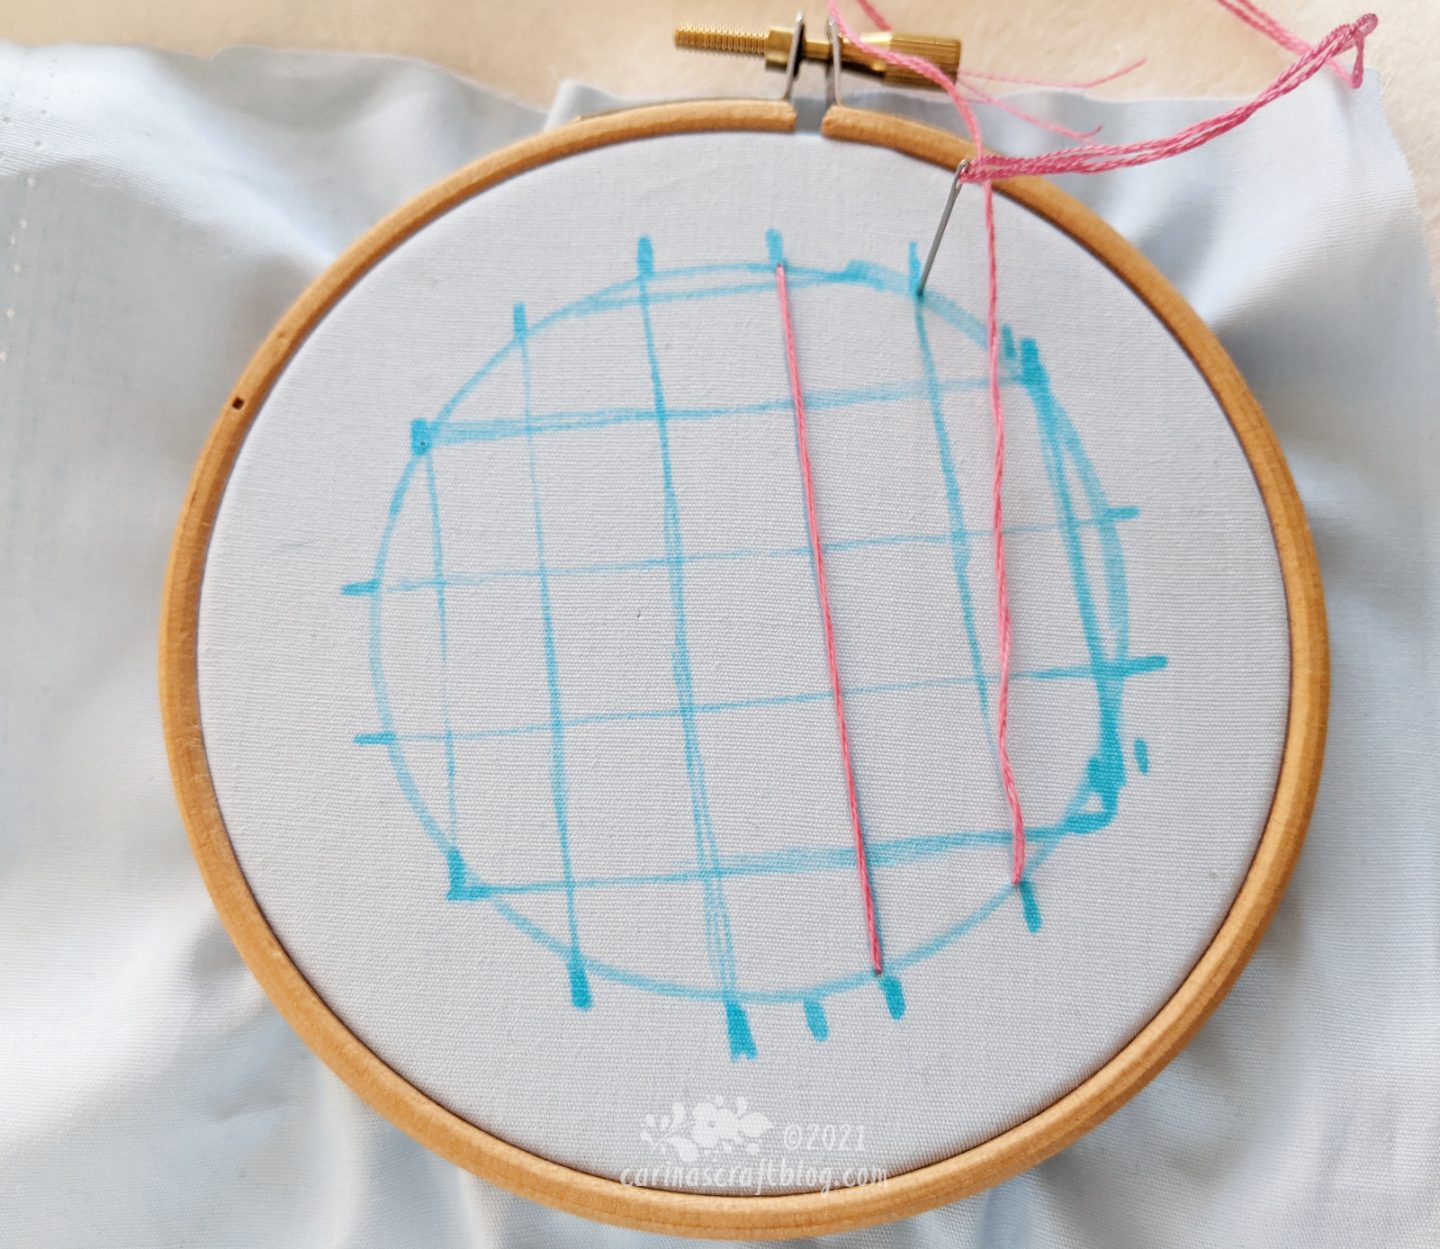
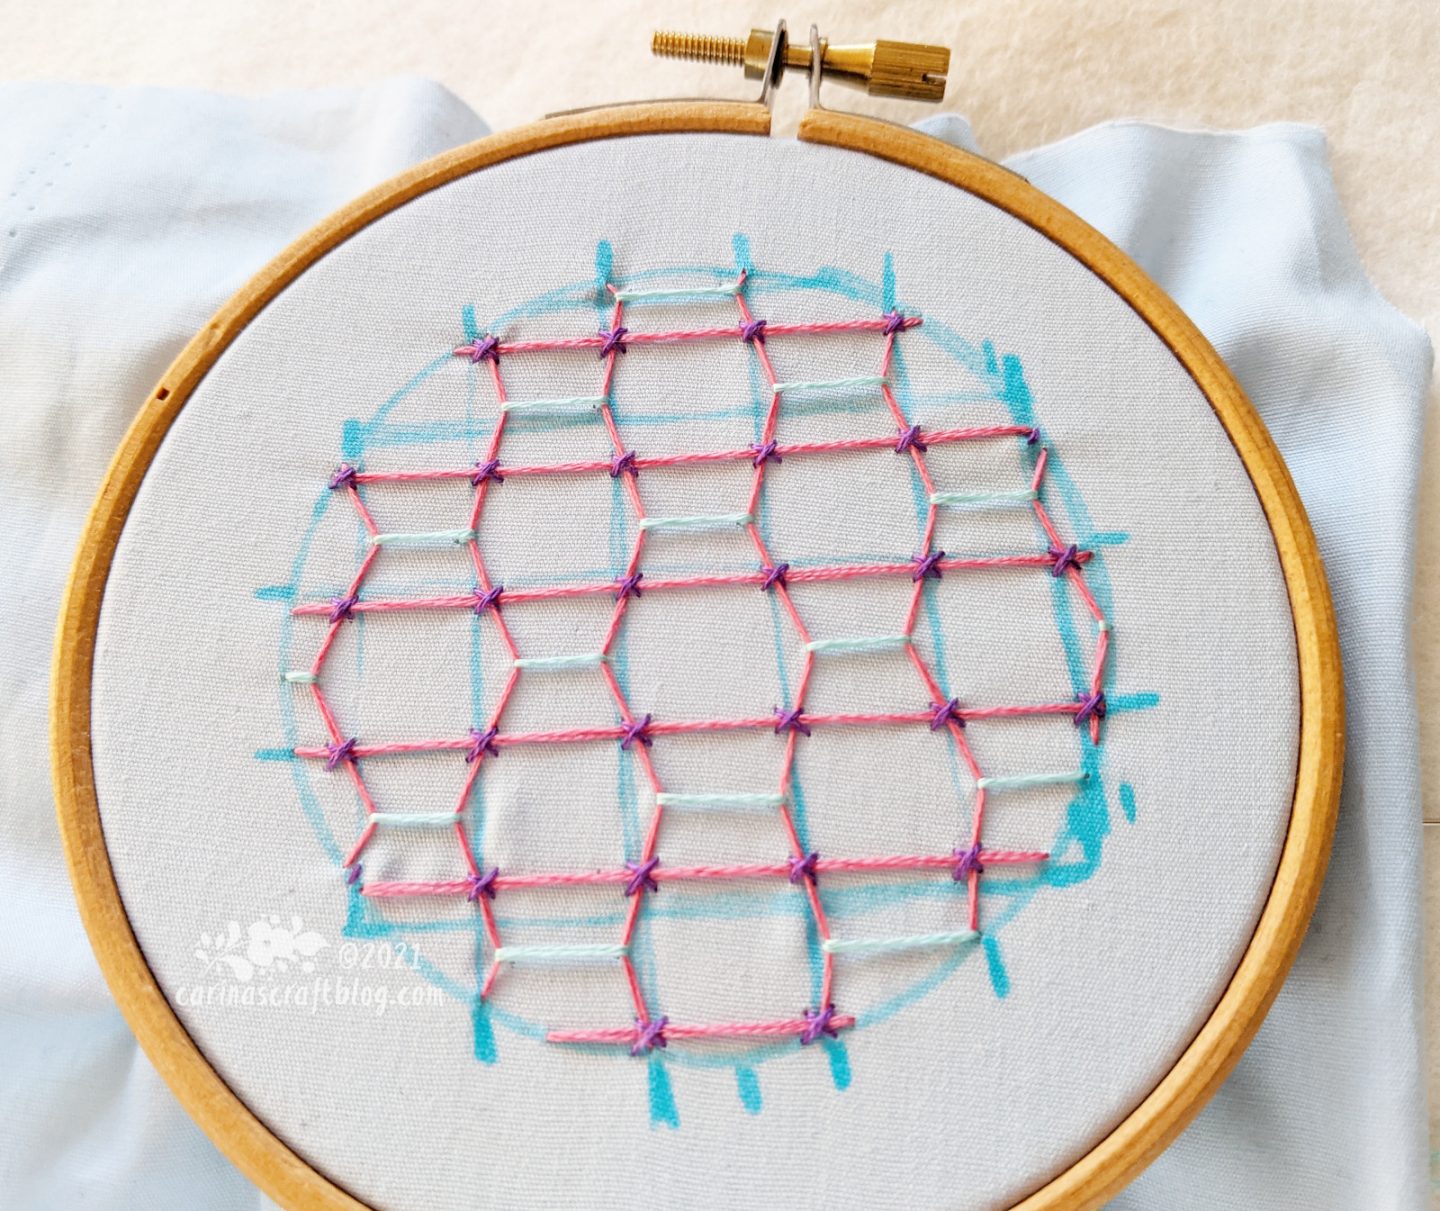
Then make long straight stitches along the vertical lines. Or you could do it along the horizontal lines if you like. But since this is a type of weaving, it just makes sense to me to start with the vertical stitches.
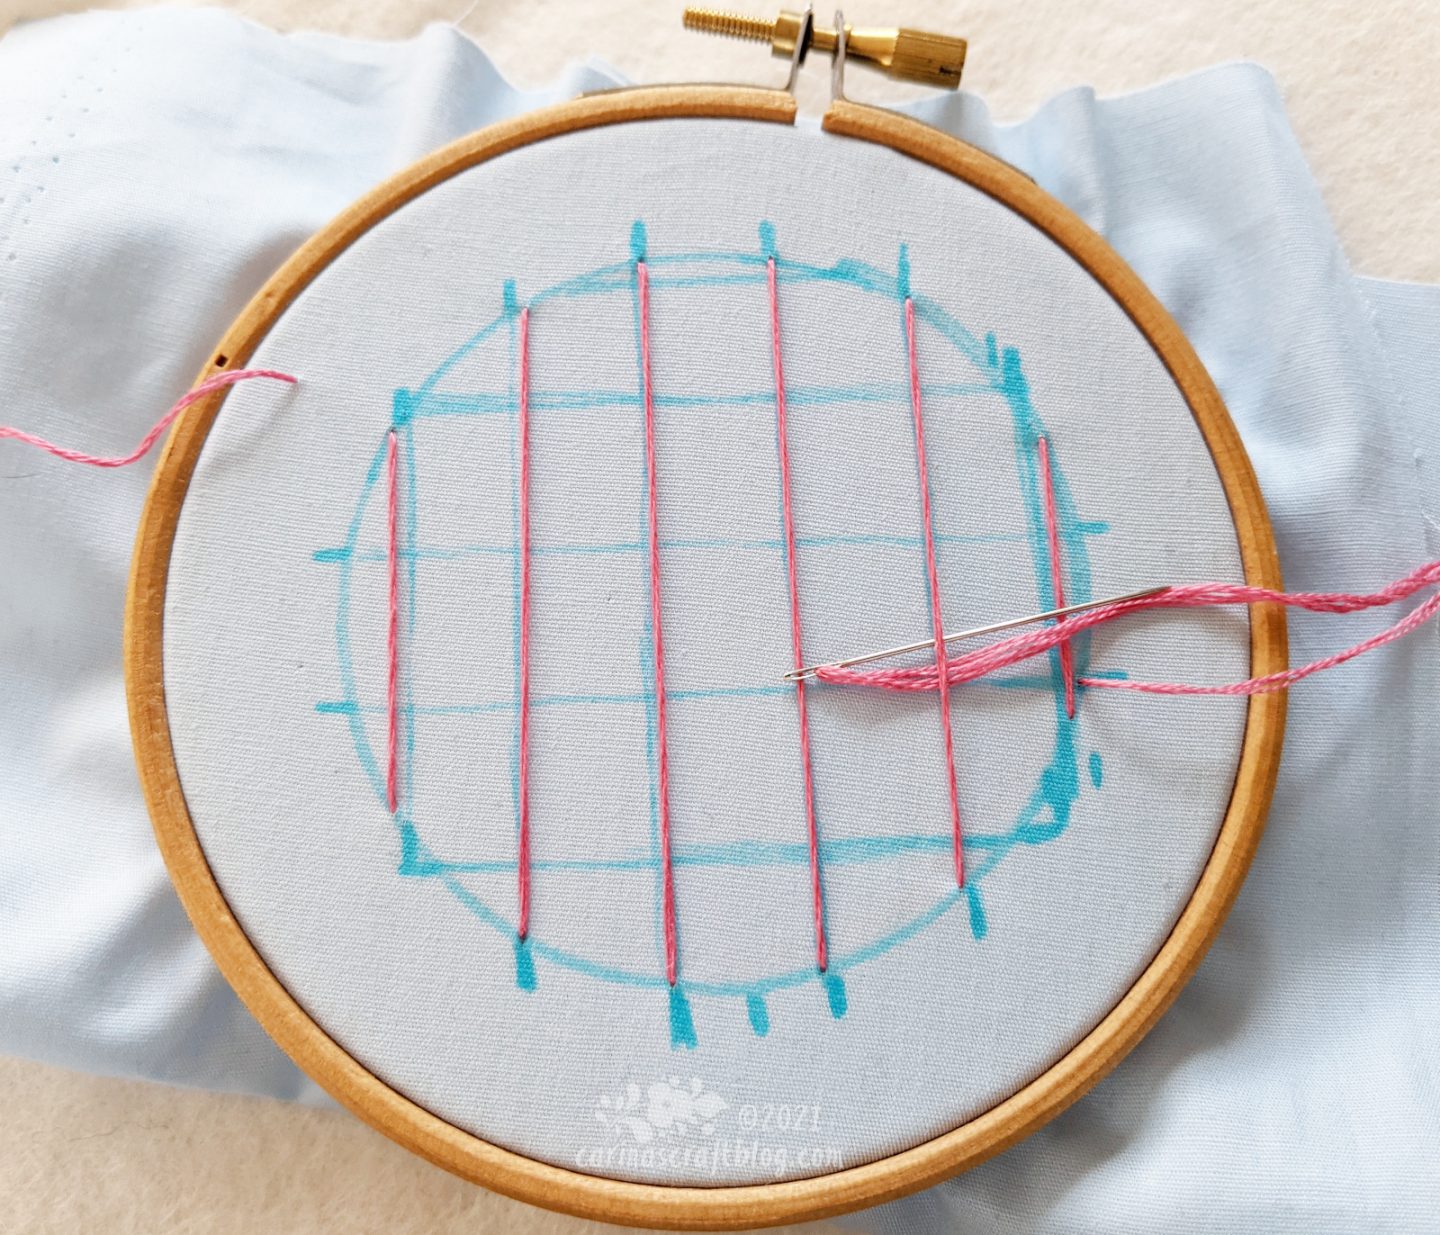
Once you have made the long vertical stitches, weave the thread over and under those stitches, following the horizontal lines. You may find it easier to do if the eye of the needles goes first. That way you don’t risk catching the threads or the fabric with the tip of the needle.
You should now have something that looks like this. But hopefully a bit less wonky! :-D
By the way, if you end up with one or two spots that are “over, over, over” instead of “over, under, over” don’t worry it will be all be fine!
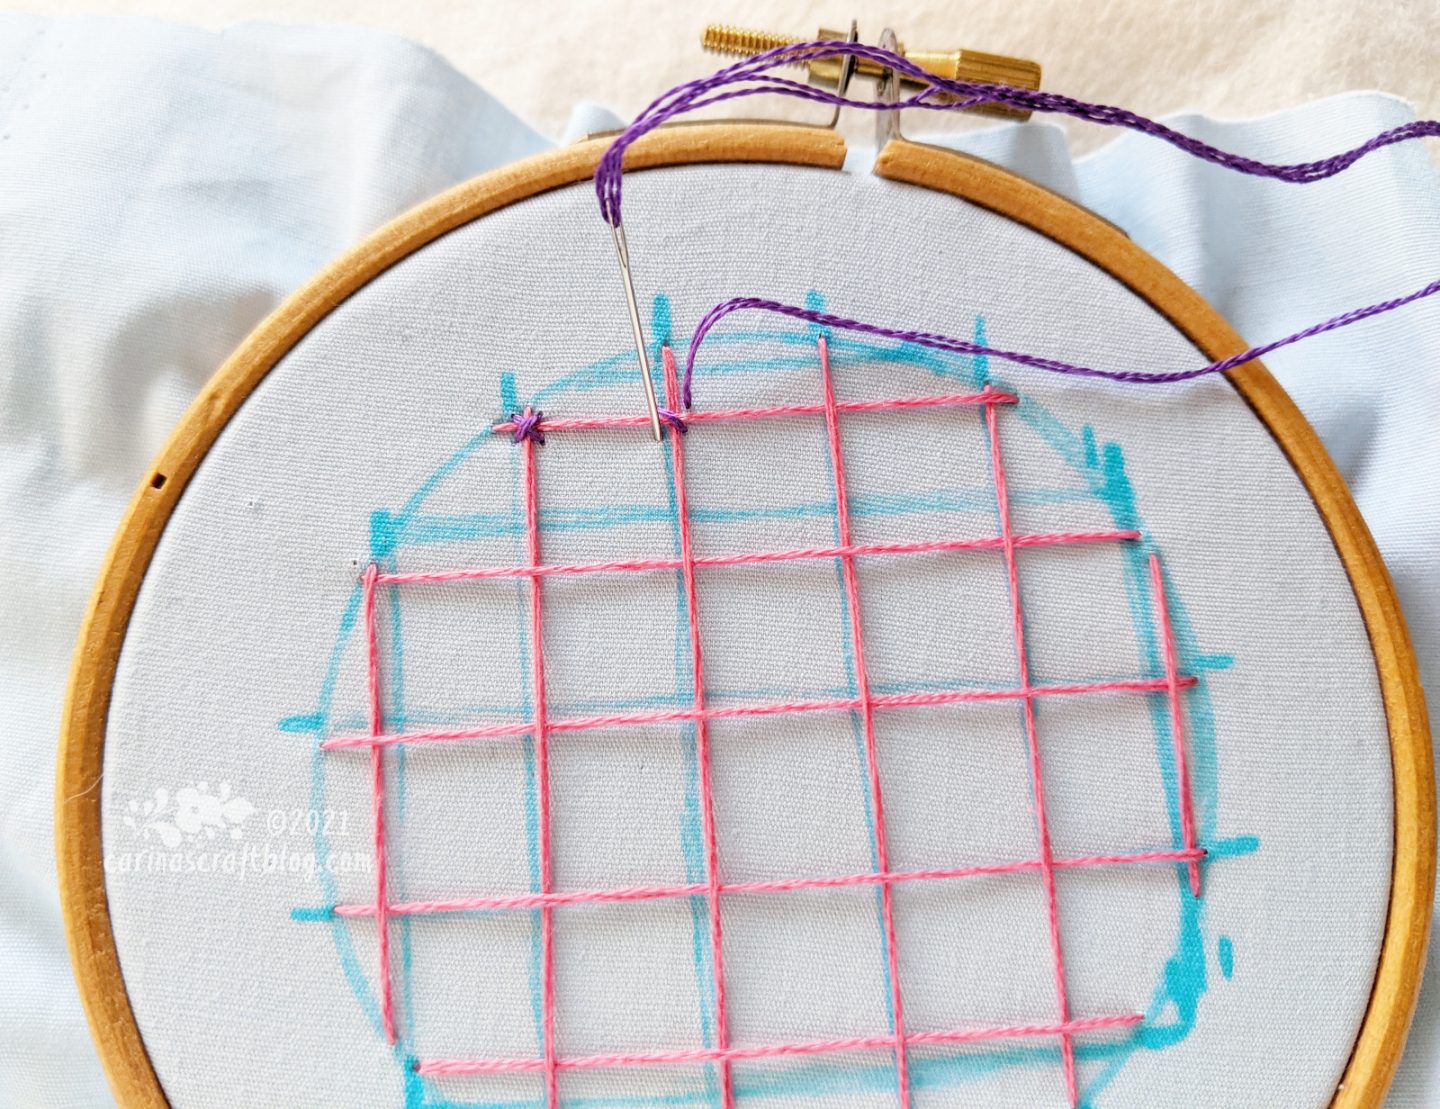
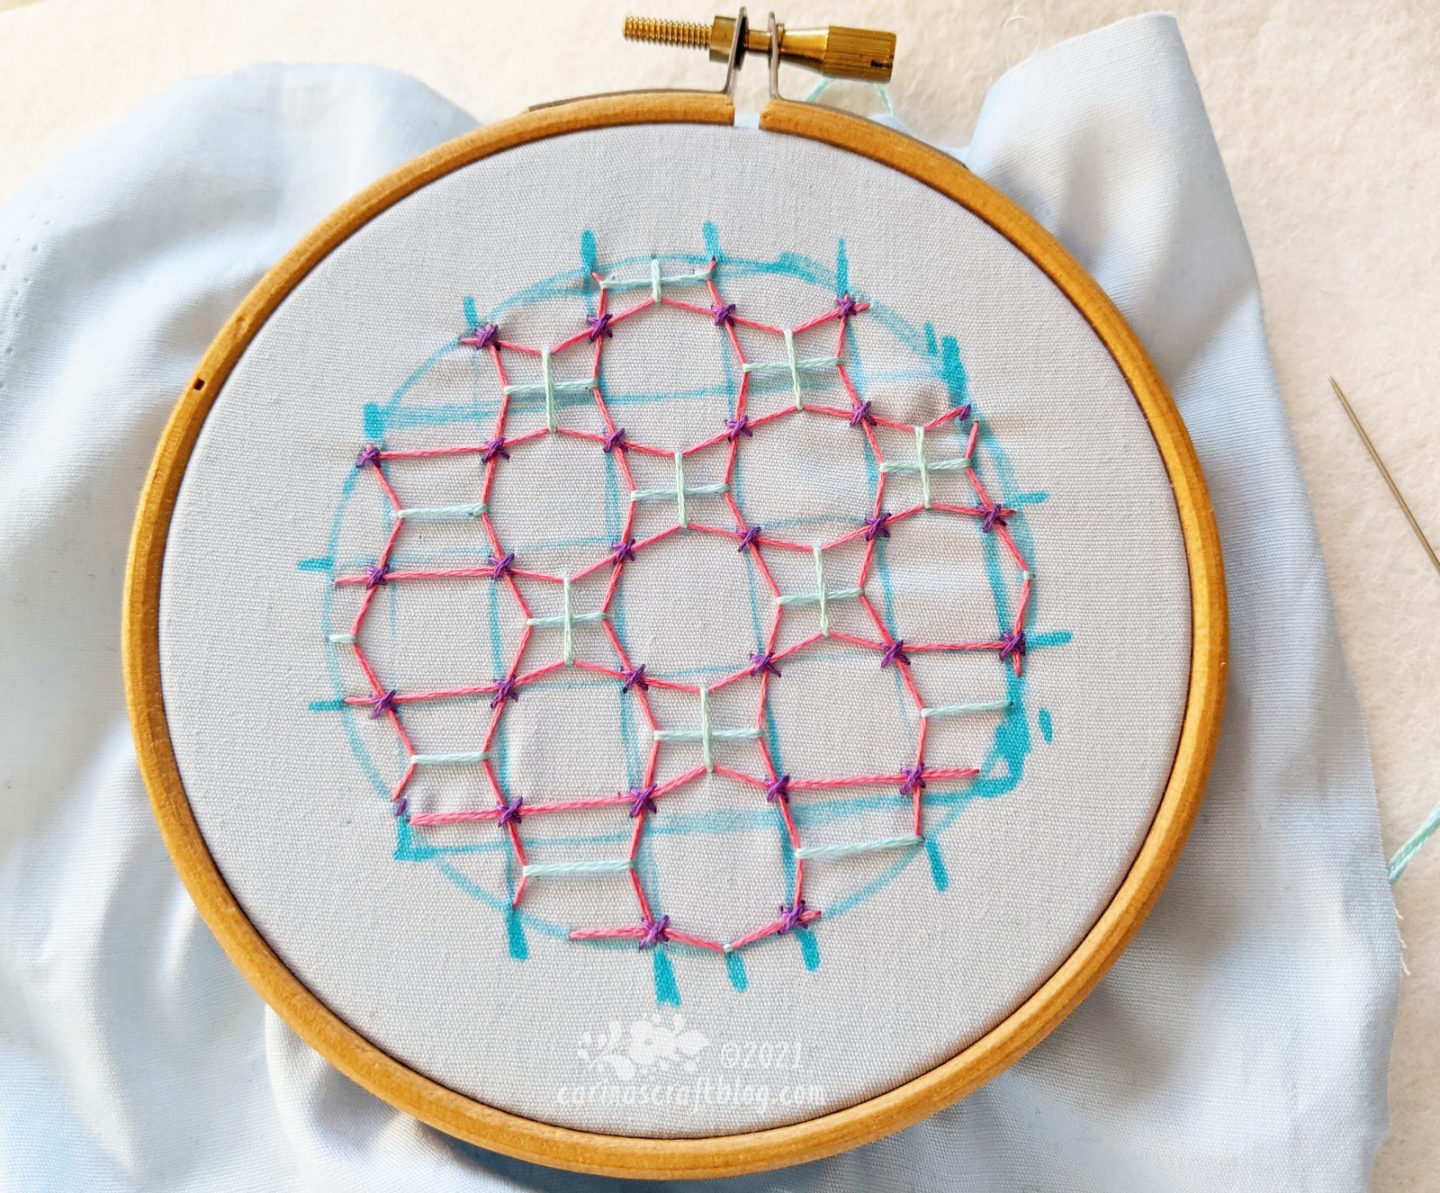
Now add little cross stitches at every intersection of vertical and horizontal threads. This holds the long threads in place. Especially if they are really long. And you can see why it’s not a big deal if you miss a weave under or over here and there because the cross stitches will hold it all in place.
You can do the cross stitches really small, maybe with just one strand of thread, or large (both thickness of thread and the actual size of the stitch).
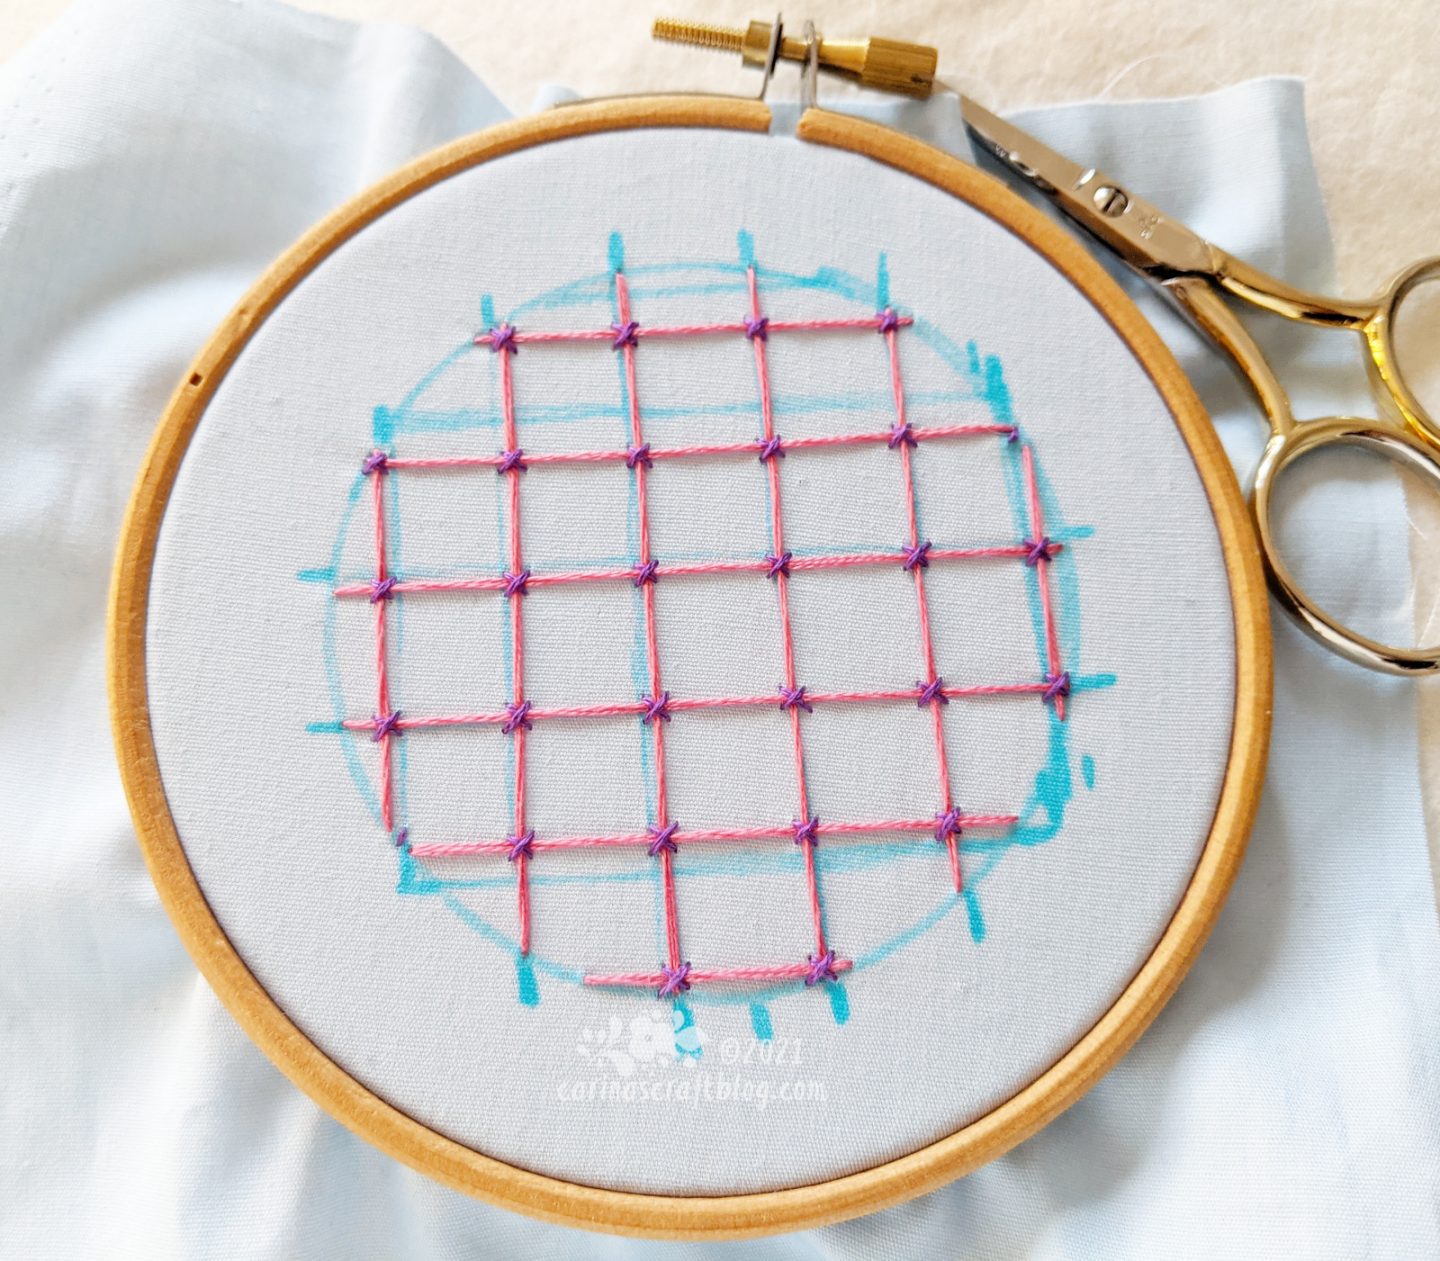
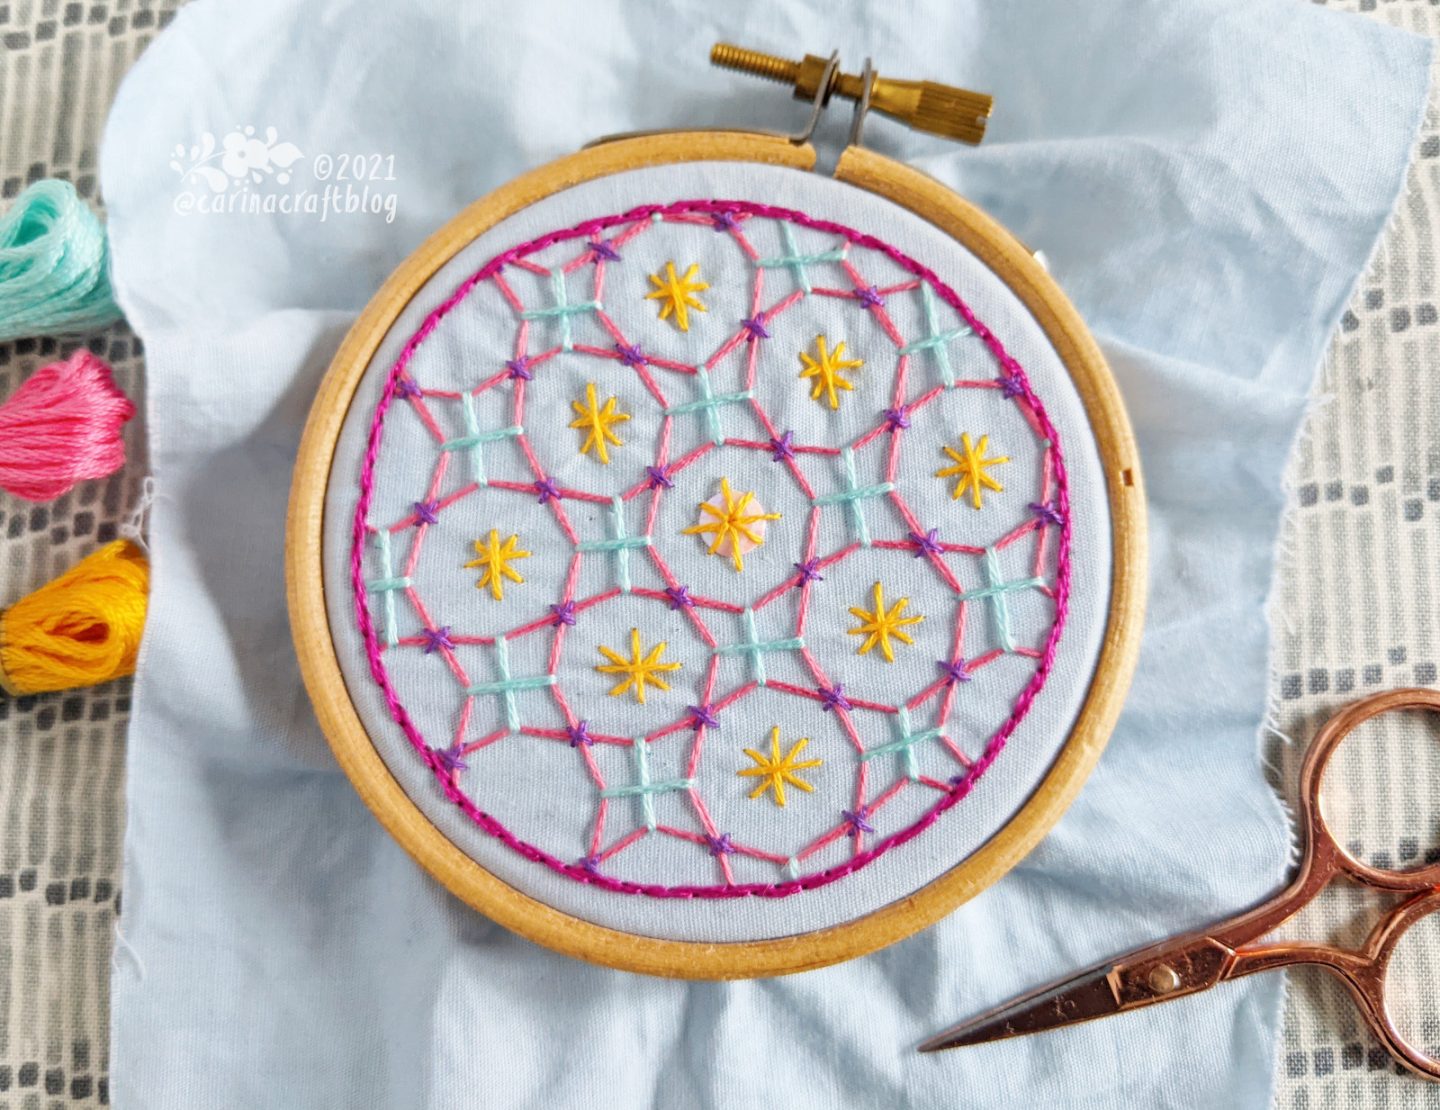
All the long stitches are now held snuggly in place by the cross stitches. This is the basic bottensöm. In English it is called lattice stitch. You could stop here, without adding anything else. But where’s the fun in that?! Let’s keep going!
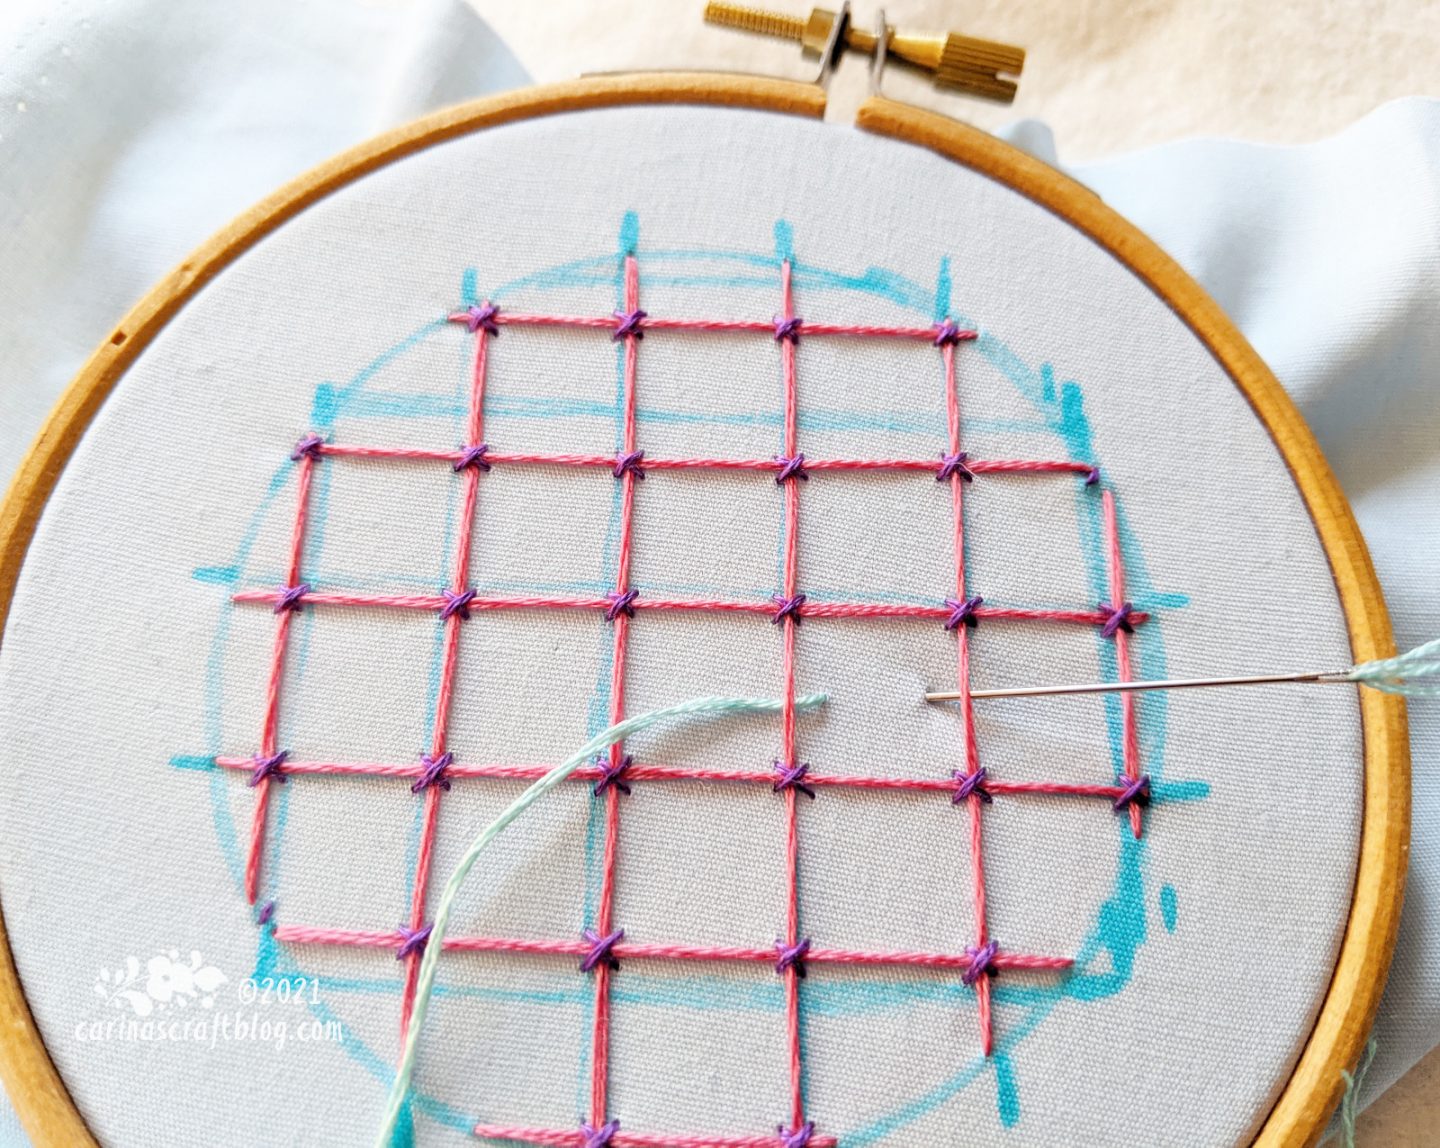
Pick one of the squares in the grid. I usually start in the middle one, or just next to it as I’ve done here.
Bring the needle up just inside the square, then slide the needle and thread under the nearest thread. Then slide the needle and thread under the opposite thread and insert the needle just inside the same square.
Do this for alternating squares in the grid in the horizontal direction.
Then repeat this action on the same squares but in the vertical direction. The threads of the squares should be pulled a bit out of shape, so the space between them looks sort of circular.
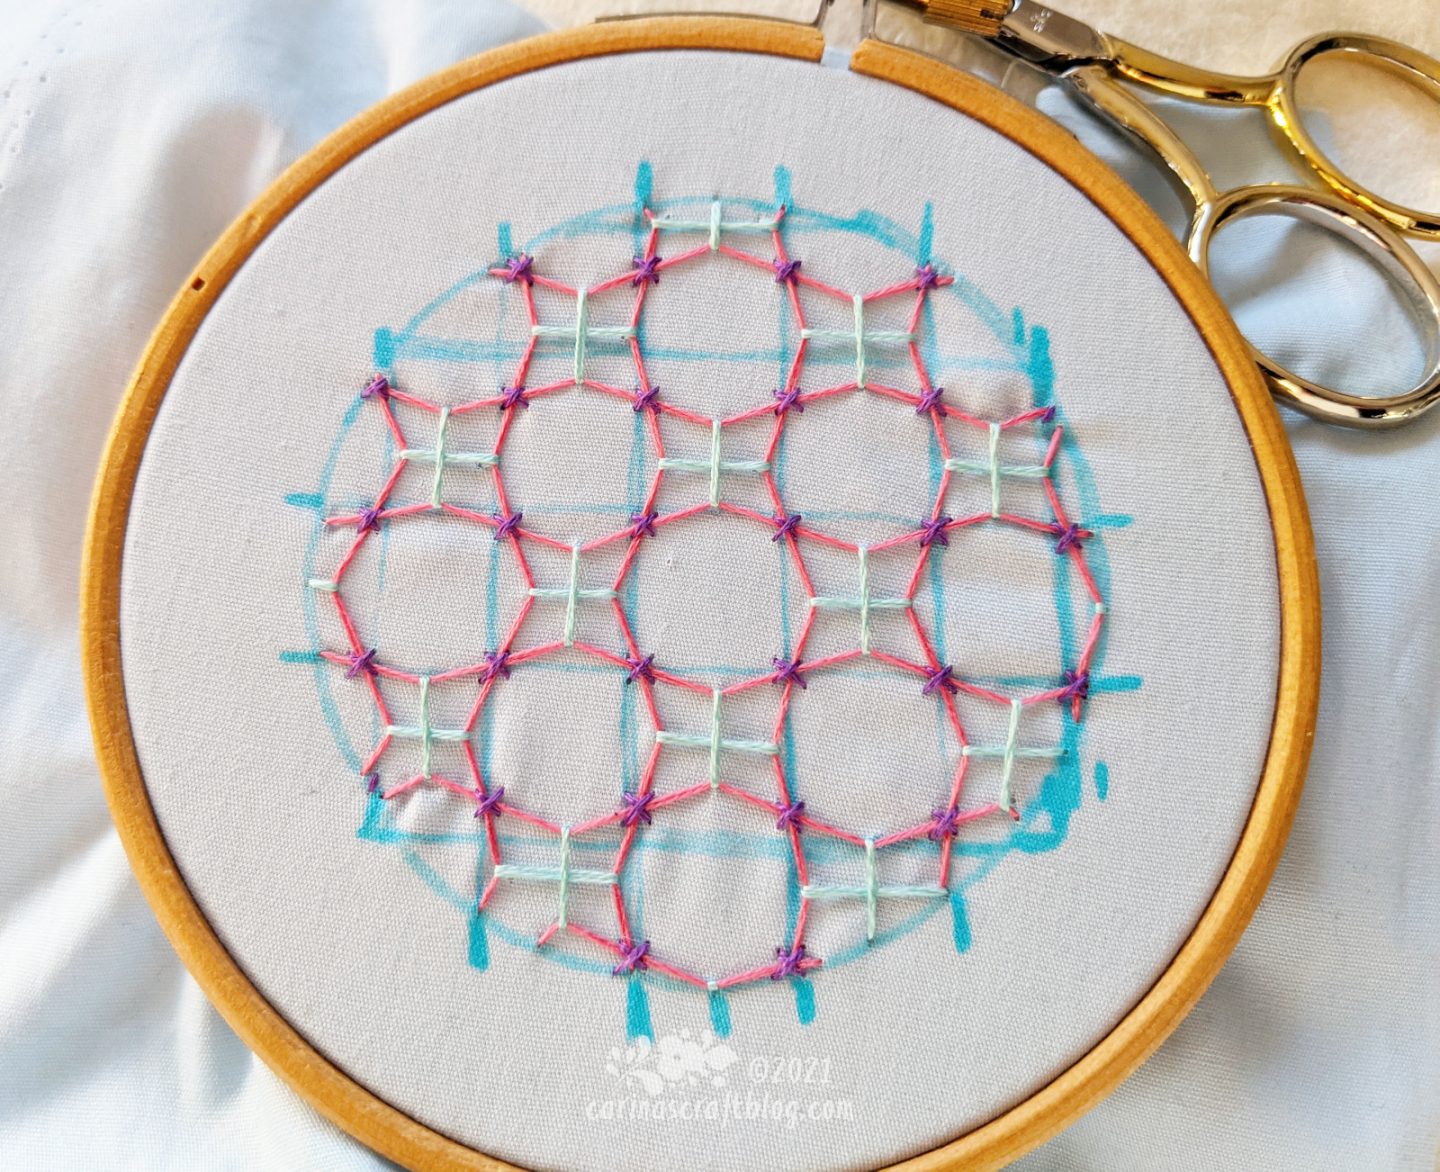
Now, this is more interesting than just a grid, right? Now it looks like alternating circles and crosses. You could stop here but….let’s add a bit more!
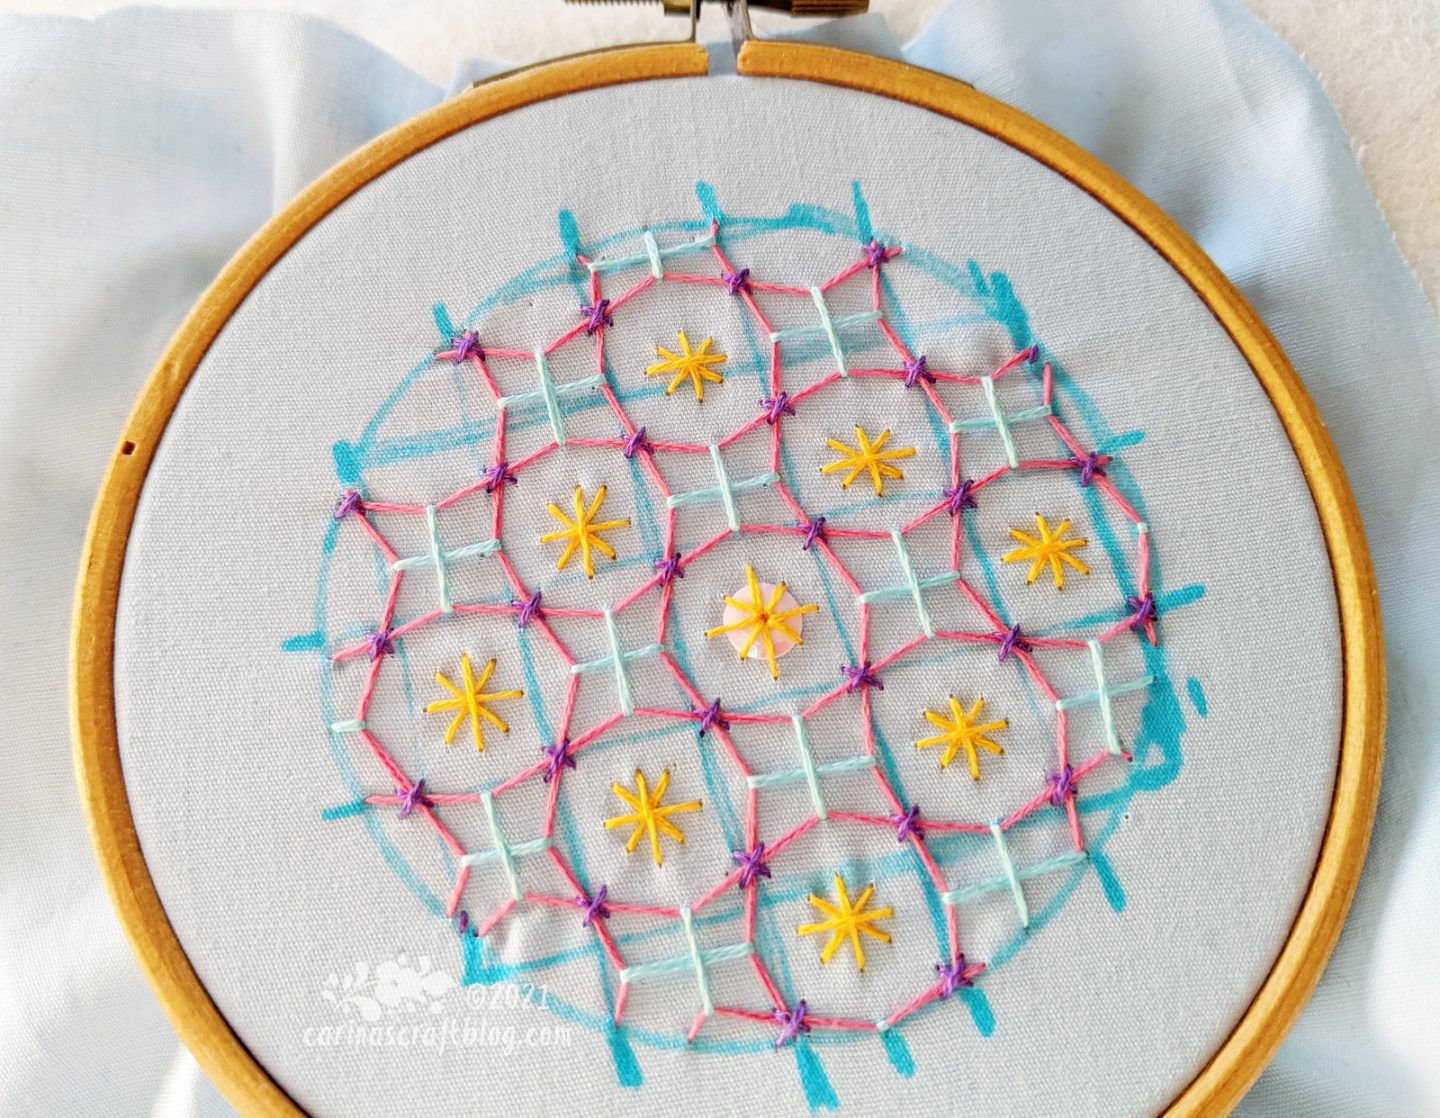
I added some eight point star stitches and a sequin to this. But there are so many things you can do here. Add different stitches, weave threads through the small cross stitches. Add sequins or buttons or how about some mini pom poms?
If you want some inspiration for bottensöm, I highly recommend checking out #bottensöm on Instagram. The posts are mostly in Swedish but a picture says more than a thousand words, right? :-)
If you found this tutorial useful and want to support this ad-free blog why not buy me a cuppa and join the Hot Choc Club (where you will get access to several embroidery patterns, yay!)

